This section includes the following:
| | Overview |
| | Account Management |
| | Claiming and Onboarding Devices |
This section guides users through the process of creating an account and logging into cnMaestro. Once you have an account, you can then claim and onboard devices to bring them under management.
This section describes the following procedures:
| |
Creating a Cambium Support account (if you don’t have one already)
Creating a cnMaestro account
Logging in to cnMaestro
| |
Claiming and Onboarding Devices by Serial Number
Claiming and Onboarding Devices by Cambium ID
To access cnMaestro you need to create a Cambium Support account, which sets your user name and password, and a cnMaestro Cloud account.
cnMaestro uses the existing Cambium Support account. If you do not have a Cambium Support account, you need to create one.
To Create a Cambium Support account, follow the below steps:
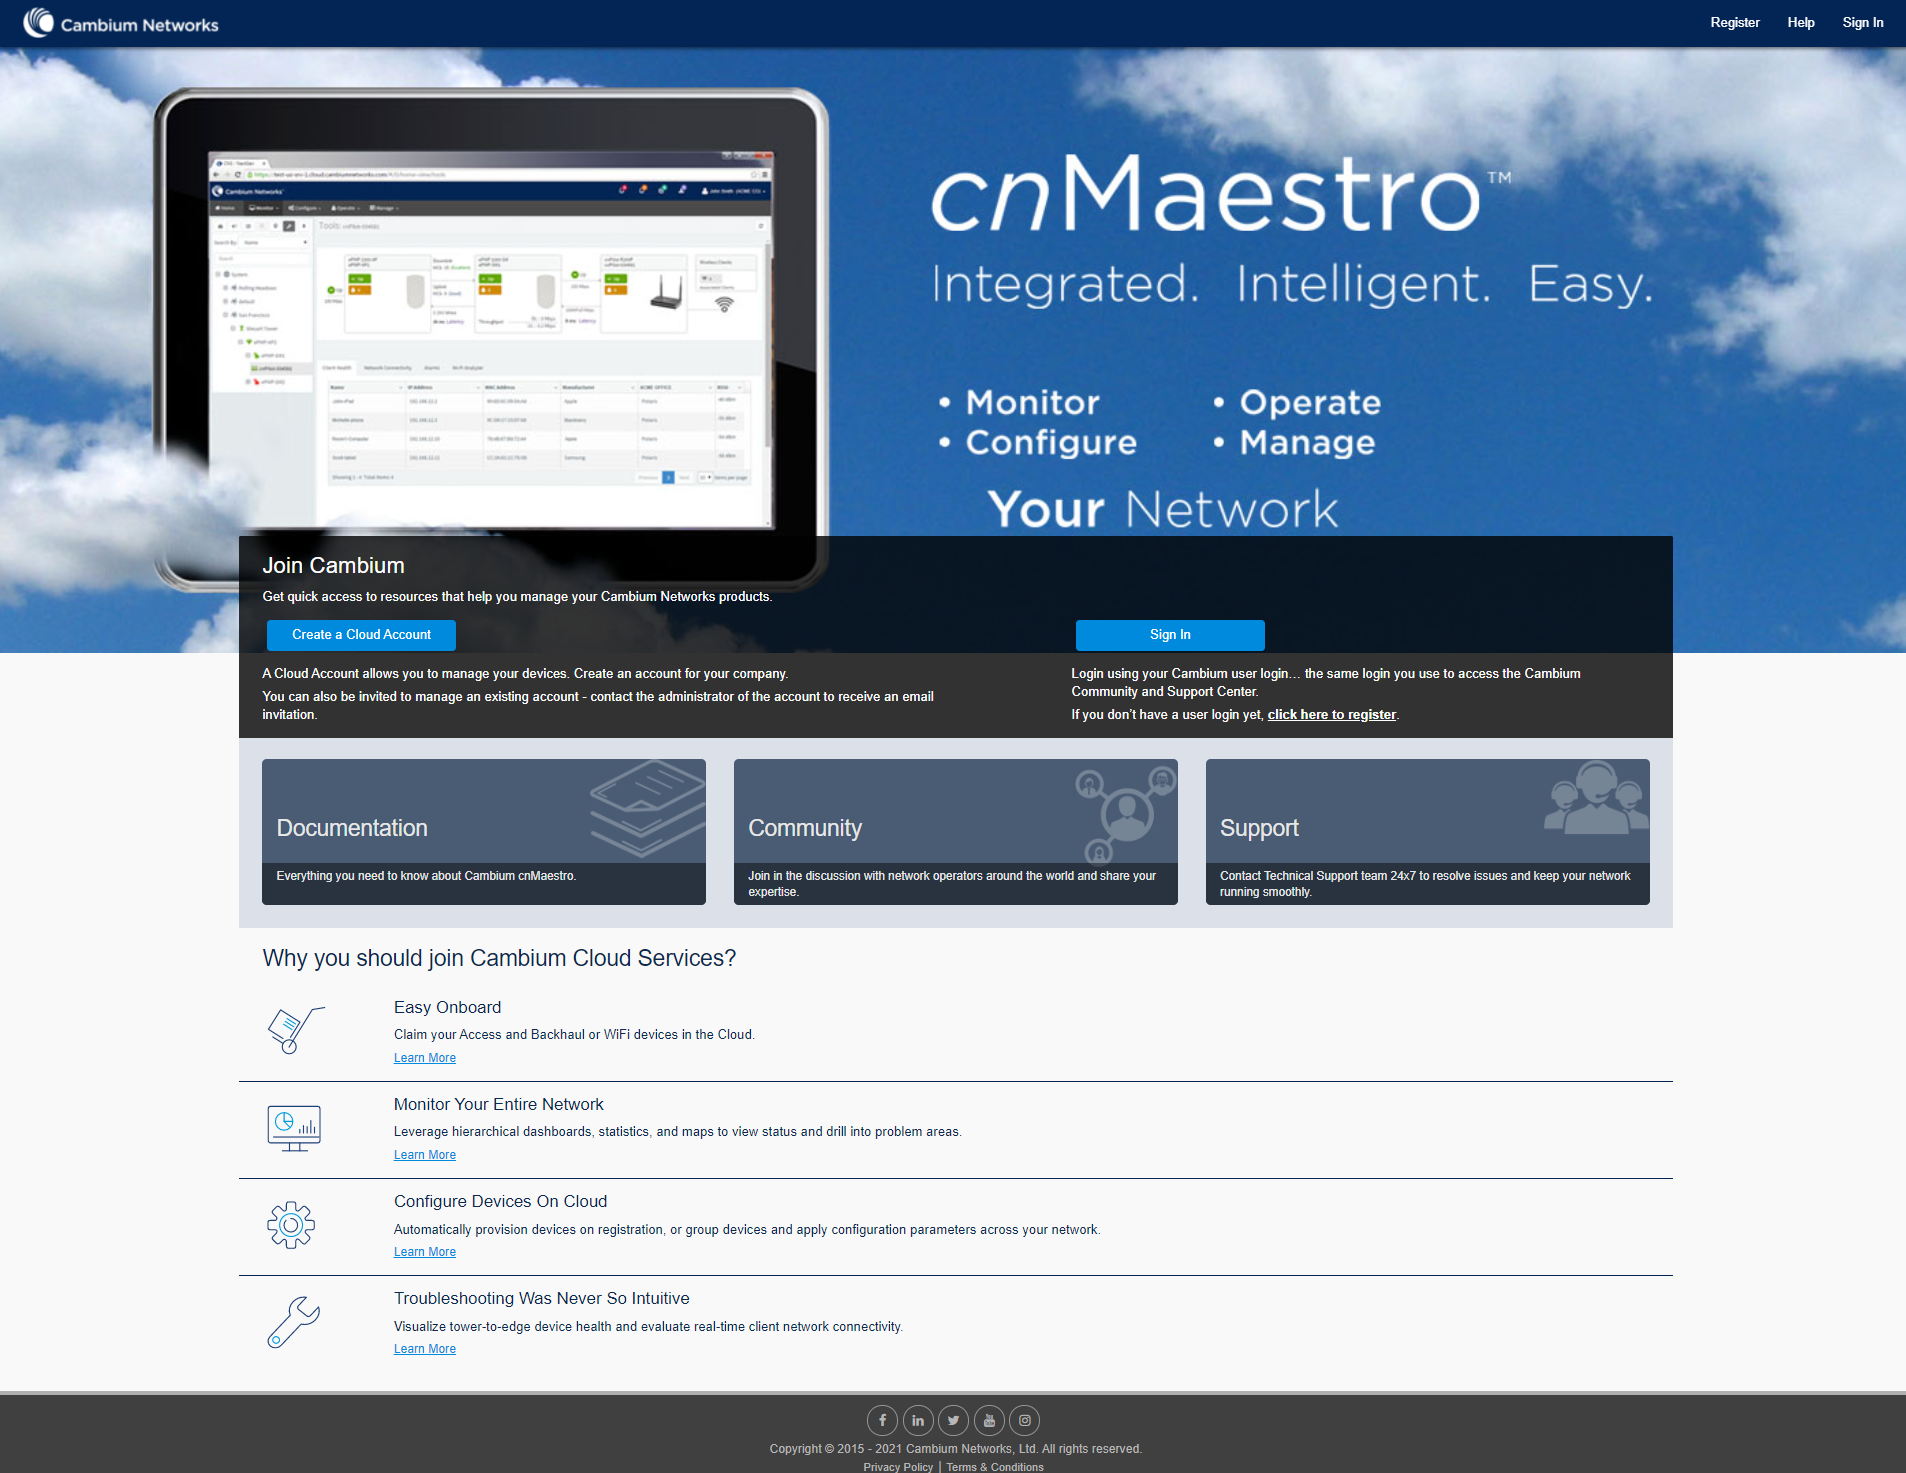
| 1. | Open a web browser and type cloud.cambiumnetworks.com. |
| 2. | The cnMaestro Main Login window appears. |
Figure 1 Main Login Screen
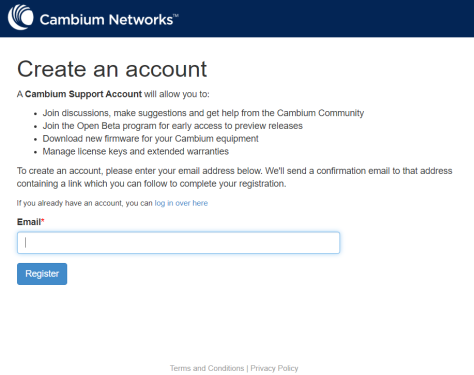
| 3. | Select the under . |
| 4. | A registration form will be displayed where the user can enter an email address, for the Support account. |
Figure 2 Initial Registration Screen
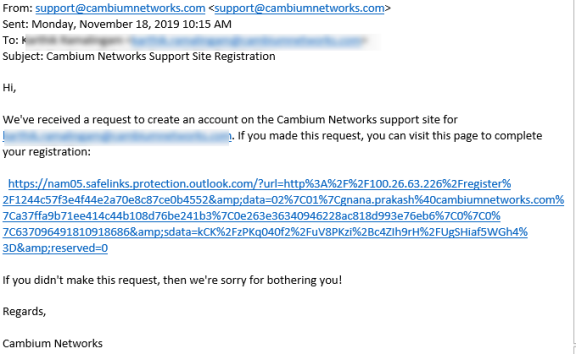
| 5. | Enter an email address and click the button. An email will be sent to user with a validation link. |
| 6. | Open the validation email and click on the validation link. |
Figure 3 Email from Cambium Support to Validate Account

|
If you do not receive an email within a few minutes, ensure to check your spam folder. |
| 7. | The Finish registering form appears. |
Figure 4 Complete the Registration Form
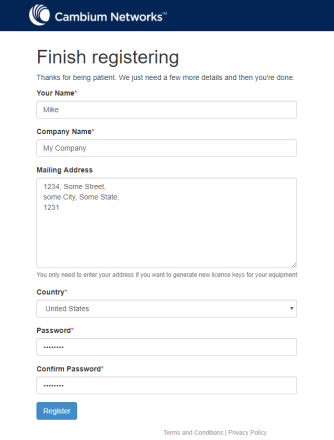
| 8. | Fill in the registration form and click to complete the registration process. |
Once you have a Cambium Support account, login to cnMaestro and setup the cnMaestro account.
To create a cnMaestro account, follow these steps:
| 1. | Open a web browser and type cloud.cambiumnetworks.com. |
| 2. | The Main Login window appears. |
| 3. | Login using your Cambium Support account. |
| 4. | window appears. |
| 5. | Select and fill in the Cloud Management Account form. |
Figure 5 Account Management Form
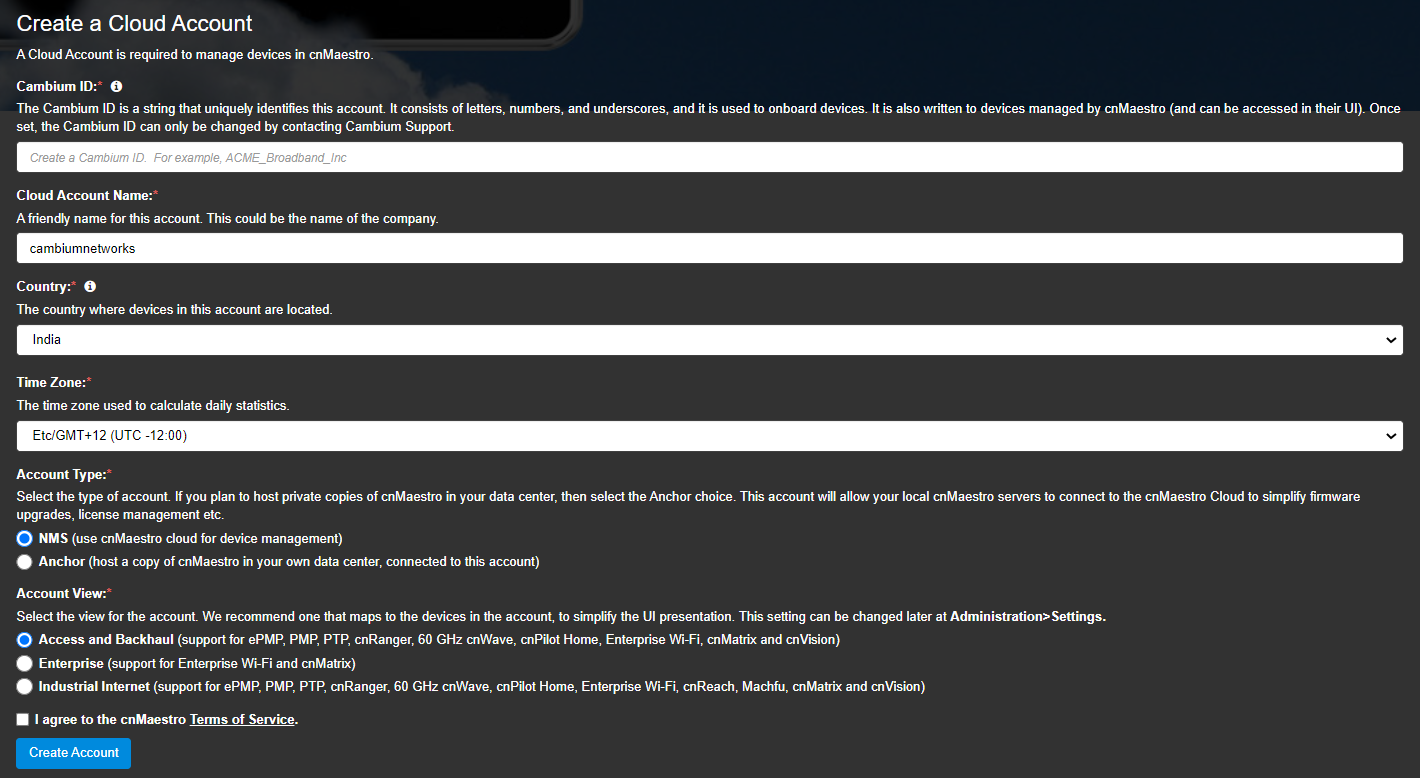
|
|
Theis the primary identifier of the account, and it also may be used to onboard devices. |
| 6. | Click to complete the process. |
Once the Cambium Support and cnMaestro Accounts have been created, you can log in to cnMaestro by completing the following steps:
| 1. | Open a web browser to cloud.cambiumnetworks.com. |
| 2. | The Main Login window appears. |
| 3. | Select and enter your account credentials. |
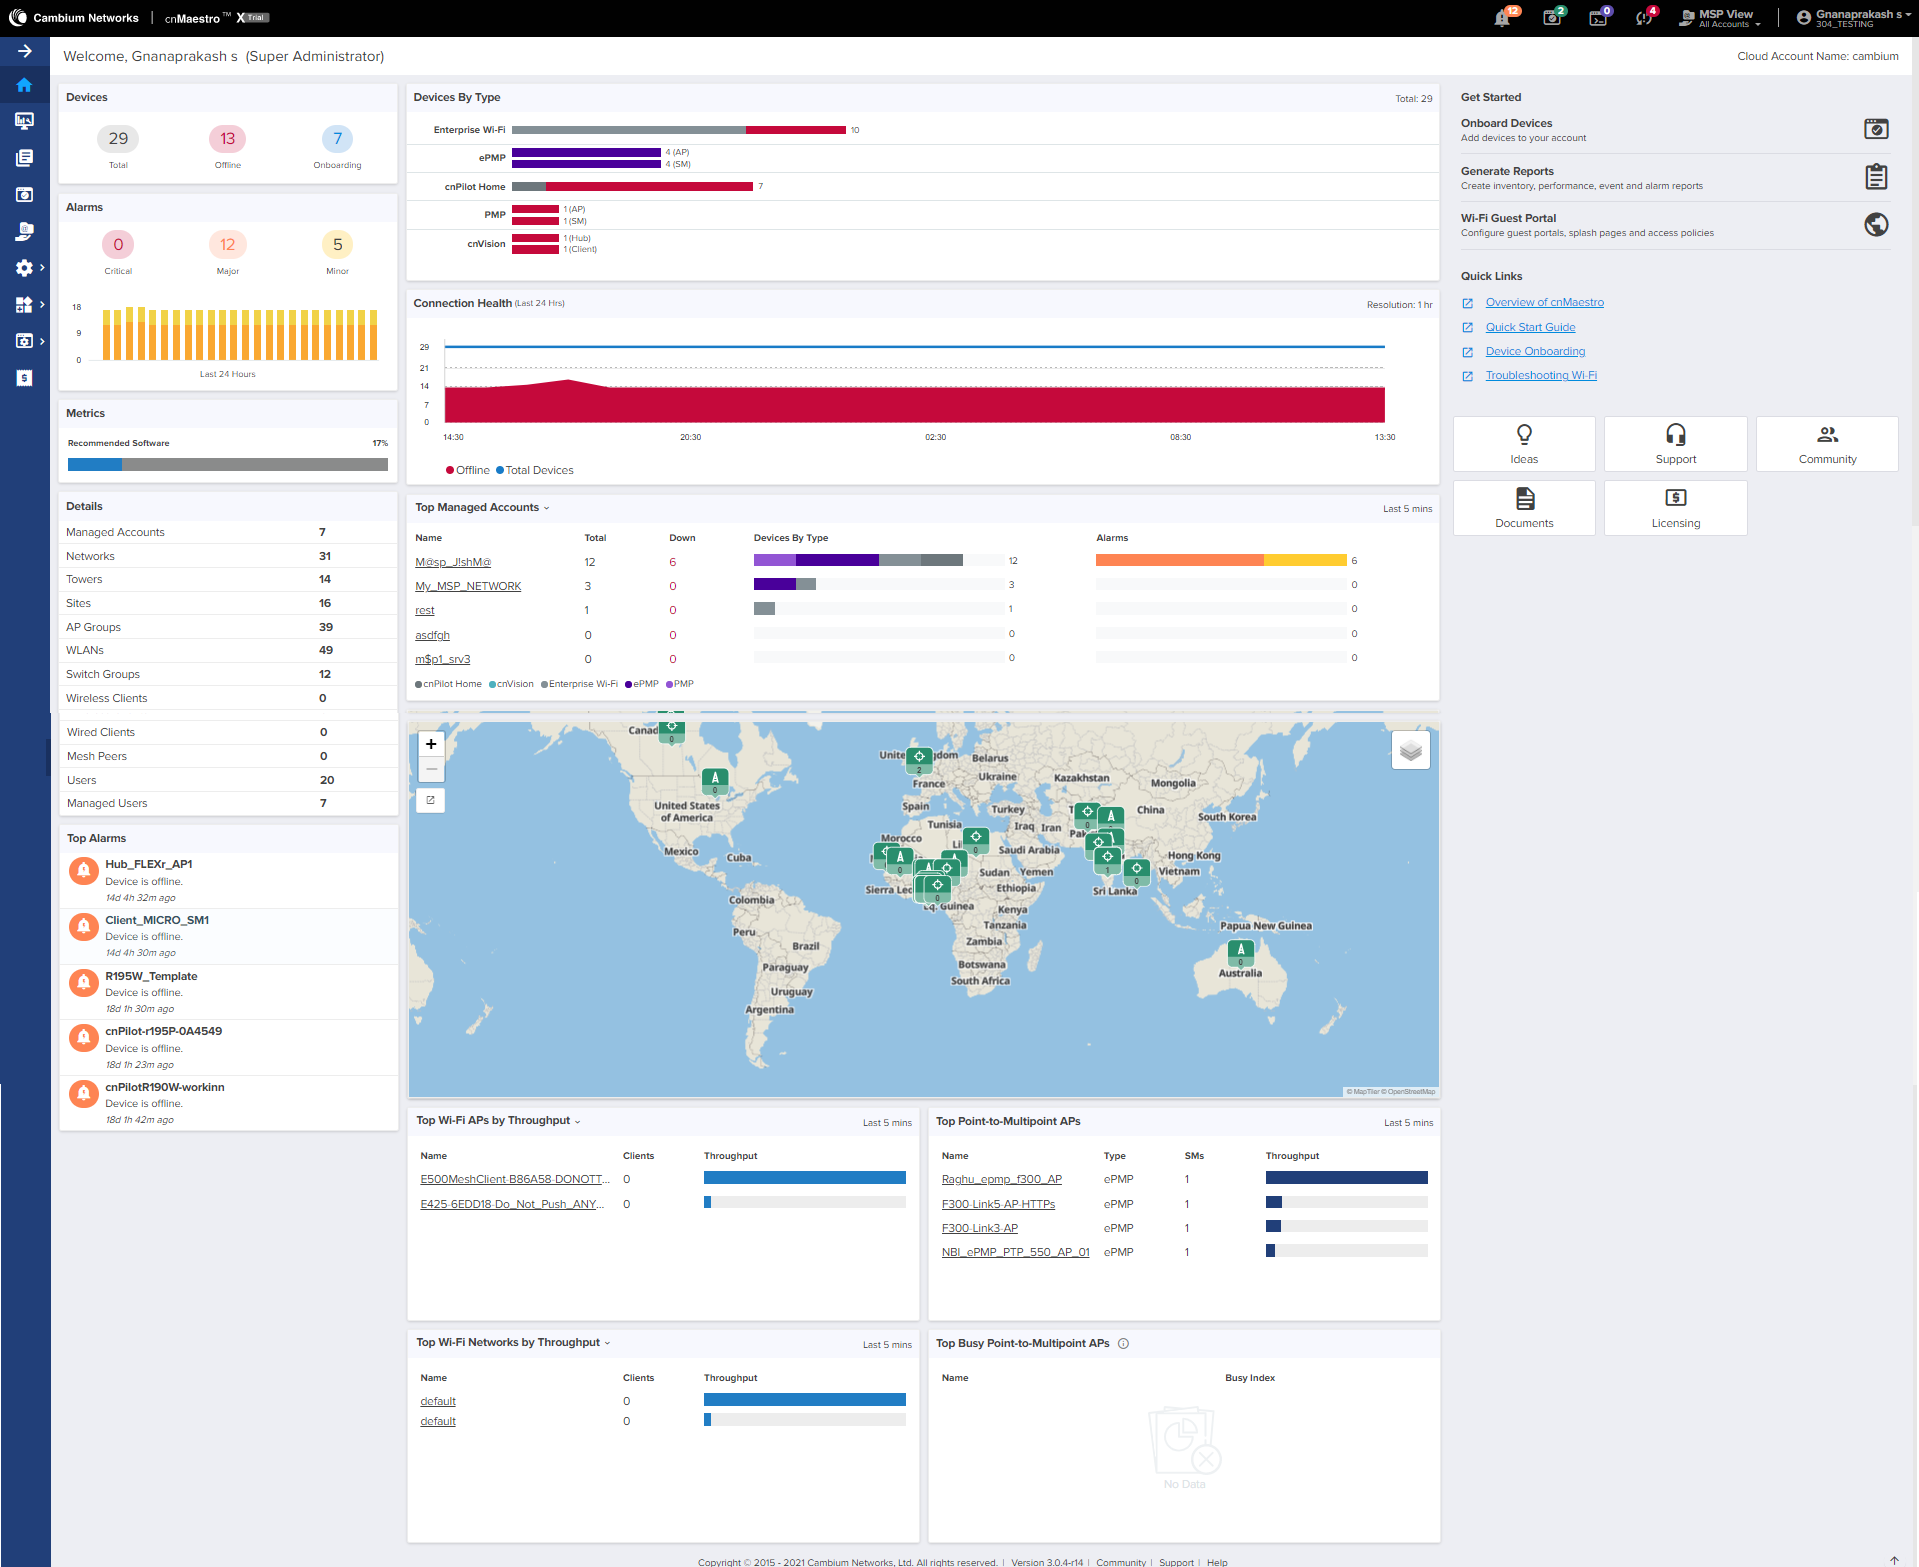
| 4. | The cnMaestro Home Page appears. |
Figure 6 cnMaestro Home Page

To manage devices in cnMaestro, it is necessary to claim and onboard them.
Claiming lets the cnMaestro infrastructure know who owns a device. All devices contact a central Cambium Router when they attempt to connect to cnMaestro. The Router determines which cnMaestro instances belong to the device by looking up who claimed it.
Once a device is claimed, it is redirected to a cnMaestro Server instance and listed in the Onboarding Queue. The Onboarding Queue contains devices waiting to be brought under management.
Once a device has been accepted under management, it will remember the cnMaestro association, so the claiming and onboarding process does not need to be repeated.
Device Claim with Serial Number (MSN) is as easy as entering the serial numbers of devices, one per line, and clicking the button. The system prompts the user to validate the devices before applying them. When complete, they will be placed into the Onboarding Queue, where they can be pre-provisioned to update software or configuration before onboarding.
Claim a device using the serial number as follows:
| 1. | Navigate to tab and click Claim Device. |
Figure 7 Onbord > Claim Device
| 2. | Thewindow appears. |
| 3. | In the tab, enter the Serial Number (MSN) of the device. |
Figure 8 Claiming Devices with Serial Number
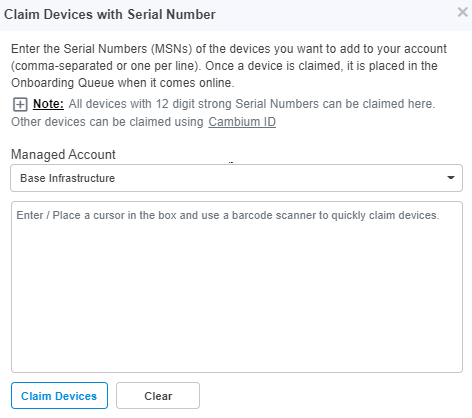

|
Note Place a cursor in the box and use a barcode scanner to quickly claim the devices. |
| 4. | Click Thewindow appears |
| 5. | Enter the serial number of the device in the text box. |
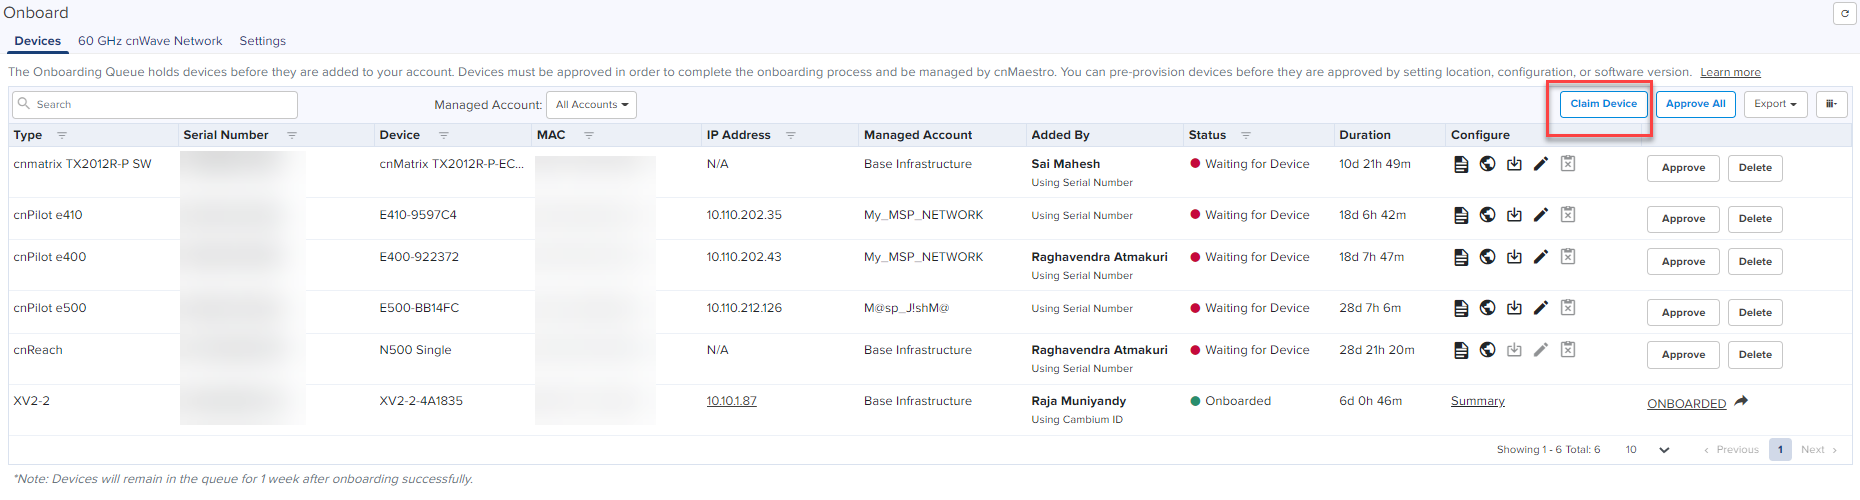
| 6. | To onboard this device, navigate to the Onboard tab > click Approve All. |
Figure 9 Onboarding Queue
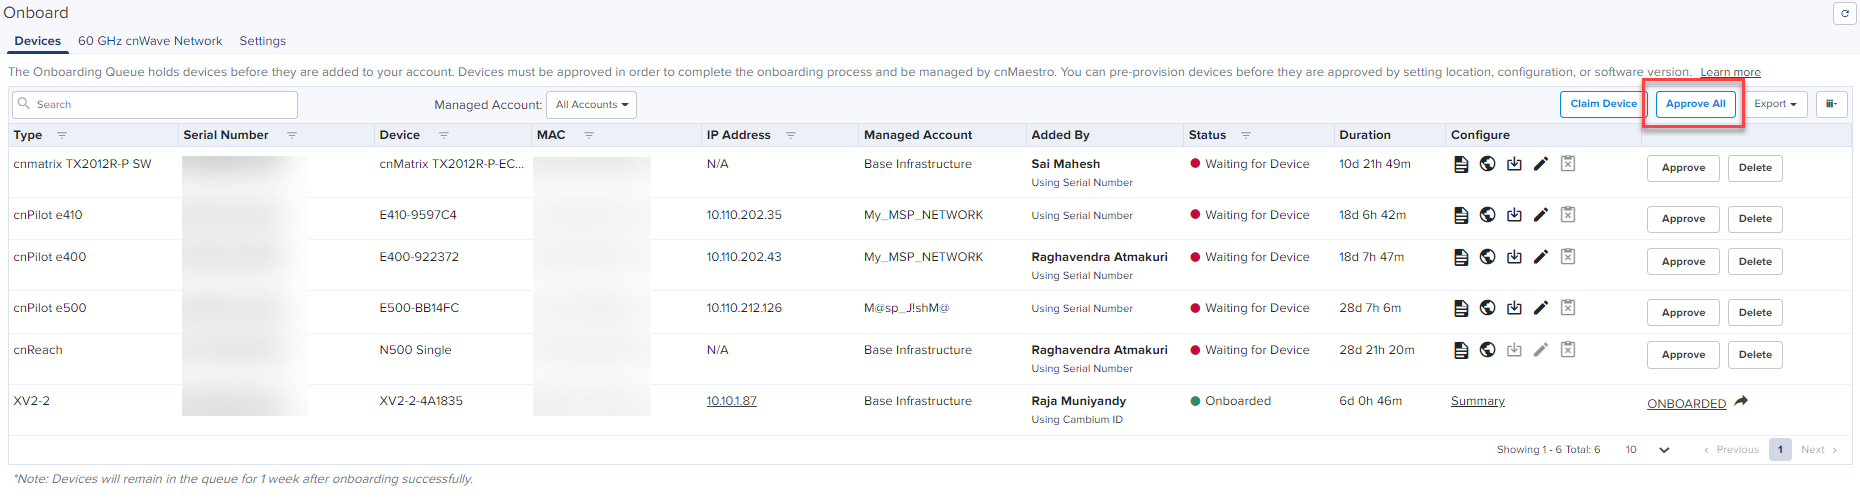
|
|
Note If the button is not clicked, the device will remain in the Onboarding Queue until it is manually onboarded by selecting the button. |
Figure 10 Provisioning Wizard
The Cambium ID is defined when the Cloud Account is first created. It uniquely identifies the account, and it is visible on the User drop down menu.
| | Cambium ID with Onboarding Key is required for legacy devices that do not have a 12-character serial number (these devices are usually 5+ years old). |
| | Cambium ID with Onboarding Key is optional for devices that have 12-character serial number. |
Figure 11 Cambium ID
To claim a device with Cambium ID, one needs to access the device.
There are two ways to claim a device with Cambium ID.
The directions for each specific device type are presented later in this chapter.
Once devices are added to the Onboarding Queue using Cambium ID, the administrator must approve them before they are onboarded.
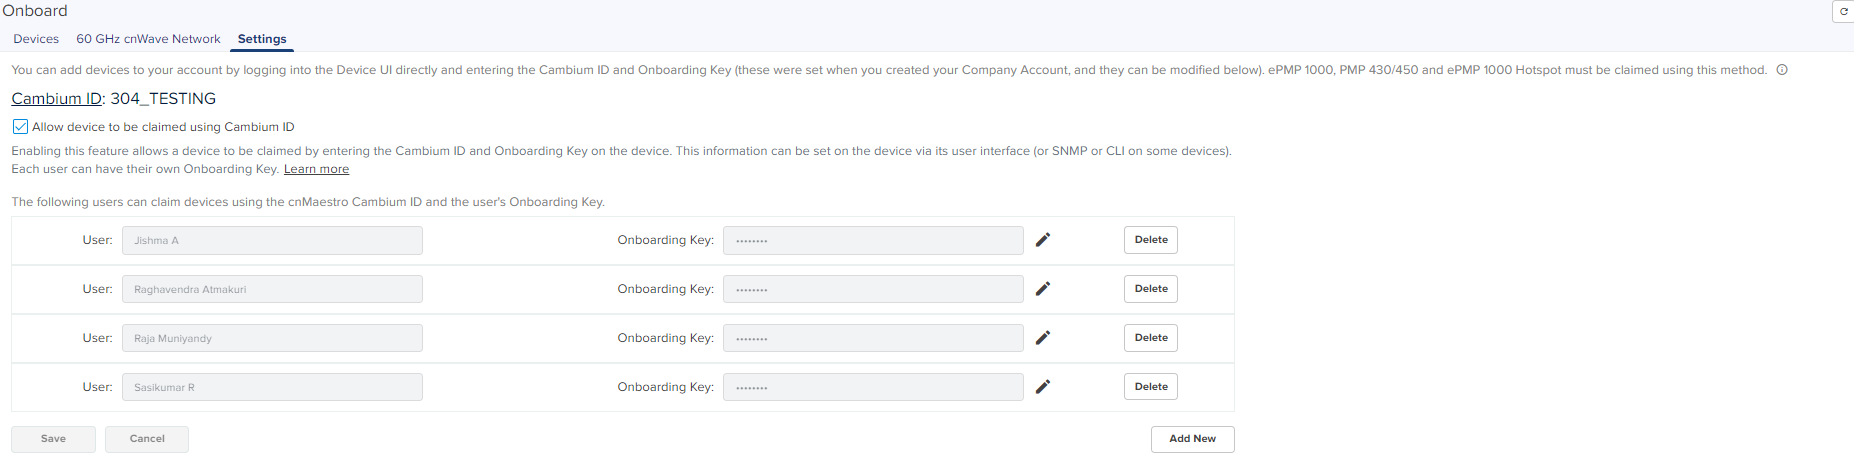
You must configure the Cloud Manager to support Cambium ID onboarding. Once enabled, Cambium ID onboarding works for all device types.
Figure 12 Cambium ID Configuration
An Onboarding Key must be associated with a Cambium ID to onboard using this mechanism.. This provides security and tracking benefits for onboarded devices.
Each Onboarding Key is mapped to an account administrator. This allows Cambium Cloud to know who is onboarding a device. Onboarding Keys can be revoked if needed.
| 1. | Login to your cnMaestro account. |
| 2. | From the home page select in the left tab menu. |
| 3. | Navigate to the Settings tab. |
| 4. | Select check box |
| 5. | To add an Onboarding Key click . |
| 6. | Select the User field and enter the user name. |
| 7. | Enter the Onboarding Key. |
| 8. | Click to save the Onboarding Key. |
The device will automatically show up in the Onboarding Queue when it reconnects to the correct cnMaestro instance. Once the device appears in the Onboarding Queue it can be provisioned and brought under management by selecting the button.
| 1. | Login to the Device UI. |
| 2. | Navigate to the page that contains the cnMaestro account information. |
|
|
Note The location will vary from device to device. For example, in cnPilot devices, this page is located under the Administration/Cambium Network Manager tab. |
| 3. | Enter cloud.cambiumnetworks.com for the server to connect. |
| 4. | In the Cambium ID field, enter the Cambium ID for the cnMaestro account. |
| 5. | Though not required, it is strongly recommended entering an Onboarding Key. |
| 6. | Using an Onboarding Key requires the same Key to be entered in cnMaestro, which will be described below. |
| 7. | Save and apply the changes to the device (a reboot may be necessary). |