cnMaestro provides a number of ways to navigate the UI.
This section includes the following topics:
| | Account View |
| | Home page |
| | Page structure |
| | Page navigation |
| | Access and Backhaul view |
| | Enterprise Account |
| | Side menu |
| | Section tabs |
| | System status |
| | Logout |
cnMaestro supports three different account views, based upon the composition of devices.
| | Access and Backhaul view |
| | Enterprise view |
| | Industrial Internet view |
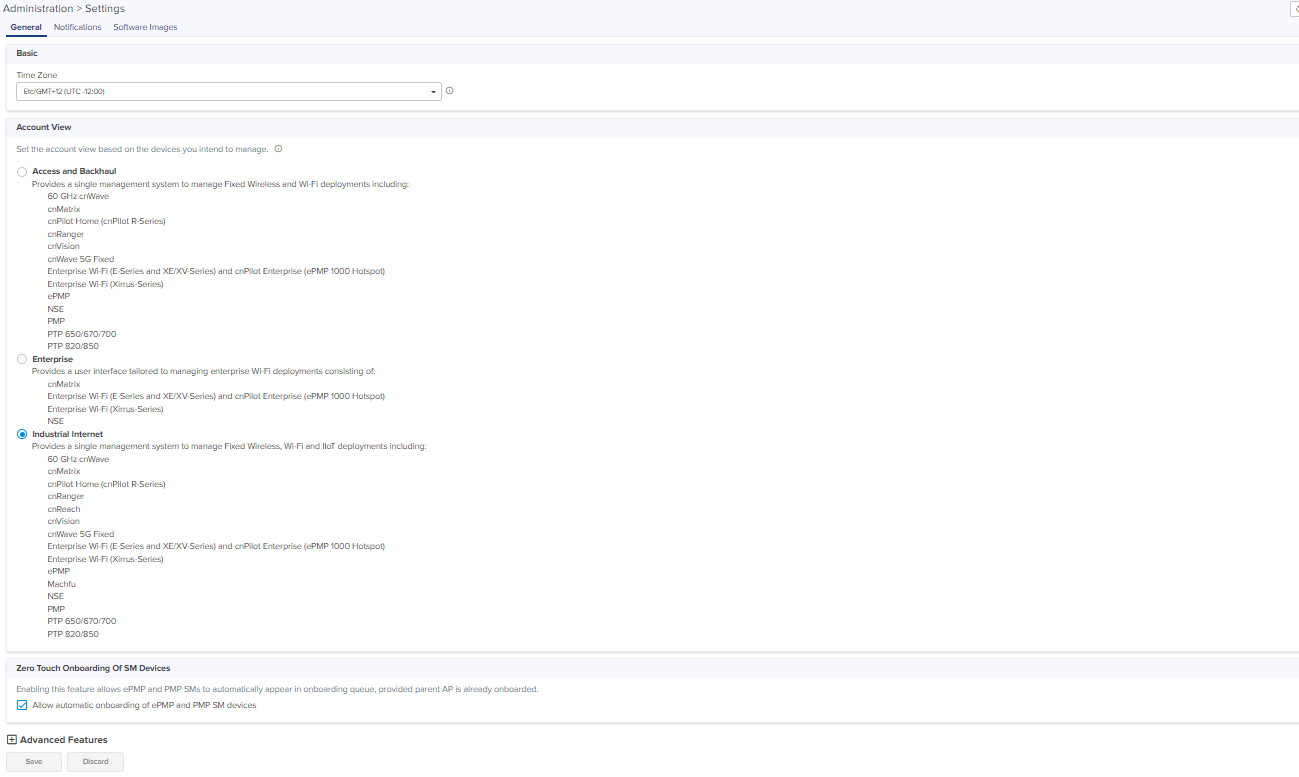
The account view is selected when the account is created but it can be changed later through the > page.
Figure 1 Account View
The Access and Backhaul View supports all Fixed Wireless and Wi-Fi devices. The device types include 60 GHz cnWave, cnMatrix, cnPilot Home (cnPilot R-Series), cnRanger, cnPilot, cnVision, cnWave 5G Fixed, Enterprise Wi-Fi (E-Series and XV-Series) and Enterprise (ePMP 1000 Hotspot), Enterprise Wi-Fi (Xirrus-Series), ePMP, NSE, PMP, PTP 650/670/700, and PTP 820/850.
The Enterprise View supports the Enterprise Wi-Fi portfolio, which includes the cnPilot Enterprise APs (ePMP 1000 Hotspot), cnMatrix, and Enterprise Wi-Fi APs (E-Series and XV-Series), Enterprise Wi-Fi (Xirrus-Series), and NSE. It provides a simplified UI for Wi-Fi components (hiding fixed wireless features such as Towers).
Industrial Internet View provides a single interface for Fixed Wireless, Wi-Fi, and IIoT deployments. The device types include 60 GHz cnWave, cnMatrix, cnPilot Home(R-Series), cnRanger, cnVision, cnWave 5G Fixed, ePMP, PMP, cnReach, PTP 650/670/700, PTP 820/850, Enterprise Wi-Fi (E-Series and XV-Series) and cnPilot Enterprise (ePMP 1000 Hotspot), Enterprise Wi-Fi (Xirrus-Series), Machfu, and NSE.
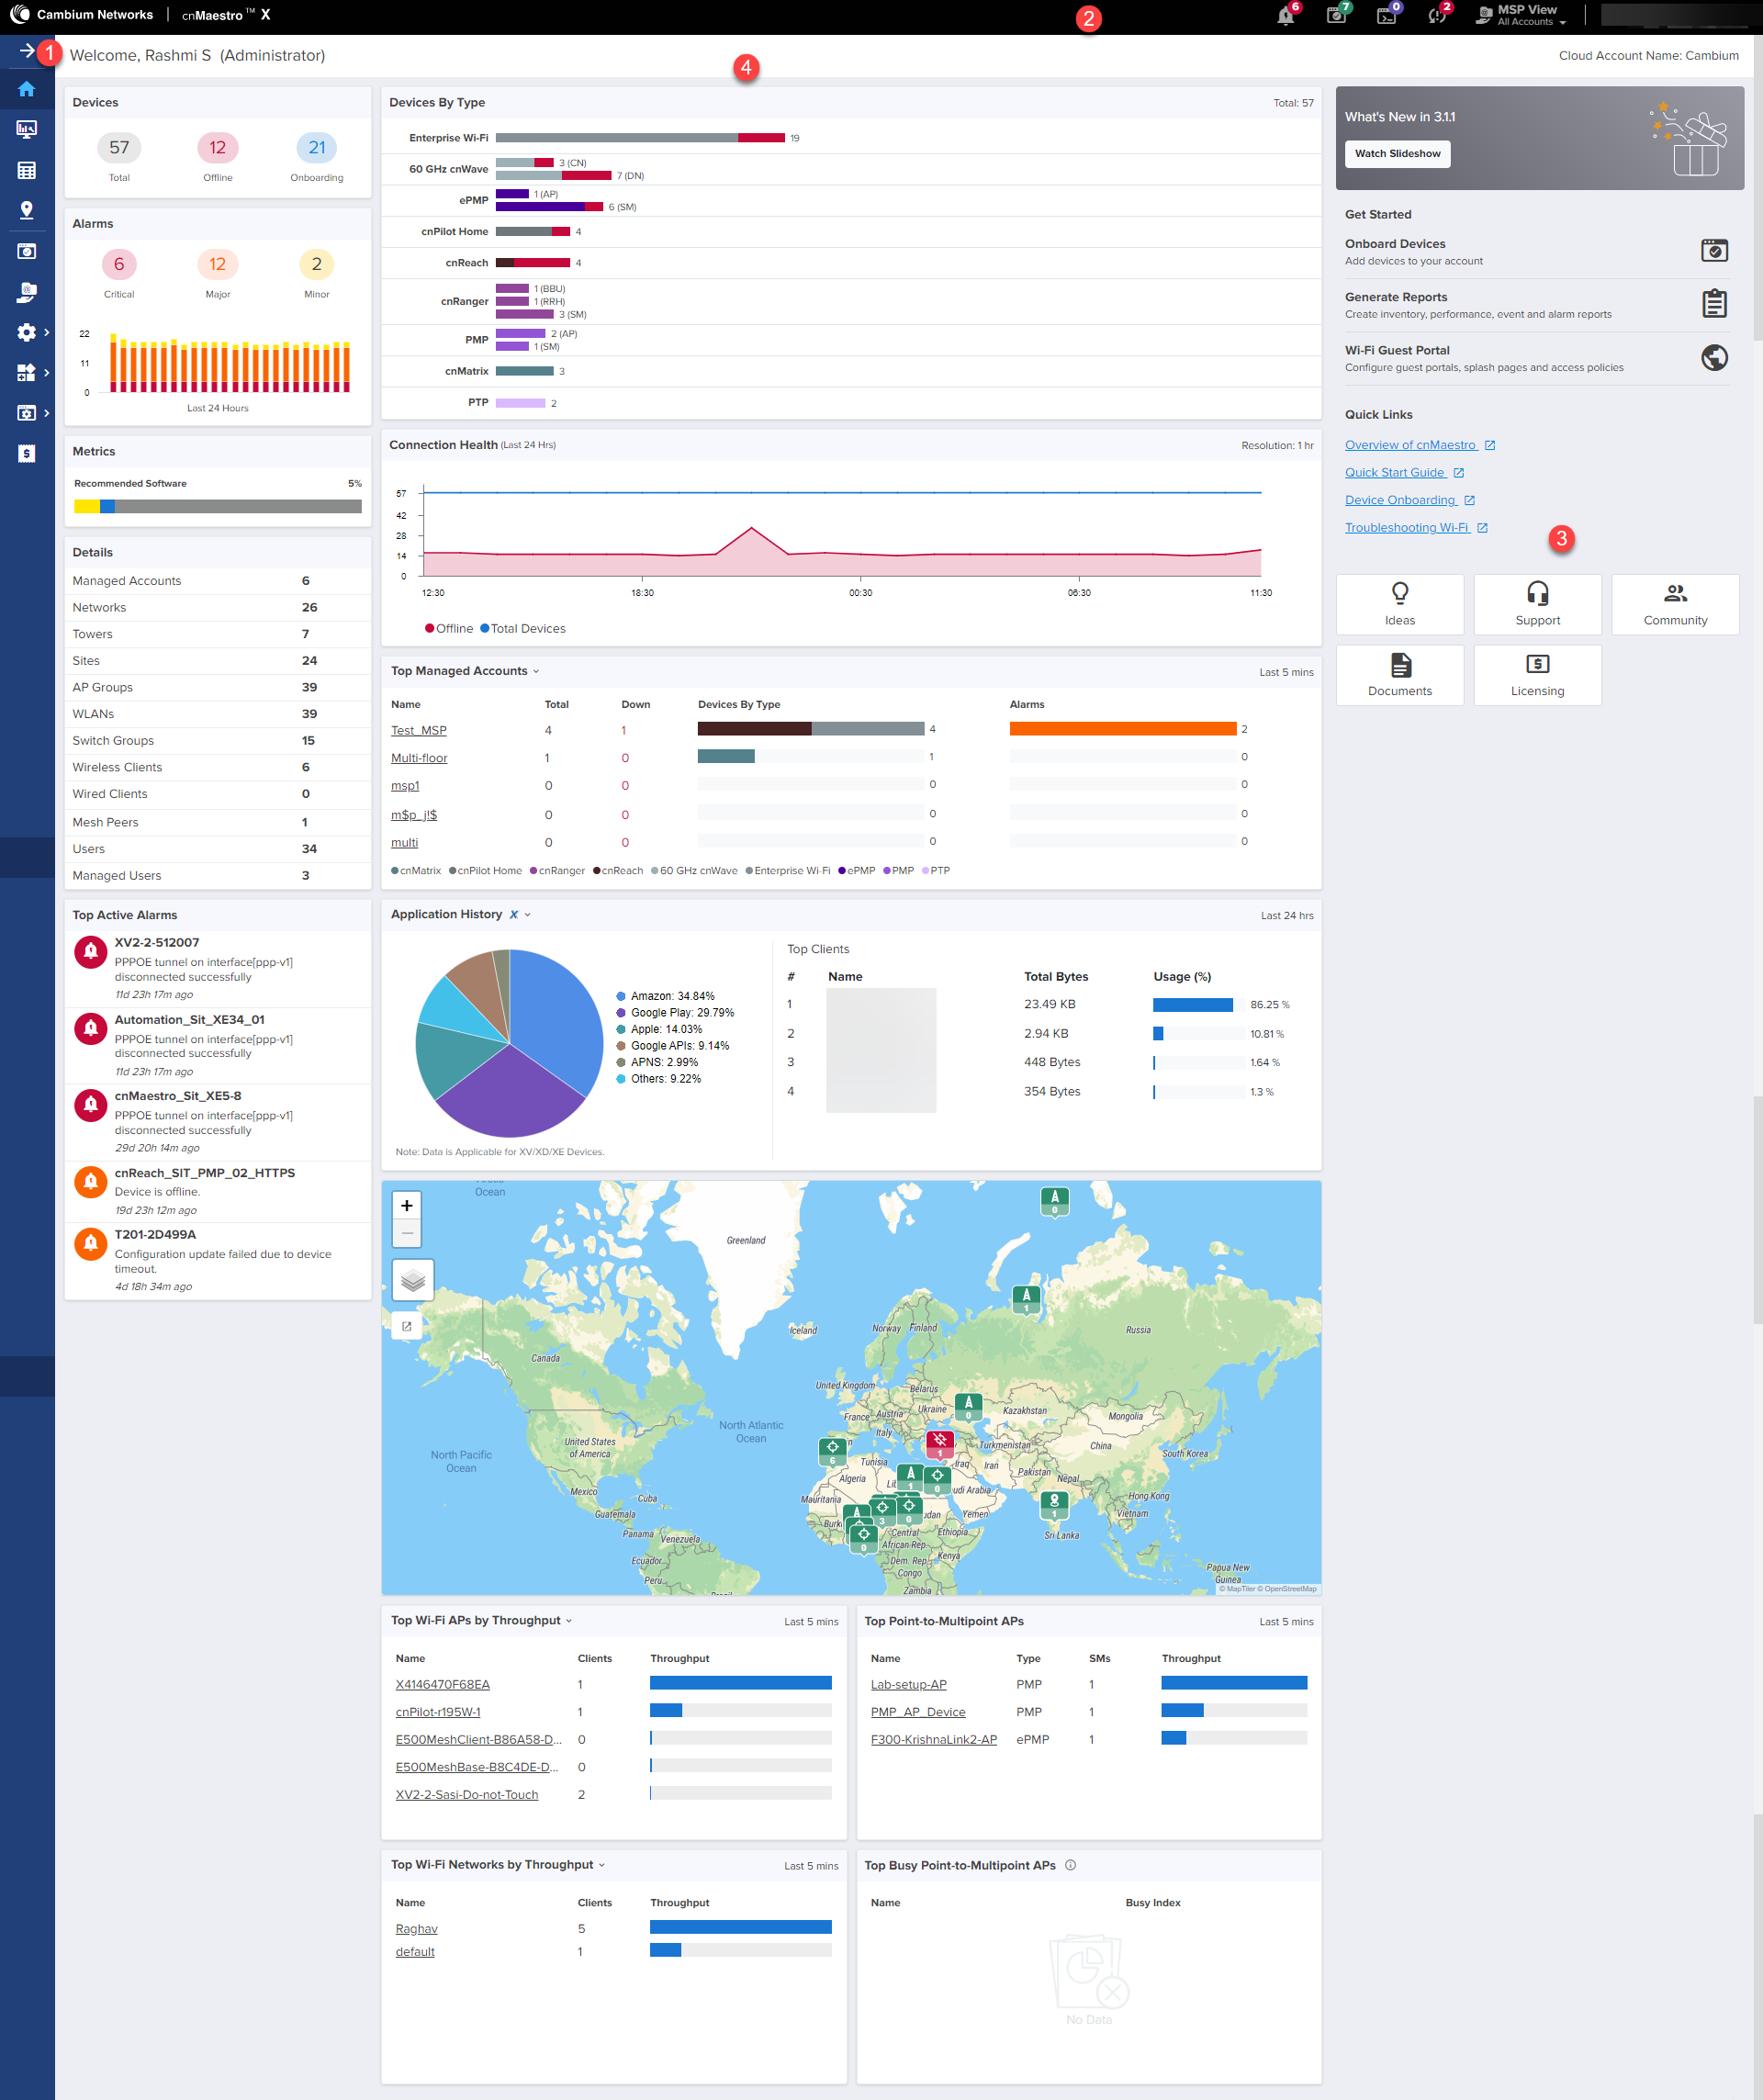
The Home page is displayed when the user logs into the cnMaestro. It provides links to the core functional areas in the UI, such as Cambium Support Center, Community, Documents, and Licensing.
Figure 2 cnMaestro Home page

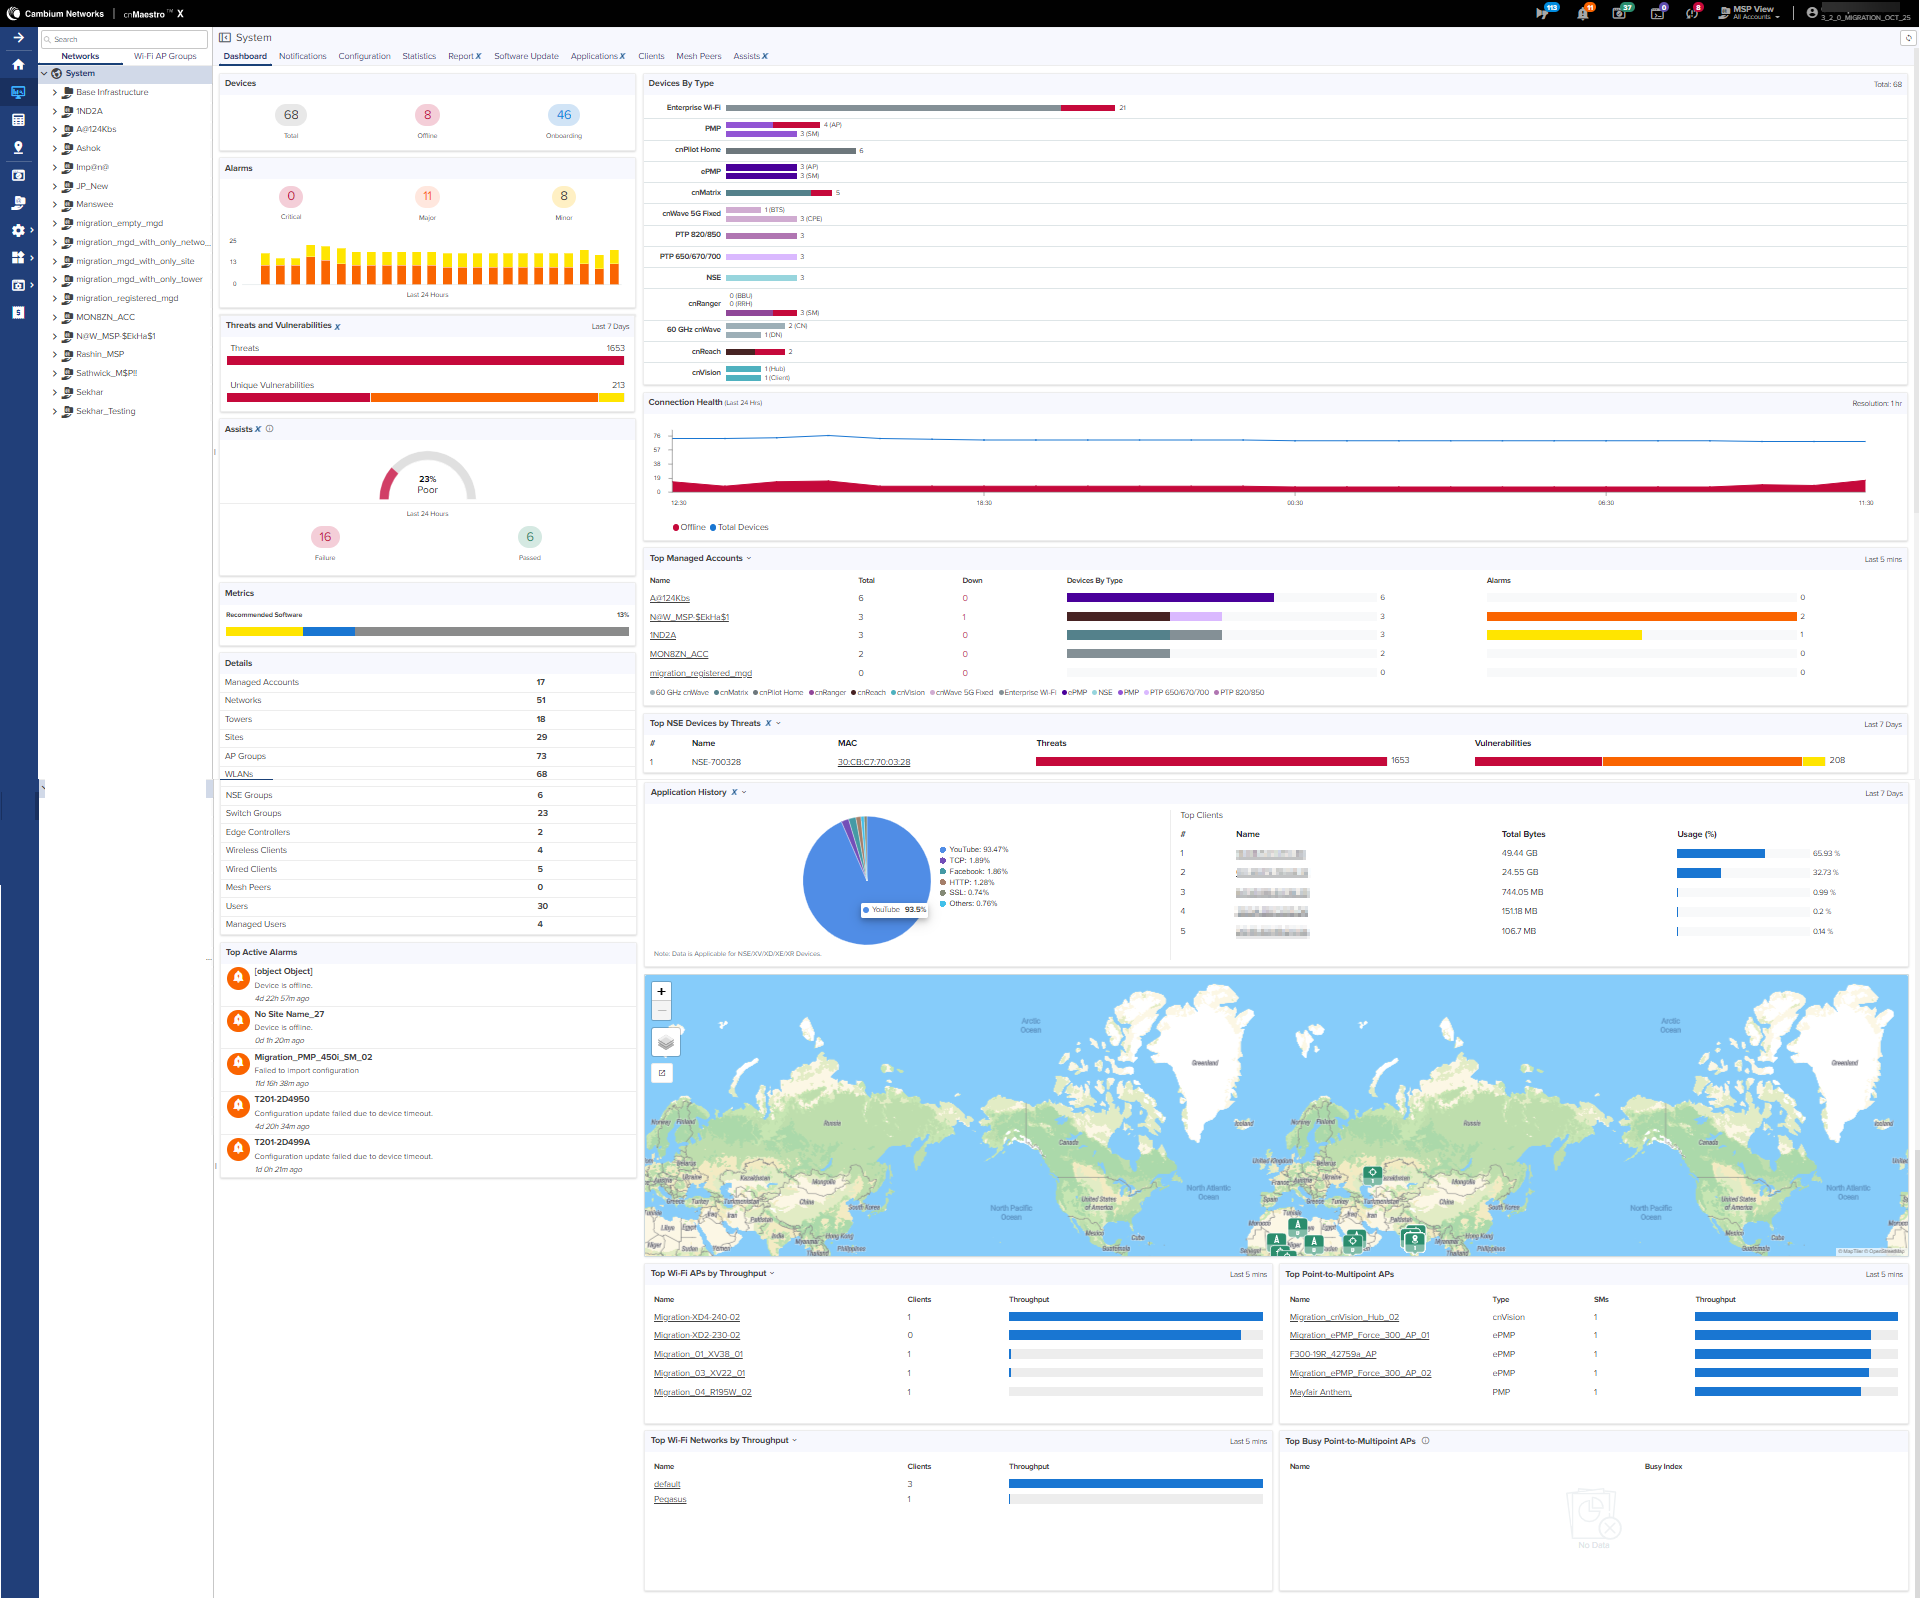
cnMaestro follows a standard page structure, which consists of a left-side menu and a content area. In many pages, tabs provide additional content navigation.
Figure 3 cnMaestro page structure
|
Number |
Elements |
Description |
|---|---|---|
| 1 . | Left menu | Shows the functional areas of the UI. This menu can be expanded or collapsed to view the submenu by clicking the top arrow. |
| 2 | Header | Shows the basic counters for Major Alarms, Devices Awaiting for Approval, Software Updates Jobs, Announcements, and Out of Sync Devices. |
| 3 | Right menu | Provides links to Cambium Ideas, Support, Community, Documents, and Licensing . |
| 4 | Functional area | Shows the detailed view of the section selected in the left menu. |
The cnMaestro pages include items such as Dashboard, Notifications, Configuration, Statistics, Report, Software Update, Applications, Clients, Mesh Peers, and Assists. The content of a page differs depending upon its context. For example, a Dashboard page will be different at the System/Network/Tower/Site/Device levels. The context, or level in the hierarchy, is selected in the Device tree as shown in Table 4.
The Access and Backhaul view leverages a hierarchical tree to display device installations. In this view, customers can group their fixed wireless devices into Networks, and display their Point-to-Multipoint devices in Tower-based sectors. Navigation is performed using the tree. The Device tree is segmented into Network and Wi-Fi AP Group tabs.
The Network tab displays a hierarchical view of the devices. It consists of Systems, Networks, Towers, Sites, and Devices. There is a strict ordering for how nodes can fit in the hierarchy, and as one navigates through and selects nodes, the pages display the node chosen.
Selecting an arrow icon will open the node and display the next level of hierarchy.
|
|
NOTE
|
Figure 4 Networks
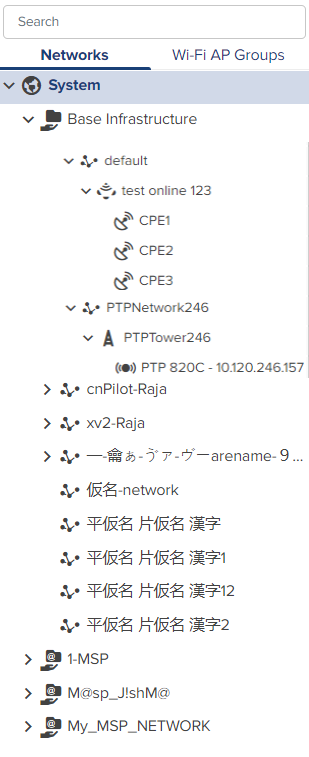
The structured hierarchy has the following nodes:
|
Icon |
Name |
Description |
|---|---|---|
|
|
60 GHz cnWave CN |
CN is mapped to a Site in E2E Network. |
|
|
60 GHz cnWave DN |
DN is mapped to a Site in E2E Network. |
|
|
60 GHz cnWave Onboard E2E Network |
60 GHz cnWave devices are located within a Network deployed through the Onboard E2E controller. |
|
|
60 GHz cnWave External E2E Network |
60 GHz cnWave devices are located within a Network deployed through the external E2E controller. |
|
|
60 GHz cnWave PoP |
PoP is mapped to a Site in E2E Network and deployed through the External E2E controller. |
|
|
60 GHz cnWave PoP Onboard E2E Network |
PoP is mapped to a Site in E2E Network and deployed through the Onboard E2E controller. |
|
|
60 GHz cnWave Site |
are located within E2E Networks. A site maps to a single area and represents a location on a map that has 60 GHz cnWave devices. |

|
cnMatrix |
cnMatrix devices are located within a Network. Optionally they can also be mapped standalone to a Tower or a Site. |
|
|
cnRanger RRH |
cnRanger RRH access points are located in a and are mapped to a BBU. |
|
|
cnRanger Sierra 800 |
Sierra 800 points are located in a and are optionally mapped to a . |
|
|
cnRanger SM |
cnRanger SM access points are located in a and are optionally mapped to an RRH. |

|
cnReach |
cnReach device which could have zero, one, or two radios, and support one or two roles, including Point-to-Point (PTP), Point-to-Multipoint (AP or EP) (PTMP), or IO Expander. |
|
|
cnPilot Home |
Wi-Fi devices are generally matched to a local SM and inherit its . They can also be mapped standalone to a or a . |
|
|
cnVision Client |
cnVision Client Subscriber Modules are located in a (if they are standalone, which is only used for bootstrapping) or they are associated with an AP. The SM will inherit the and of the AP to which it is associated. |
|
|
cnVision Hub |
cnVision Hub is located in a and are optionally mapped to a . |

|
cnWave 5G Fixed BTS | cnWave 5G Fixed BTS devices are located within a Network. |

|
cnWave 5G Fixed CPE | cnWave 5G Fixed CPE devices connected through cnWave 5G Fixed BTS device in a Network. |
|
|
Enterprise Wi-Fi |
Enterprise Wi-Fi devices are generally matched to a local SM and inherit its . They can also be mapped standalone to a or a . |
|
|
ePMP AP |
ePMP Access Points are located in a and are optionally mapped to a . |
|
|
ePMP SM |
ePMP Subscriber Modules are located in a (if they are standalone, which is only used for bootstrapping) or they are associated with an AP. The SM inherits the and of the AP to which it is associated. |
|
|
Machfu |
Machfu devices are located within a Network. Optionally they can also be mapped standalone to a Network or a Tower. |
|
|
Network |
All devices are placed within . Networks can represent geographical regions or collections of devices with shared responsibility. Accounts can have one network or many networks. Networks allow one to provide structure to accounts with many devices and also provides aggregation buckets for cnMaestro statistics (essentially the system pre-calculates statistics, so they are displayed quickly). |
|
|
NSE 3000 | NSE device located in an Network. |
|
|
PMP AP |
Point-to-Multipoint Access Points (PMP AP) are located in a and are optionally mapped to a . |
|
|
PMP SM |
Point-to-Multipoint Subscriber Modules (PMP SM) are located in a (if they are standalone, which is only used for bootstrapping) or they are associated with an AP. The SM will inherit the and of the AP to which it is associated. |

|
PTP Master |
Point-to-Point (PTP) Master device located in a network and optionally mapped to a Tower. |

|
PTP Slave |
Point-to-Point (PTP) Slave device located in a network and optionally mapped to a Tower. |

|
PTP 820/850 | Point-to-Point (PTP 820/850) device located in a network. |
|
|
Site |
are located within networks and hold Wireless Access Points. A site maps to a single area and represents a location on a map that has APs or a building. |
|
|
System |
The node is at the top level of the hierarchy, though it does not have an explicit node in the tree. Its pages are displayed when the user logs in for the first time, when one selects the button in the hierarchical tree (displayed when Networks are shown) or selects the node in the breadcrumbs. The System level aggregates data from all devices within the account. |

|
Tower |
are located within networks and hold Point-to-Point devices or Point-to-Multipoint APs. All the devices on a Tower are mapped to the same Network, and all their children devices such as Subscriber Modules or Home APs are also mapped to the same network. |
cnMaestro has a Default network into which unmapped devices will be placed. These can be moved to a named network. The Default network cannot be deleted, but it can be renamed.
Each node in the device tree has a menu icon ( ) that supports node-specific actions.
For example, the System node allows to Add Network or launch the Update Software page, while individual devices allows to Edit, Reboot, Refresh, and Delete the device from management (so it can be transferred to another account). The actions supported across the tree include the following:
|
Action |
Node | Description |
|---|---|---|
|
For All Devices |
||
|
Add Network |
System | Add a new Network to the System node. |
| Add Site | Network | Add a new Site to the Network node. |
| Add Tower | Network | Add a new Tower to the Network node. |
| Delete | Most Nodes | Delete a node from the tree. This is available for all nodes except System and the default network. Deleted devices will be removed entirely from the management system (along with their historical statistics). In order to delete a container, such as Network or Site, all nodes inside the container must be deleted first. |
| Edit | Most Nodes |
Edit the cnMaestro settings, including node name and location. This is available for all nodes except System. For 60 GHz cnWave, edit option applies for E2E Network and nodes. Node name can be edited. |
|
Flash LEDs |
Enterprise Wi-Fi |
The LEDs of the device identify and locate the device. |
| Reboot | Devices | Reboot the device. |
| Refresh | All | Refresh the node in the tree. This refreshes the node and its children only, not the entire tree. |
|
For 60 GHz cnWave Network |
||
|
Add Link |
Network and Most Nodes |
Add a new link to the System. |
|
Add Node |
Site and Network |
Add a new Node as a child to the Site. |
|
Add Site |
Node |
Add a new Site to the E2E Controller Network. |
|
Download PoP(s) Onboarding Config |
Network and PoP Nodes |
Download PoP(s) Onboarding Configuration data. |
|
Hide or Show Site |
Site |
Allows the user to hide or show sites in the E2E Controller Network tree menu. |
|
Sync Topology |
Network |
To sync the Topology of E2E Network and 28GHz cnWave BTS device. |
|
Update Software |
Network and Nodes |
Allows the user to update the 60 GHz cnWave nodes software. |
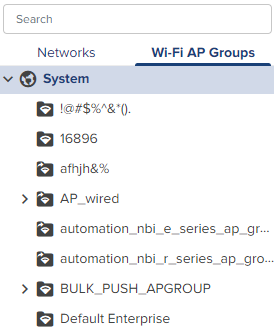
The Wi-Fi AP Group tab displays the Wi-Fi AP Groups configured in cnMaestro (and the devices mapped to them). AP Groups allow to share configuration across many access points. They also display the aggregated statistics for the devices managed and present them within the AP Group Dashboard.
Figure 5 Wi-Fi AP Group tab
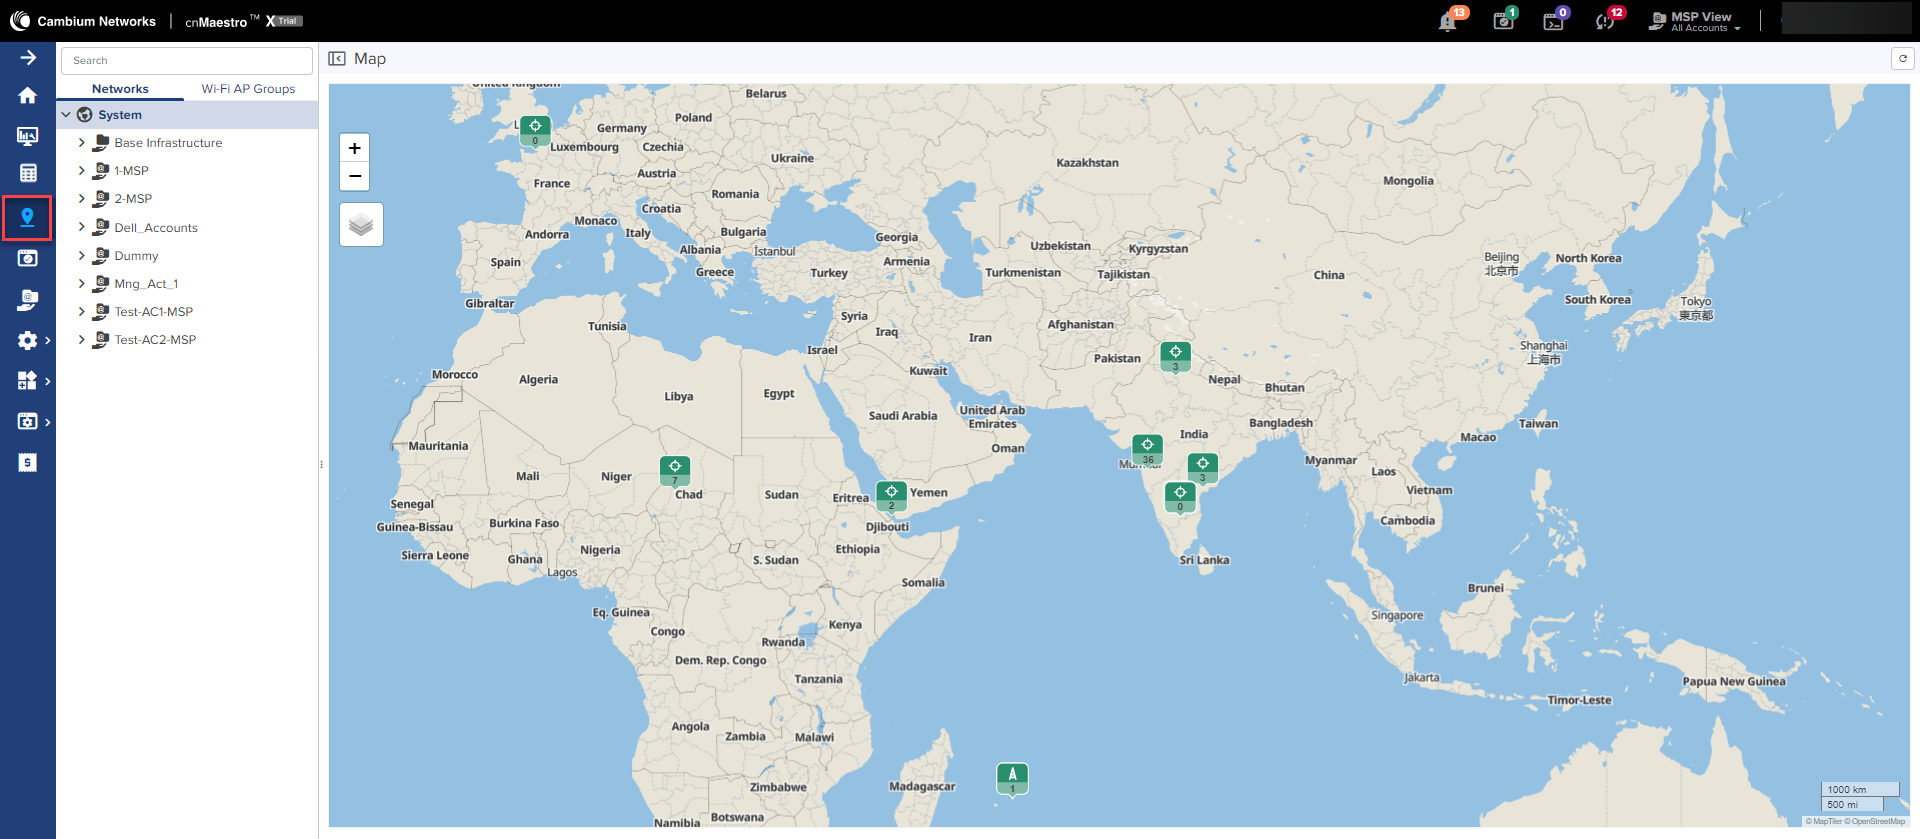
Maps are presented in Main menu with dedicated Map display. Maps often show Towers and Devices located in proximity. You can double-click the map nodes to navigate to the Device, Site, or Tower. By selecting a node in the map, the Device tree gets updated to reflect that node.
|
|
Map view is supported for devices 60 GHz cnWave, cnRanger, cnReach,cnMatrix, cnVision, ePMP, Enterprises Wi-Fi Series, PMP, and PTP at the Site and Device level. |
Figure 6 Map navigation
Some tables display , , or and allow the user to click the node and navigate to the location of the node in the tree.
Administrators can search for nodes using the Search text box. It allows the user to search based upon Device Name and MAC Address. Once the node is found and selected, one can navigate to it in the hierarchical tree.
Figure 7 Node search
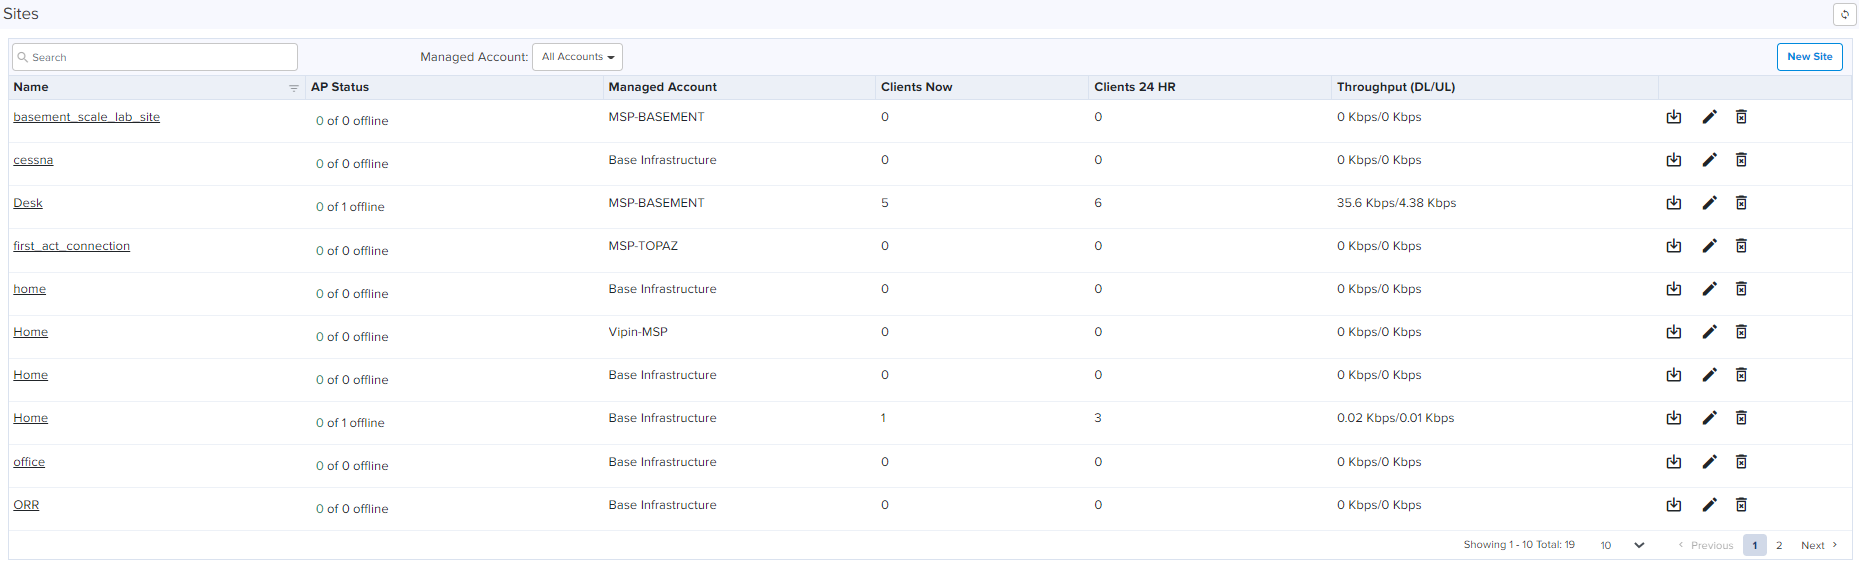
The Enterprise account differs from Access and Backhaul in that it is largely table-driven. It does not have the Quick Buttons or the Device Tree, instead, it has direct navigation for Devices, AP Groups, WLANs, Switch Groups, and Sites. Each of these is presented in tabular form.
Global functionality is presented in the System menu. It aggregates data across the entire installation.
The Devices section provides a searchable table listing all the devices in the system.

Selecting a device launches its management page.
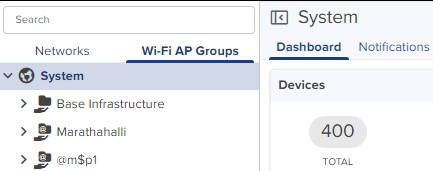
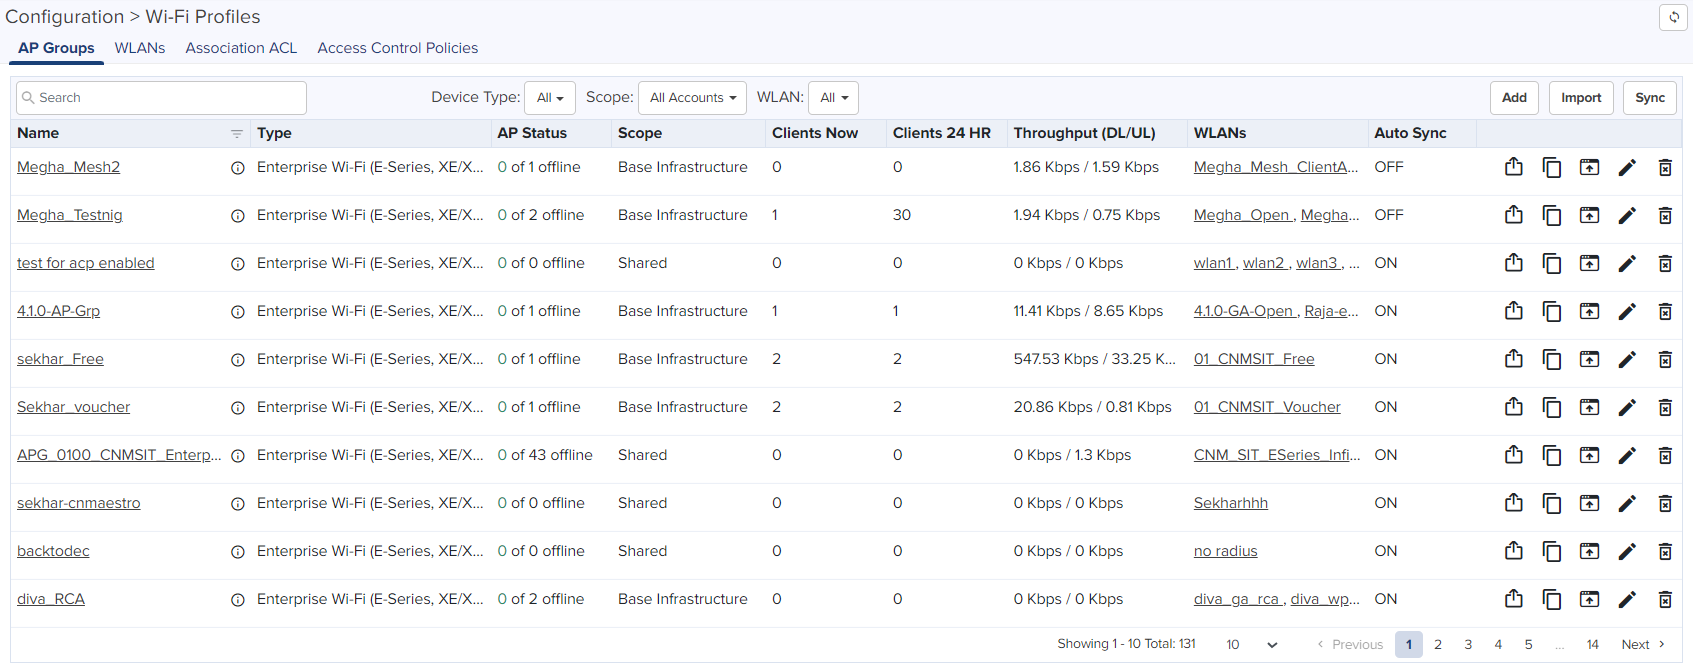
AP Groups manage shared configuration across APs. AP Groups also aggregate data for all the APs that map to them. This includes consolidating statistics and events/alarms and presenting AP Group centered pages for Dashboard, Notifications, Configuration, Statistics, Report, Software Update, Clients, and Mesh Peers.
Figure 8 AP Groups
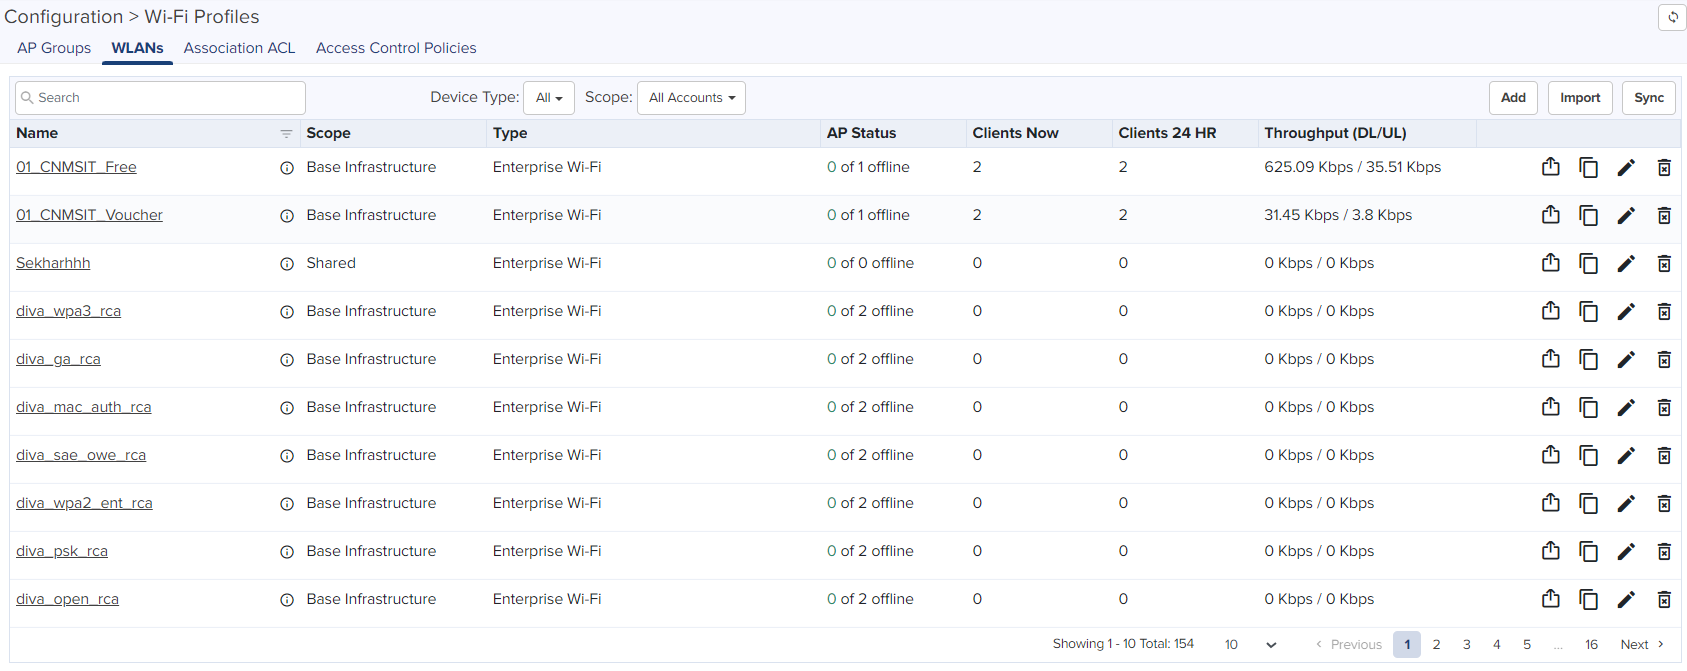
WLANs manage shared configuration across APs.
Figure 9 WLANs
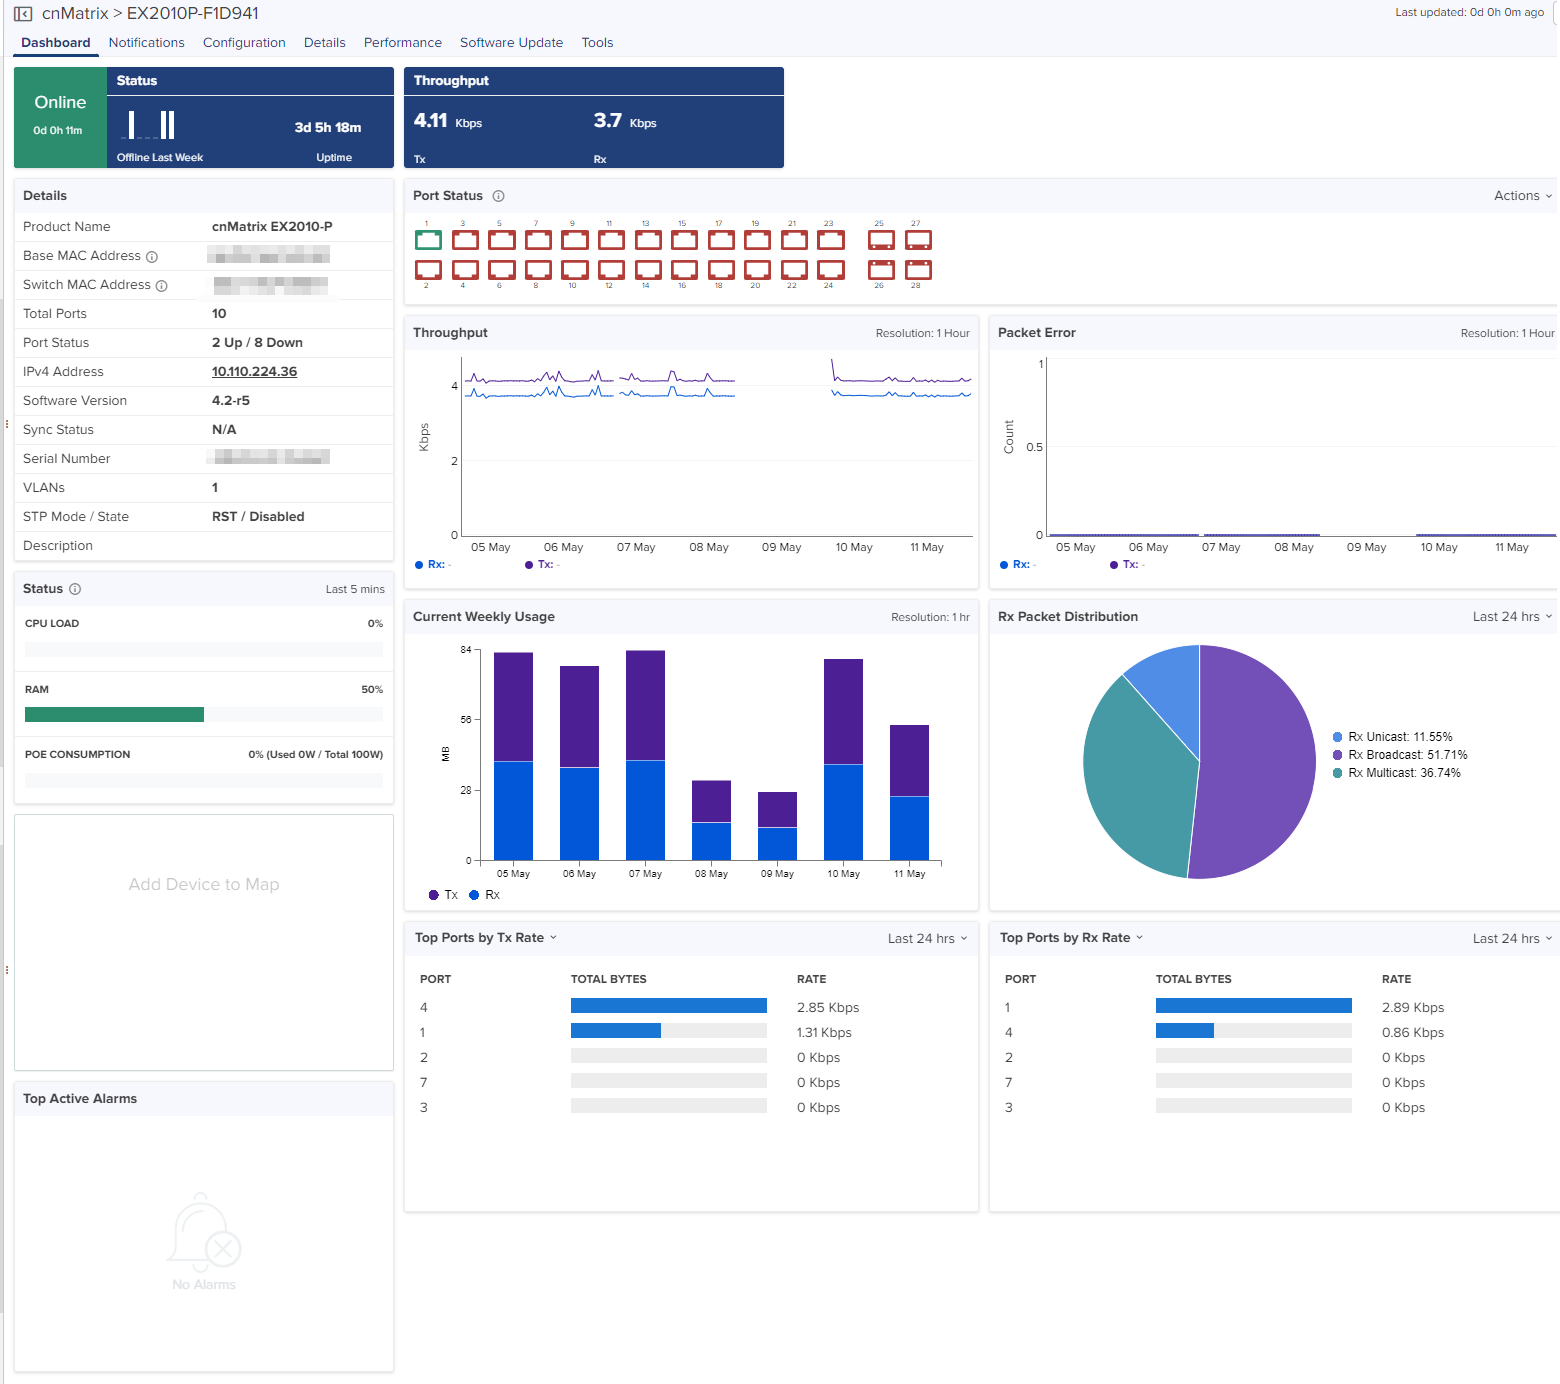
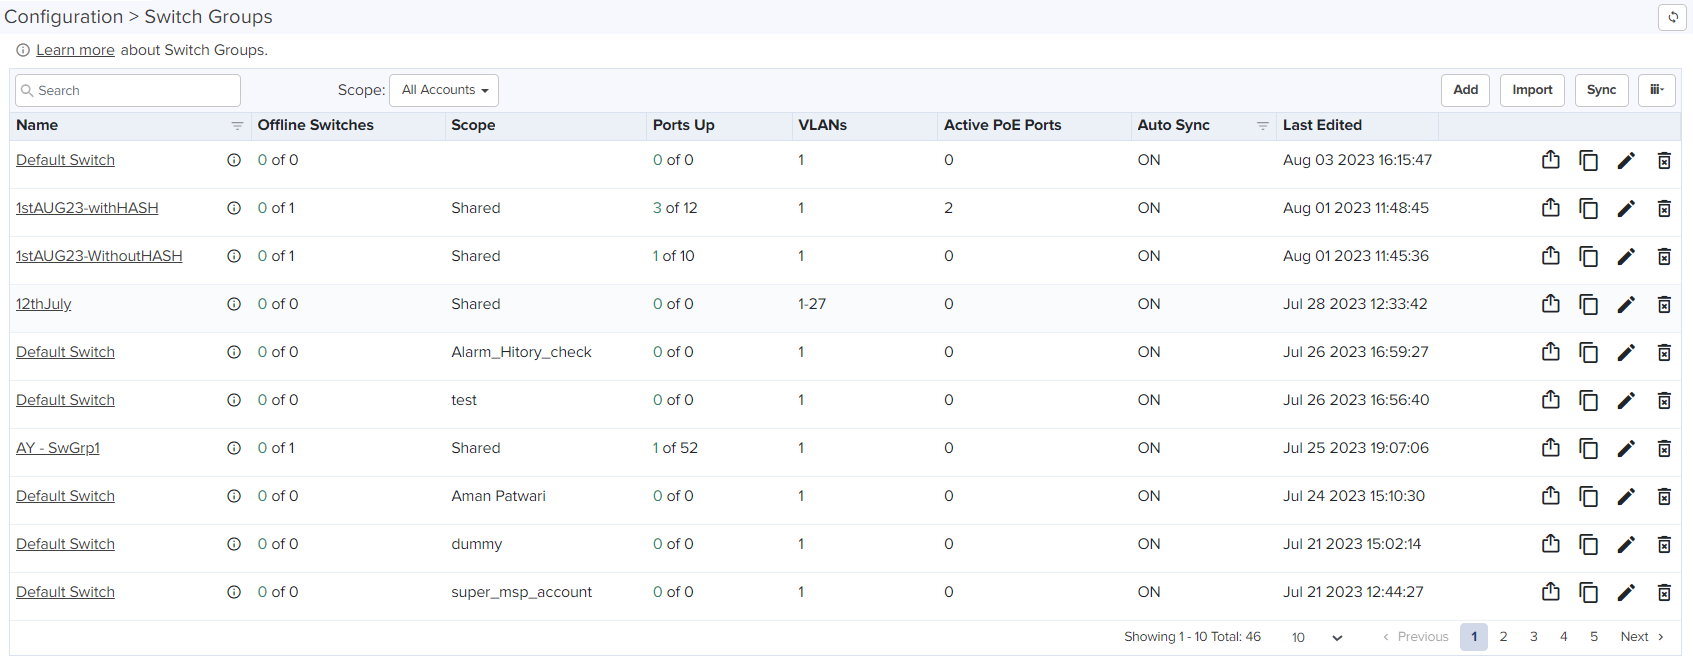
Switch Groups provide shared configuration for cnMatrix devices, and a subset of parameters can be overridden for each device. Administrators can simultaneously edit individual/bulk ports across all physical switches mapped to a Switch Group.
Figure 10 Switch Groups
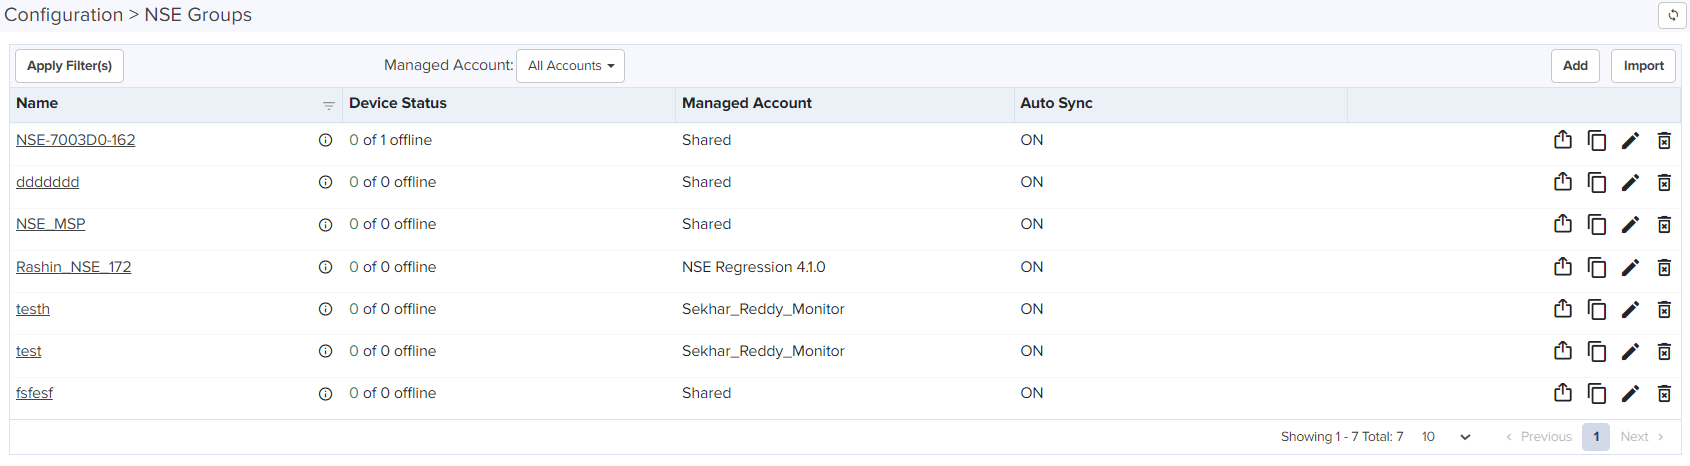
NSE 3000s are configured by creating common configuration profiles called NSE Groups. Configuration associated with an NSE group can be shared by multiple NSEs. Configuration specific to a particular NSE can be set via device overrides (Link to a section on Device Overrides).
Figure 11 NSE Groups
Sites are similar to AP Groups in that they aggregate statistics from many APs. The difference is a Site represents APs installed at a single physical location (and mapped to a Floor Plan). Sites also have their own Dashboard and aggregation pages.
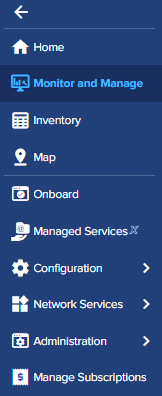
The side menu provides high-level navigation through the cnMaestro UI. In this menu click arrow in the left column to view side menu names in the page.
Figure 12 Side menu
All management sections are displayed in the context of the managed item, including System, AP, AP Group, Switch Groups, and Site. The options vary depending upon the menu selected. A breakdown is below:
|
Page |
Tabs |
|---|---|
| System |
Dashboard |Notifications | Configuration | Statistics | Report |Software Update | Application |Clients |Mesh Peers |Assists |
| Sites |
Dashboard | Notifications | Configuration | Statistics |Report| Floor Plan | Devices | Application | Clients |Mesh Peers|WIDS |
The UI header has the following System status icons.
|
Icon |
Name |
Description |
|---|---|---|
|
|
Software Update Jobs |
The number of devices in the Onboarding Queue which need to be manually accepted before completing their onboarding. |

|
Announcements | It notifies the latest firmware updates announcements. |
|
|
Devices Waiting for Approval |
The count of jobs in the queue. It includes both running and pending jobs. |

|
Major Alarms | The count of major alarms raised in the system. |
|
|
Out-of-Sync Devices |
The number of Wi-Fi devices with unsynchronized configuration (which can occur when automatic synchronization is disabled in the AP Group or the configuration is changed directly on the device). |
Clicking an icon navigates to the relevant management page.
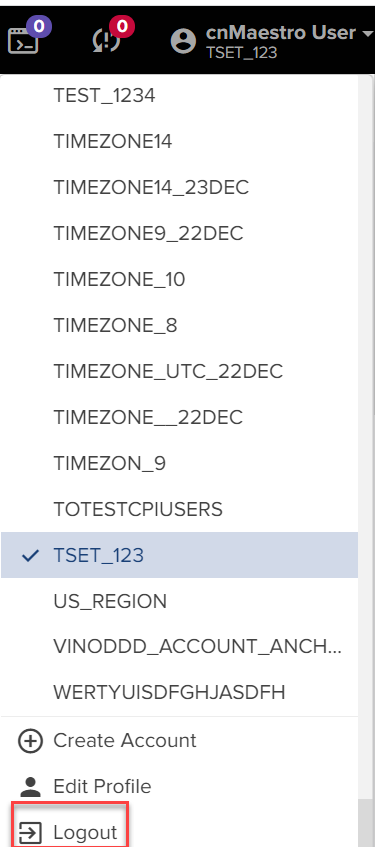
Log out of cnMaestro by clicking on the user icon in the upper-right corner and selecting Logout.
Figure 13 Logout


.png)


