This section guides users through the initial process of creating an account; logging into cnMaestro; and claiming and onboarding devices.
You must perform the following procedures to create an account and onboard devices.
| |
1. Create a Cambium Support Center login (if you do not have one already).
2. Create a cnMaestro account.
3. Login to cnMaestro.
| |
1. Claim devices using a Manufacturer Serial Number (MSN).
2. Claim devices using a Cambium ID.
To access cnMaestro, you must create a Cambium Support Center account, which sets your username and password.
cnMaestro uses an existing Cambium Support Center account. If you do not have an account, you must create one.
To create a Cambium Support Center account, perform the following steps:
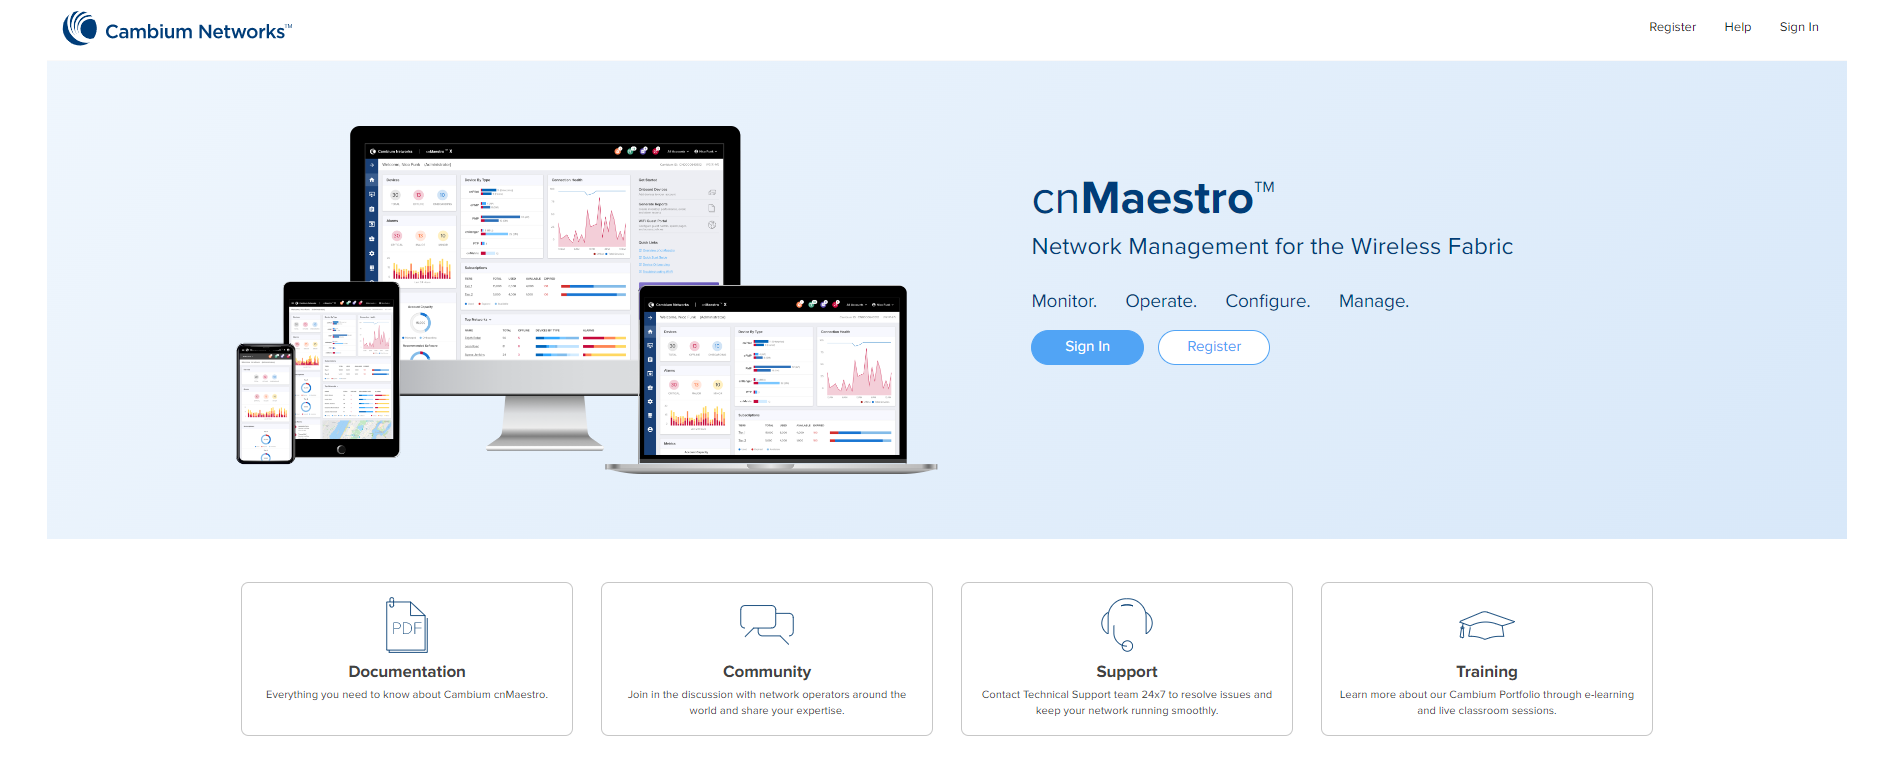
| 1. | Open a web browser and enter https://cloud.cambiumnetworks.com into the address bar. |
The cnMaestro Main login page appears, as shown in Figure 1.
| 2. | Click Register. |
A registration form appears, as shown in Figure 2.
Figure 2 Initial registration form
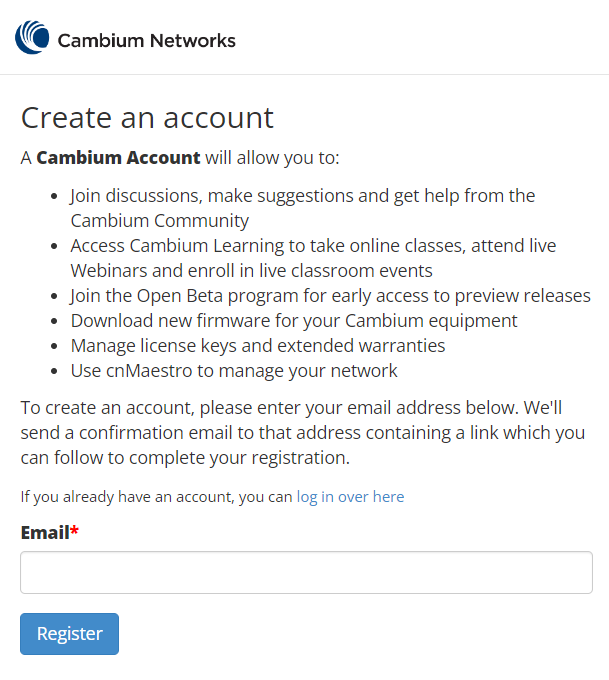
| 3. | Enter your email address and click the button. |
An email from Cambium Support Center is sent with a link for validation.
| 4. | Check email and click the validation link, as shown in Figure 3. |
Figure 3 Email from Cambium Support to validate account


|
If you do not receive the email, check your spam folder. |
The Finish registering form appears, as shown in Figure 4.
Figure 4 Finish registering form

| 5. | In the registration form, you must enter details such as your name, company name, country name, and password. |
| 6. | Click to complete the process. |
Use the Cambium Support Center account to log on to cnMaestro and create a cnMaestro account.
| 1. | Open a web browser and enter https://cloud.cambiumnetworks.com into the address bar. |
The Main login page appears.
| 2. | Log on to cnMaestro using your Cambium Support Center account. |
window appears.
| 3. | Click Add New Account. |
The Create a New Cloud Account page appears, as shown in Figure 5.
Figure 5 Create a Cloud Account form
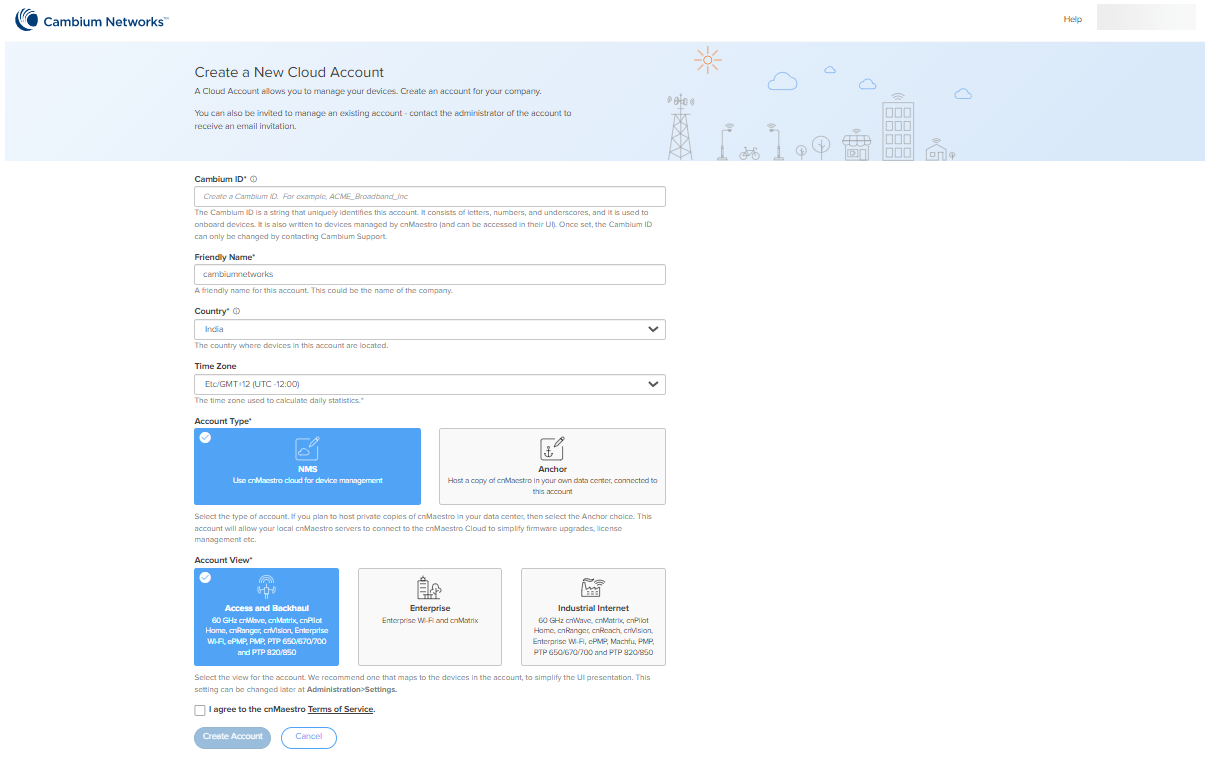
| 4. | Enter the required details and complete the form. |
|
|
Theis the primary identifier of the account. It may optionally be used to onboard devices. |
| 5. | Click to complete the process. |
To log on to the cnMaestro, perform the following steps:
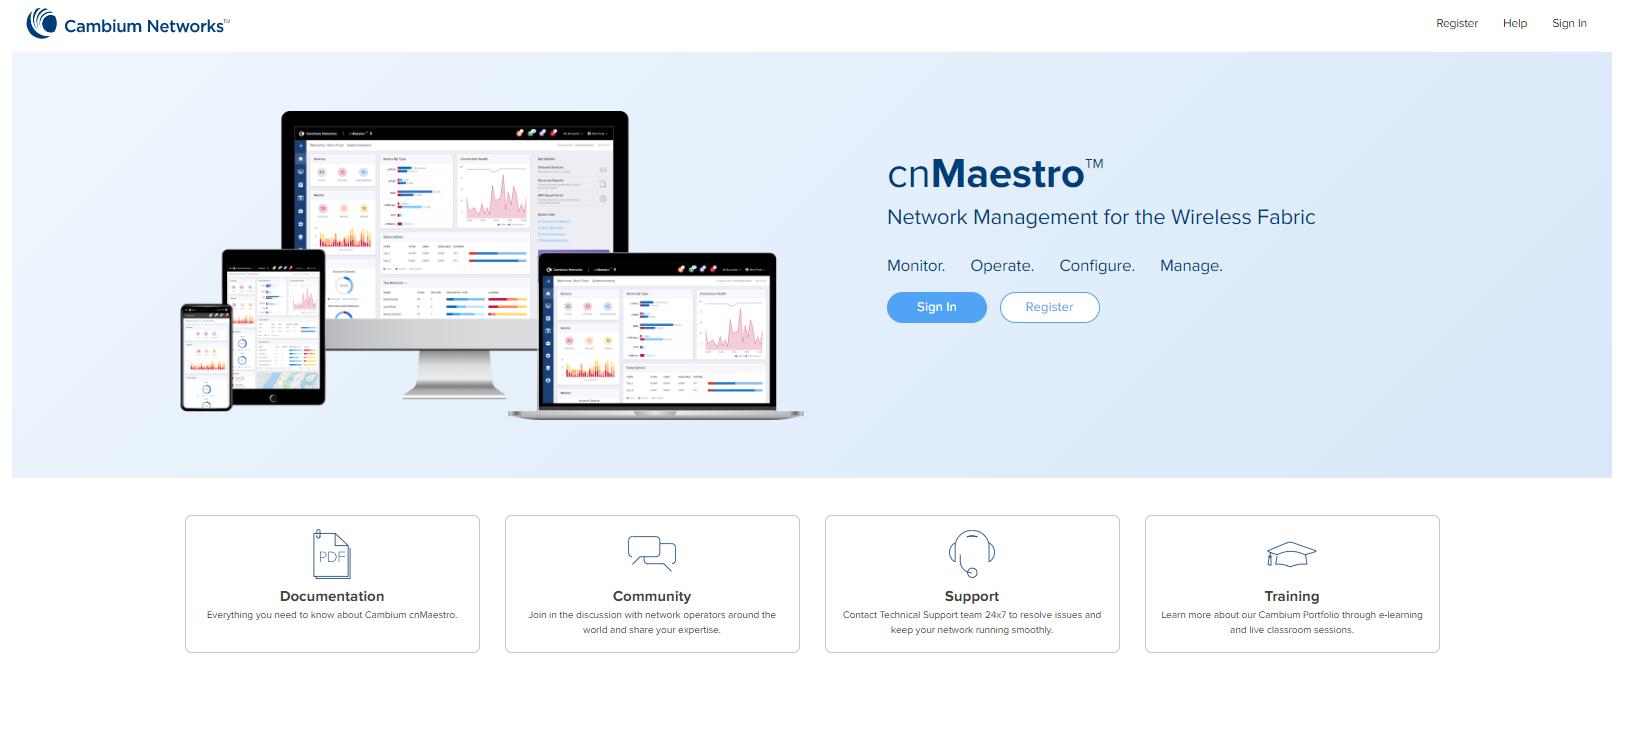
| 1. | Open a web browser and enter https://cloud.cambiumnetworks.com into the address bar. |
The cnMaestro Main login page appears, as shown in Figure 6.
| 2. | Click . |
Please enter your email address page appears as shown in Figure 7.
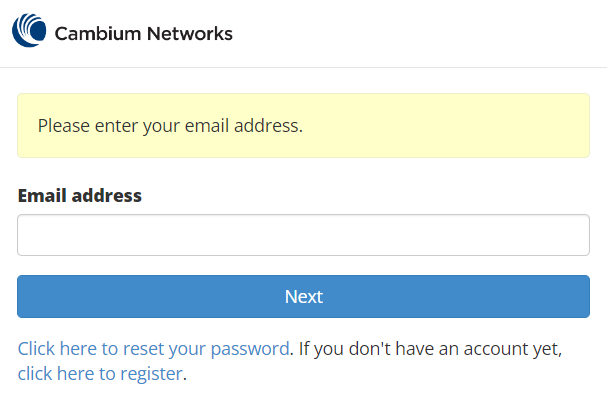
| 3. | Enter your Email address. |
| 4. | Click . |
Please enter your password page appears as shown in Figure 8.
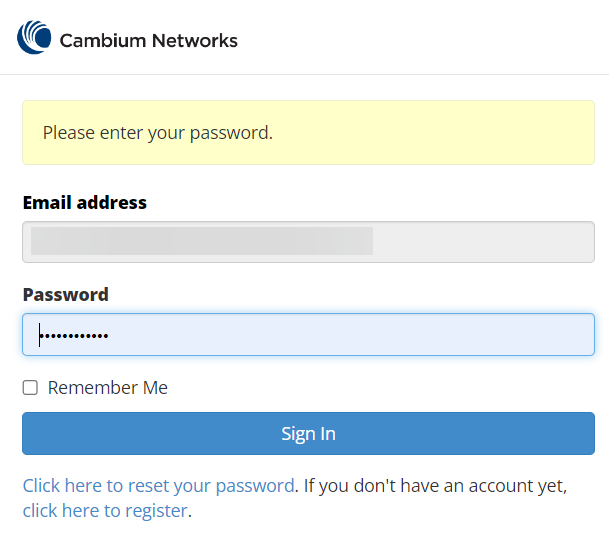
| 5. | Click Sign in. |
Select Account page appears as shown in Figure 9.

In Select Account page you can use search option to search the account.
| 6. | Click the selected account. |
The cnMaestro Home page appears, as shown in Figure 10.

To manage devices in cnMaestro, it is necessary to claim and onboard them.
Claiming specifies who owns a device. After a device is claimed, it is listed in the Onboarding Queue, where it can be pre-provisioned or approved. Once devices are approved, they are managed by cnMaestro.
You can claim a device by using the Manufacturer Serial Number (MSN). The system prompts the user to validate the devices before applying them. After being claimed, devices are placed into the Onboarding Queue, where they can be pre-provisioned to update software or configuration before onboarding.
To claim and onboard a device, perform the following steps:
| 1. | From the Home page of cnMaestro, navigate to tab. |
The Onboard page appears with details of the devices and their serial numbers, as shown in Figure 11.
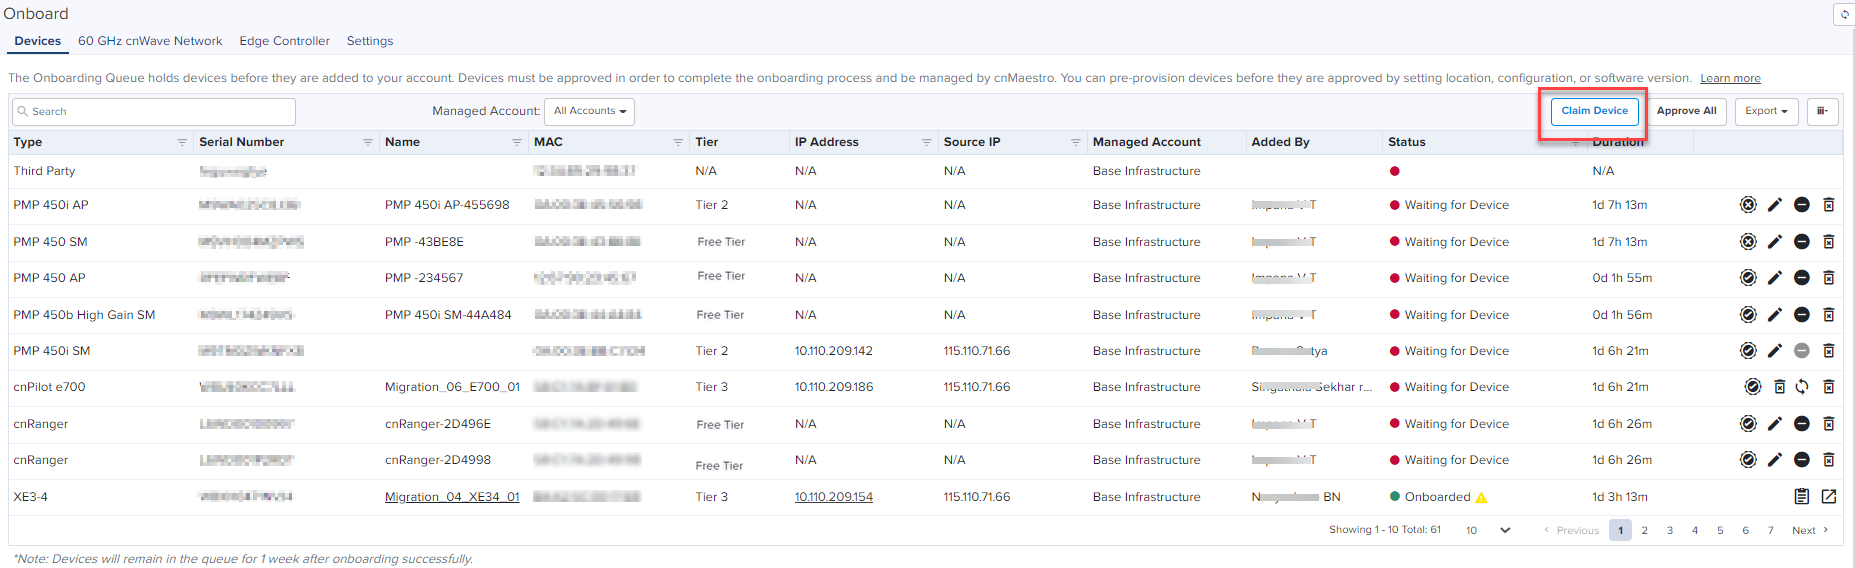
| 2. | Click Claim Devices located at the right side of the Onboard page (as shown in Figure 11). |
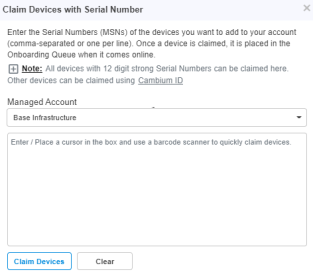
Thepage appears, as shown in Figure 12.
| 3. | Enter the Serial Number(s) of the device(s) in the text box, as shown in Figure 12. |
If MSP is enabled, select the Managed Account from the drop down and Enter the Serial Number(s) of the device(s) in the text box.

|
Note You can also place a cursor in the text box and use a barcode scanner to quickly claim the devices. |
Figure 12 Claim Devices with Serial Number page
| 4. | Click |
| 5. | To onboard the device when it contacts cnMaestro, click Approve Device or Approve All at the right side of the Onboard page, as shown in Figure 13. |
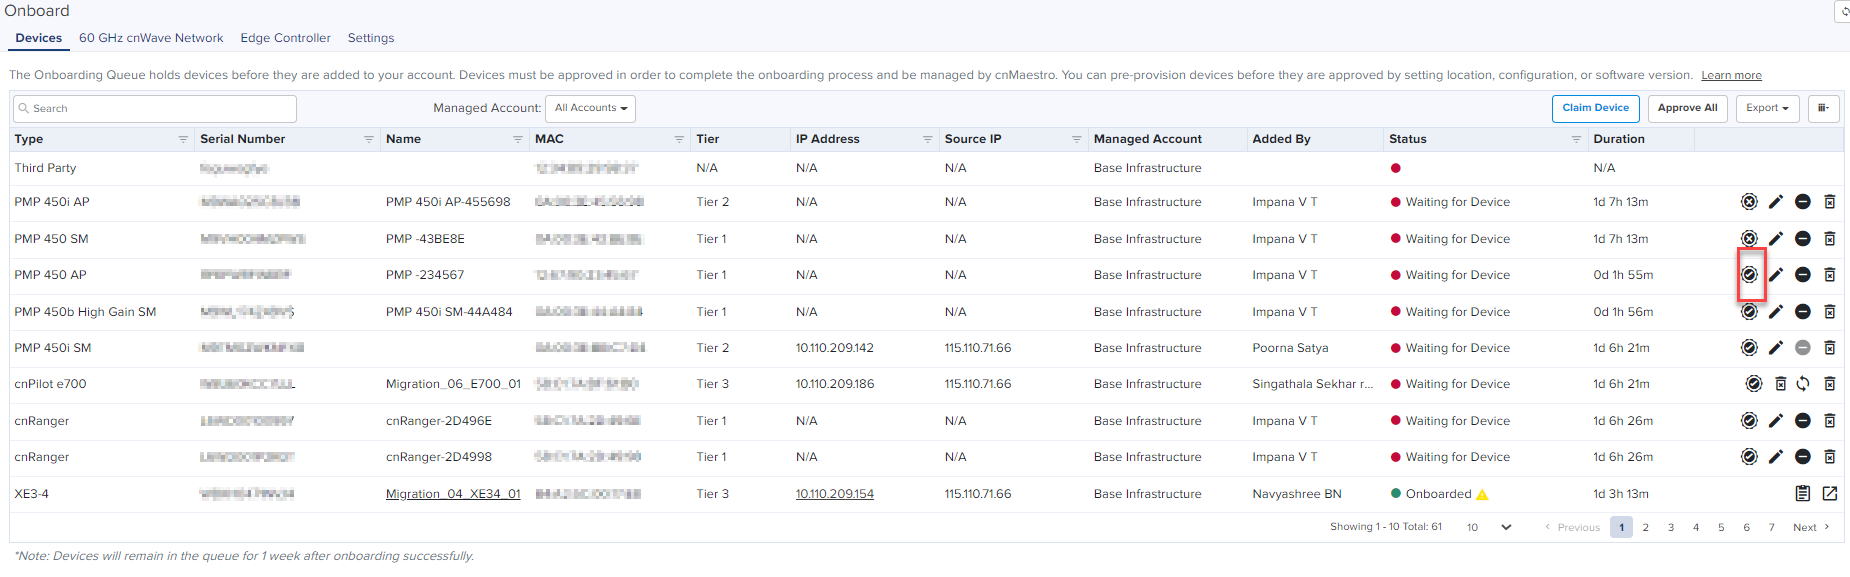
|
|
Note If you do not click the Device button, the device remains in the Onboarding Queue. |
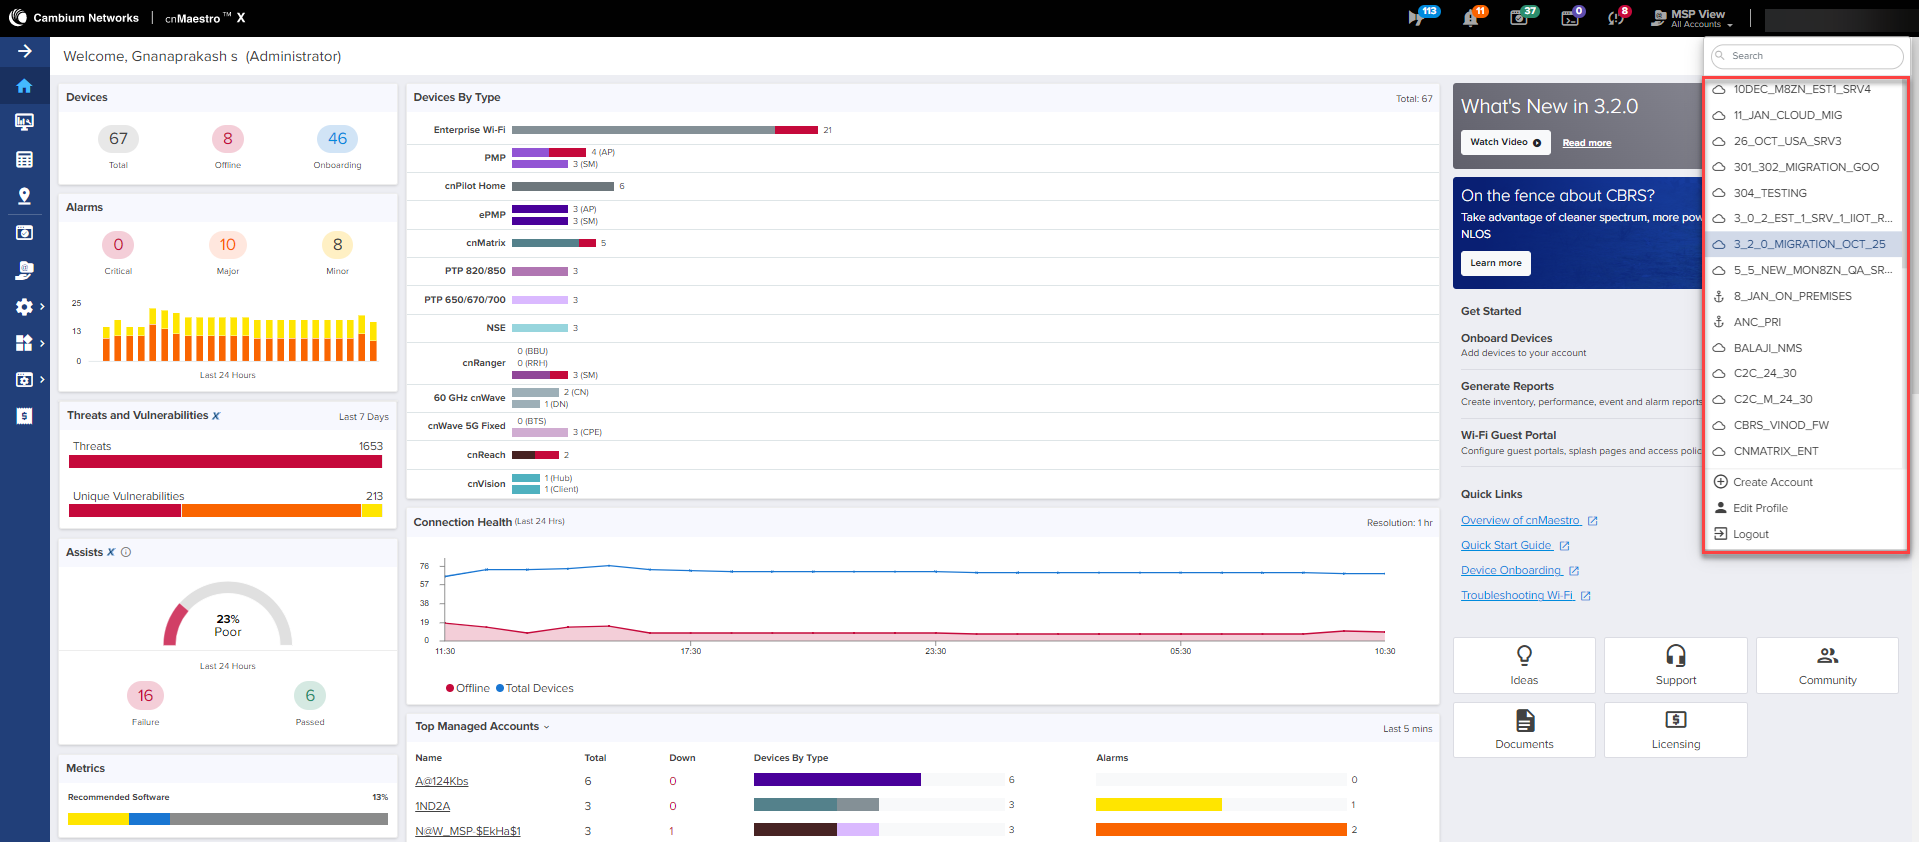
The Cambium ID, set during the Cloud account creation can also be used to claim devices. You can see the Cambium ID on the user drop-down, as shown in Figure 14.
A Cambium ID with an Onboarding Key is:
| | Required to claim legacy devices that do not have a 12-character serial number (these devices are usually 5+ years old). |
| | Optional for devices that have 12-character serial numbers (though generally not used). |
The administrator must approve all devices added to the Onboarding Queue using the Cambium ID.
You must configure the Onboarding Key in order to claim devices with Cambium ID, as shown in Figure 15.
Figure 15 Cambium ID configuration
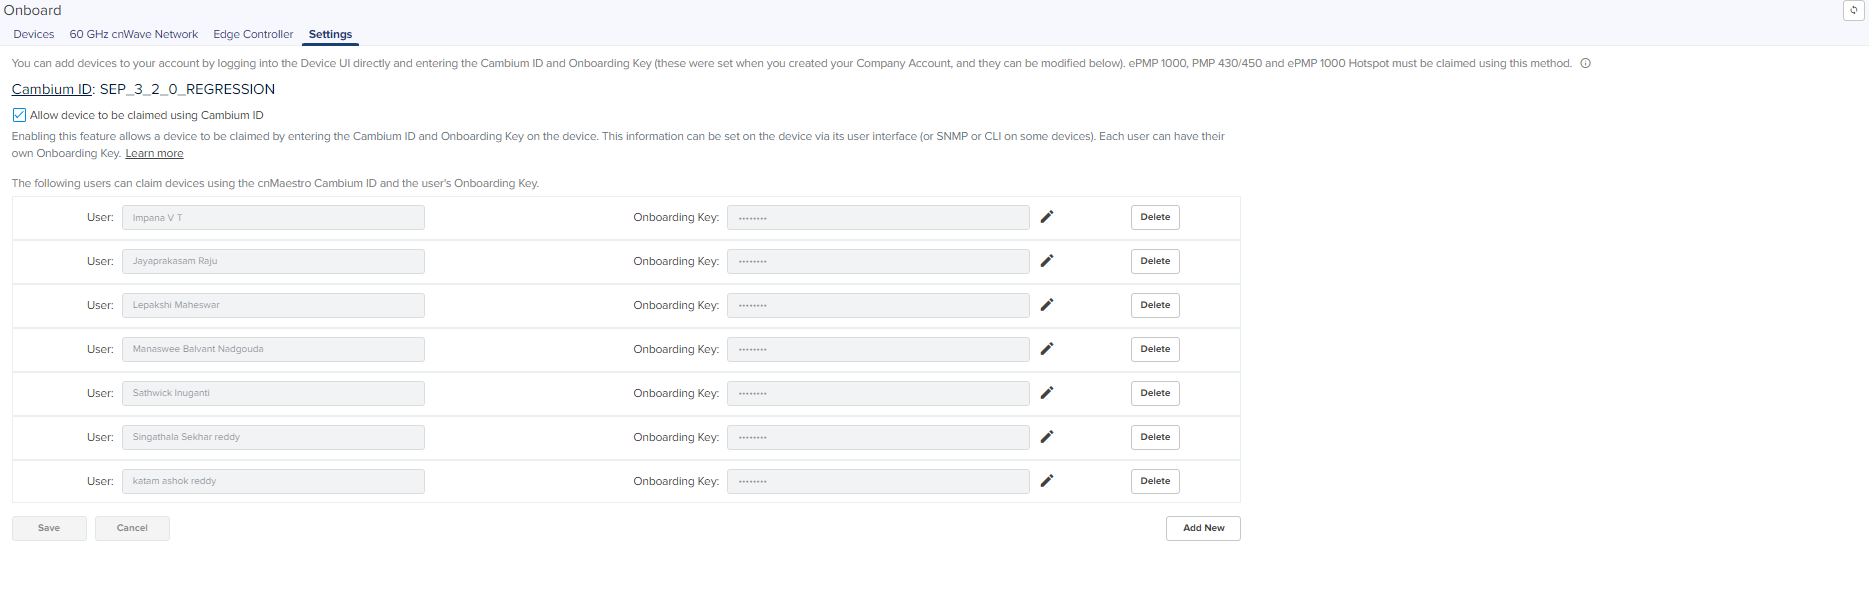
Each Onboarding Key is mapped to an individual User account. This mapping allows Cambium Cloud to know who is onboarding a device, and the key can be revoked if needed.
To configure the Onboarding Key, perform the following steps:
| 1. | Log on to your cnMaestro account. |
The Home page appears, as shown in Figure 16.
| 2. | From the Home page, navigate to the Onboard > Settings tab. |
Figure 17 Onboard settings page
| 3. | Select the checkbox |
Enabling this feature allows one to add Onboarding Keys mapped to individual Users.
| 4. | Click Add New to add a User and Onboarding Key. |
A new row appears as shown in Figure 18.

| 5. | Select the User from the drop-down. |
| 6. | Enter the Onboarding Key. |
| 7. | Click |
The Cambium ID and Onboarding Key are entered into the Device UI (see the User Guide for the individual devices to determine where; the section below demonstrates the process for cnPilot). Once entered, the Device sends these credentials to Cambium Cloud, where it is mapped to the Onboarding Queue of the Cambium ID account.
To configure the Onboarding Key using cnPilot Device UI, perform the following steps:
| 1. | Log on to the Device UI. |
The Sign In page appears, as shown in Figure 19.
.png)
| 2. | Enter your Username and Password. |
| 3. | Click Sign In. |
The device home page appears, as shown in Figure 20.
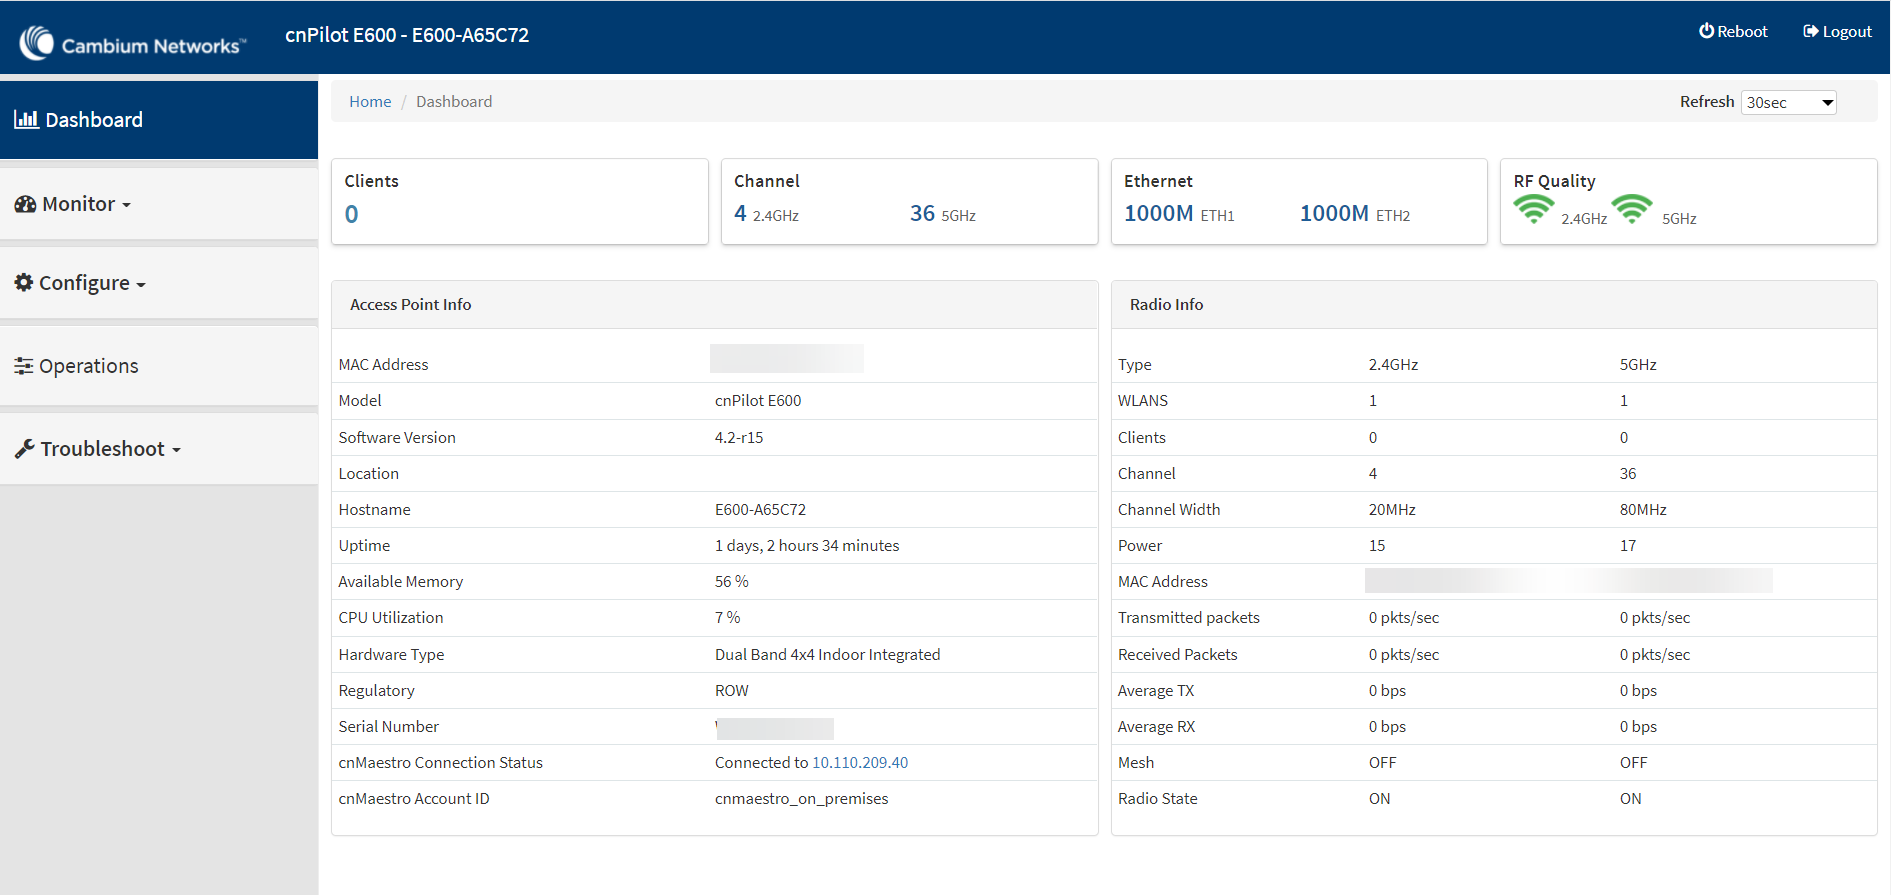
| 4. | From the Home page, navigate to Configure > System > Management. |
System configuration page appears, as shown in Figure 21.
Figure 21 cnMaestro configuration
1.png)
| 5. | Enter URL in cnMaestro URL to connect the server (by default it will be cloud.cambiumnetworks.com), as shown in Figure 21. |
| 6. | Enter the Cambium ID. |
| 7. | Enter the Onboarding Key. |
| 8. | Click Save. |
Once in the Onboarding Queue, the devices can be provisioned and managed by clicking the Device button, as shown in Figure 22.