Only cnMaestro X 3.1.1 users can migrate Xirrus devices from XMSE.
XMSE to cnMaestro X
This section describes the process of migration from XMSE to cnMaestro X.
Before you begin migration, upgrade the following to the latest version:
1. XMSE version 8.4.0
2. Xirrus APs version 8.7.0
|
|
Only cnMaestro X 3.1.1 users can migrate Xirrus devices from XMSE. |
Perform the following steps for migration:
| 1. | In XMSE do the following: |
| | Export Golden Configuration |
| | Migrate to cnMaestro X |
| 2. | In cnMaestro X do the following: |
| | Create Wi-Fi AP Group |
| | Approve APs into Wi-Fi AP Group |
| | Import and Apply AP configuration |
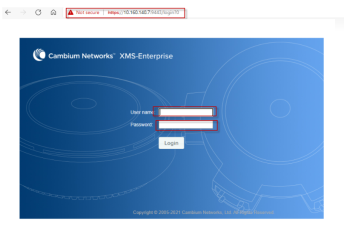
To login to XMSE, perform the following steps:
| 1. | Type the IP address in the URL. |
| 2. | Enter the username and password. |
| 3. | Click Login. |
In Export Golden Configuration save as zipped directory to the local system. Export Golden Configuration for one of the APs.
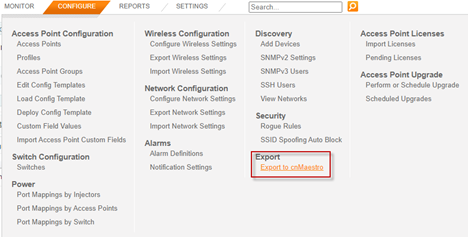
To start export golden configuration in XMSE, navigate to Configure tab > Export.
1. Select Export to cnMaestro.
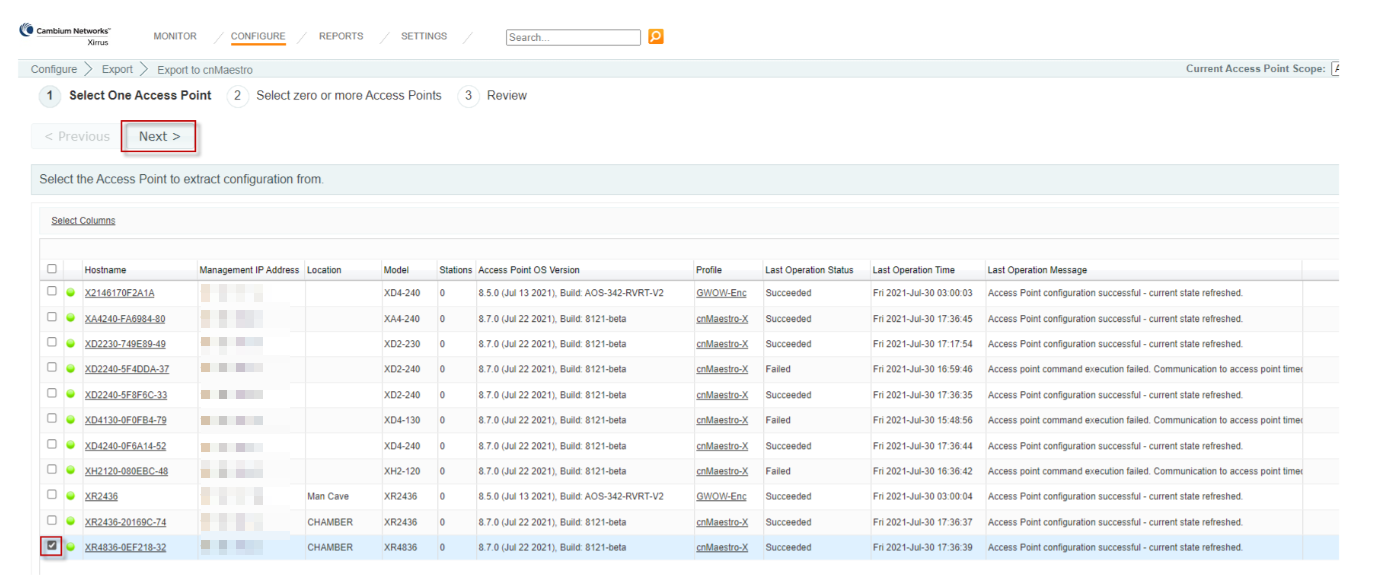
2. Select the AP to create the golden configuration for a group of APs and click Next.
|
|
|
| 4. | Select group of APs to be added to the spreadsheet and click Next. |
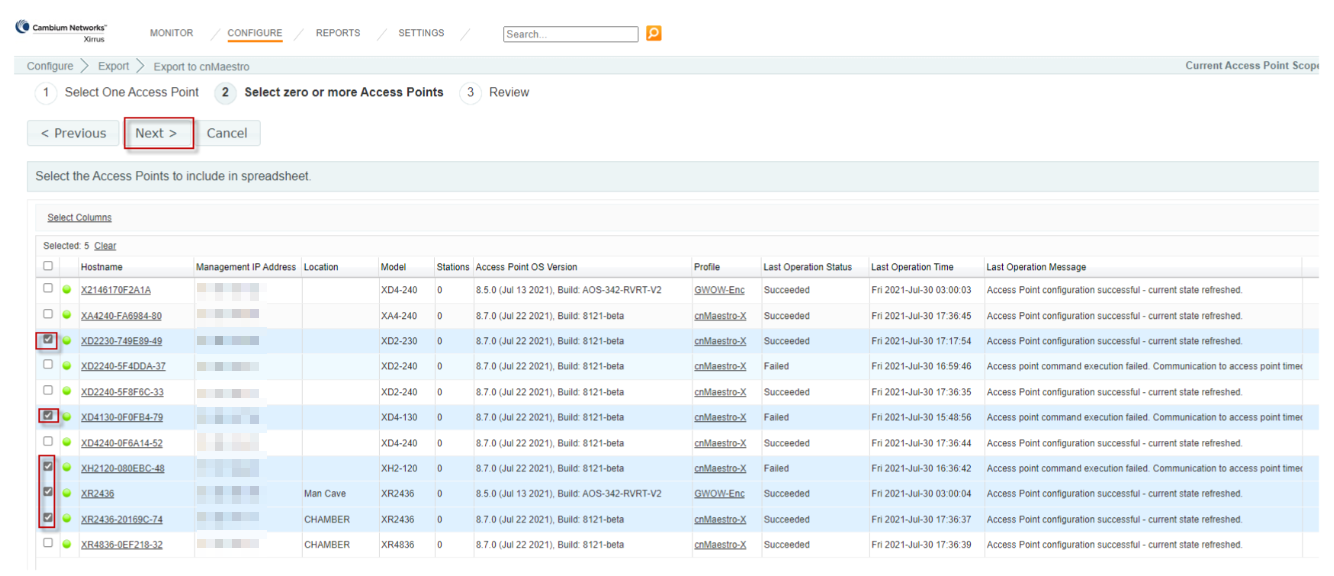
| 5. | Click Export. |
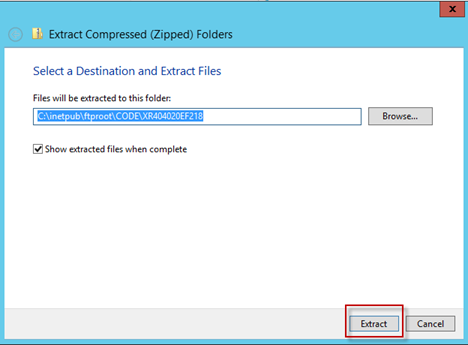
In Local System unzip the directory and files to local directory.
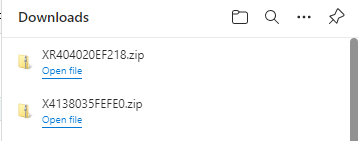
| 6. | Download the zip files from the browser window. |
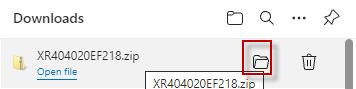
| 7. | Go to the folder where the zipped files are saved and extract the contents to a folder. |
| 8. | Open the directory path where the file has been stored and double-click on the zipped file. |
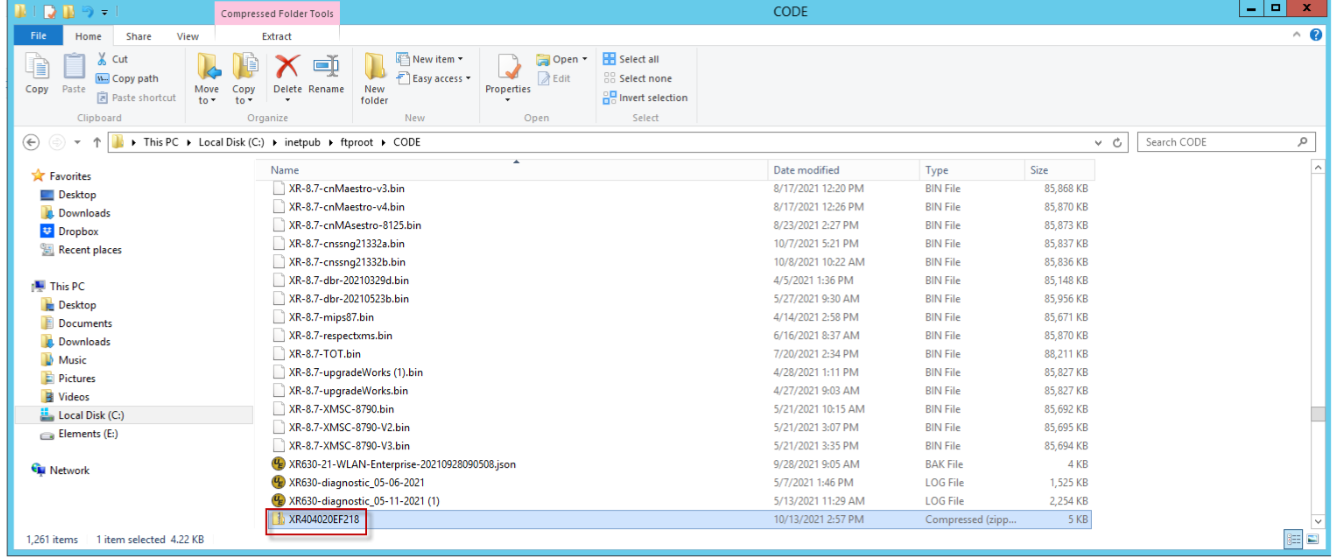
| 9. | Click Extract all. |
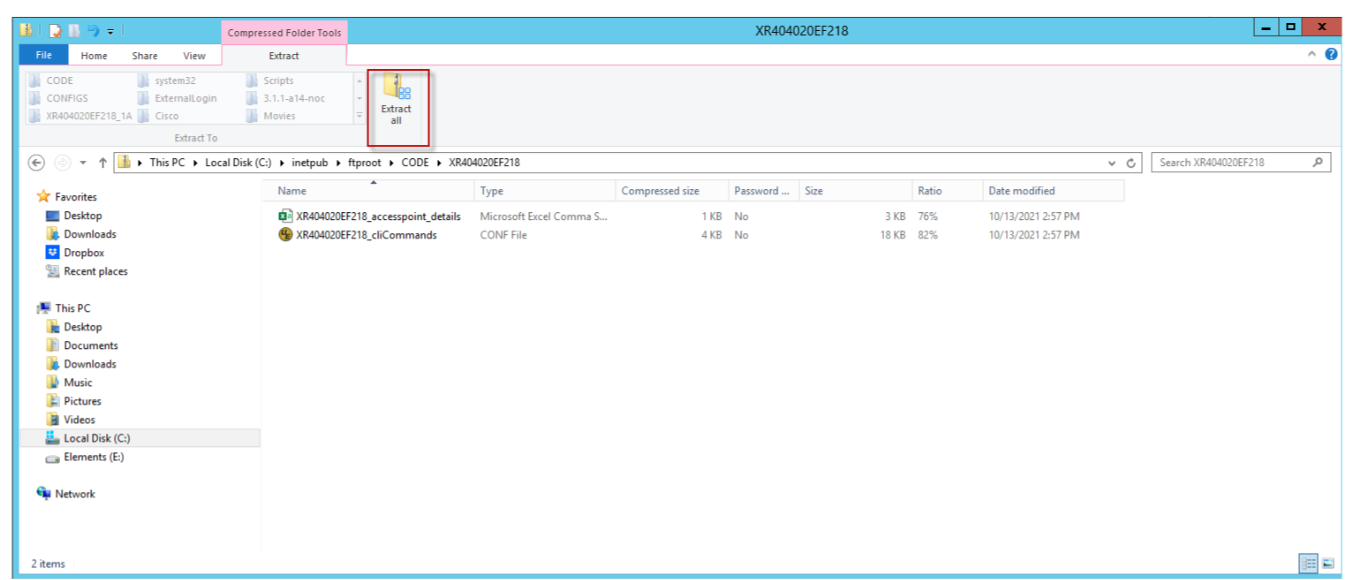
| 10. | Extract the folder to the path. |
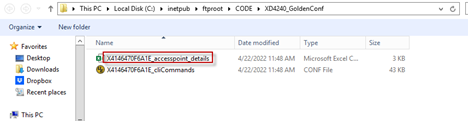
| 11. | Make a note of the folder or file location as you require this file later. |

Select APs to migrate to cnMaestro X. Perform the following steps:
| 1. | Navigate to the More menu > select Migrate APs to cnMaestro. |
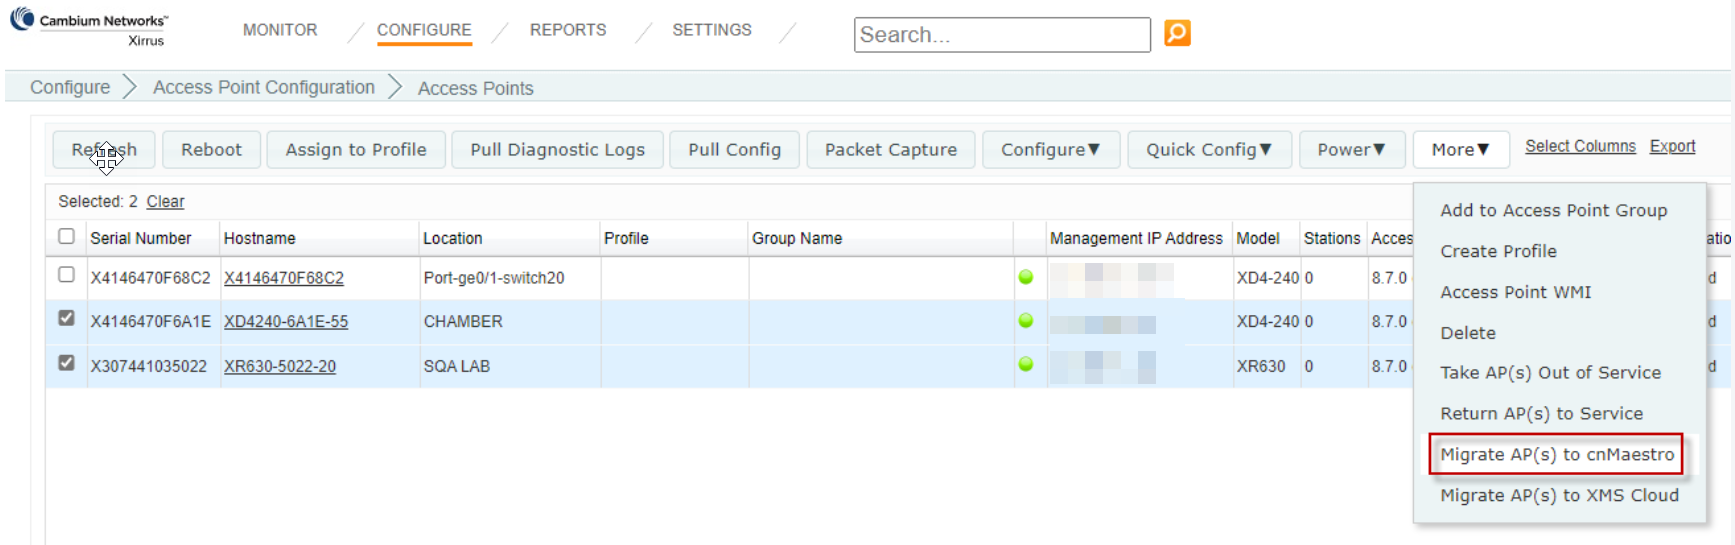
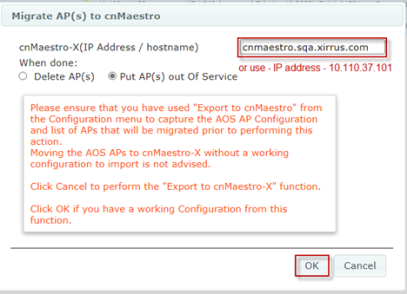
| 2. | Enter the IP address or Hostname mapped in DNS for cnMaestro X. |
| 3. | Select Delete AP or Put AP(s) out of Service and click OK. |
|
|
|
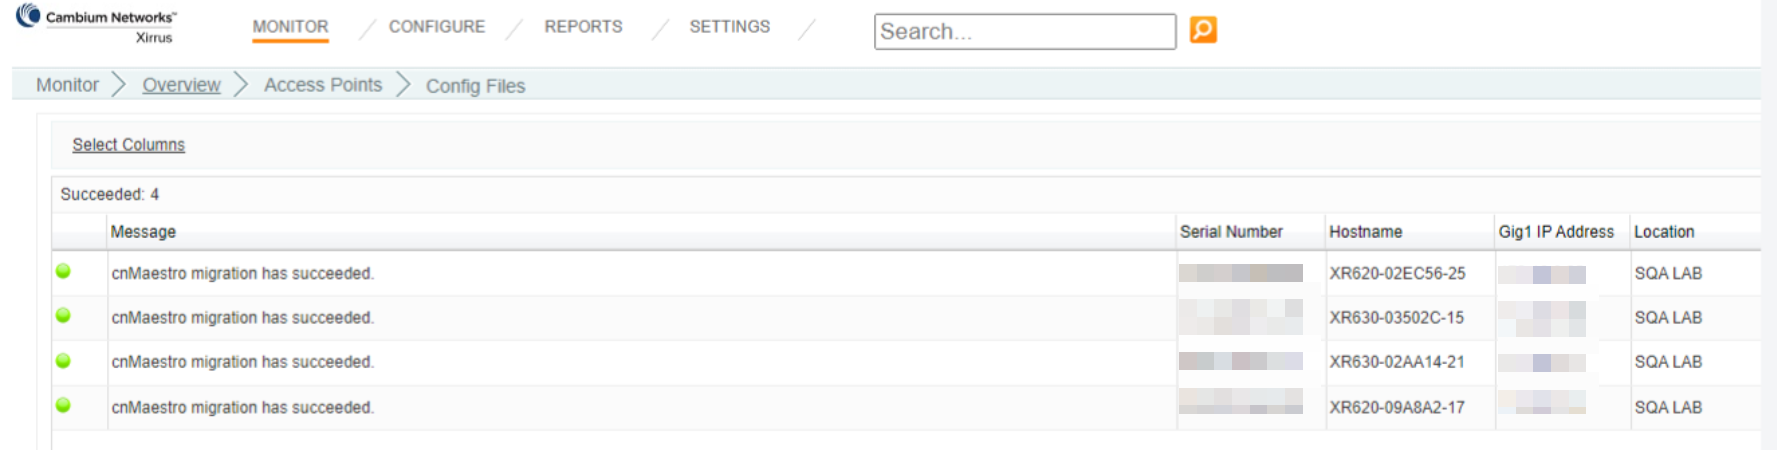
A success message from XMSE for each of the APs migrated to cnMaestro X is displayed.
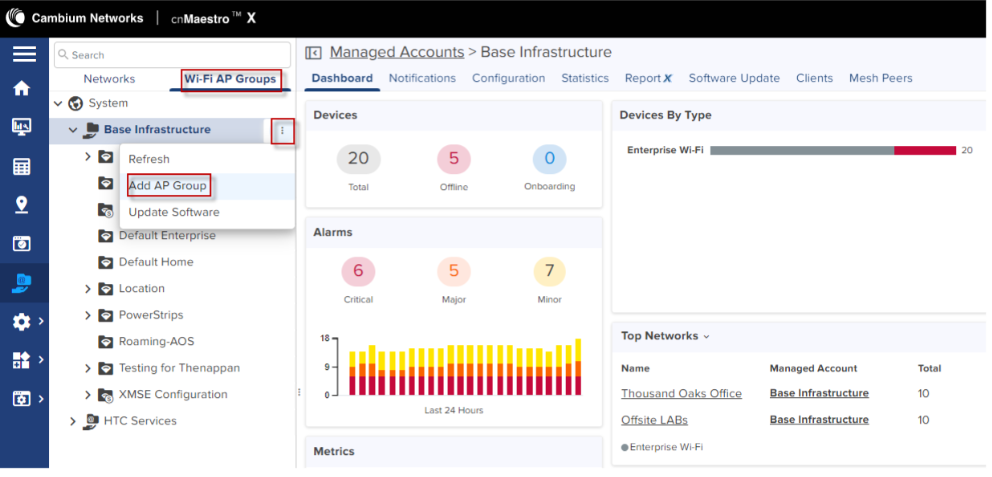
Create Wi-Fi AP Group and Import CLI command file from exported directory.
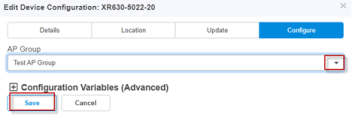
| 1. | Navigate to Wi-Fi AP Group > Base Infrastructure > click action ( ) icon to add Add AP Group. ) icon to add Add AP Group. |
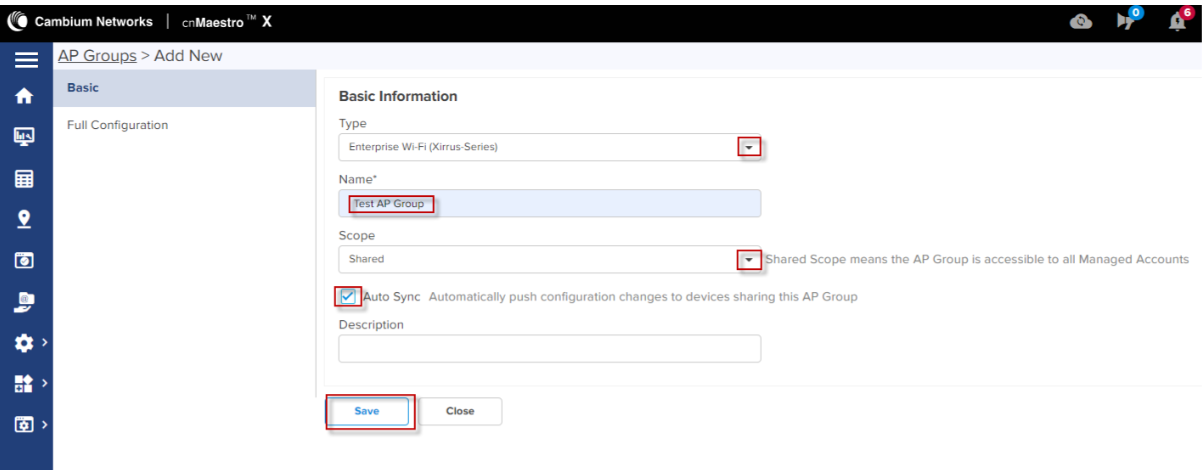
| 2. | In the Basic Information page, select Type as Enterprise Wi-Fi (Xirrus-Series) from the drop-down. |
| 3. | Select the Auto-Sync. |
| 4. | Click Save. |
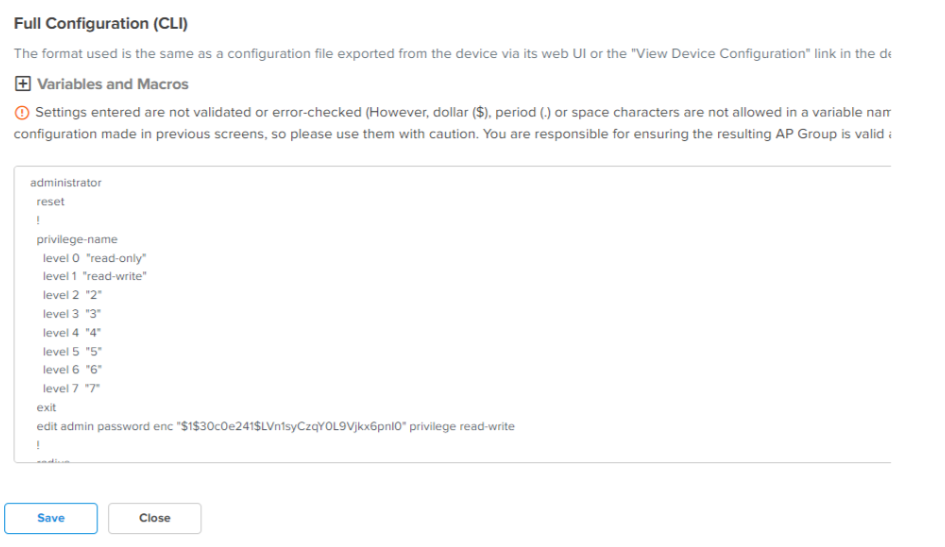
3. In the Full Configuration page, click the Import option.
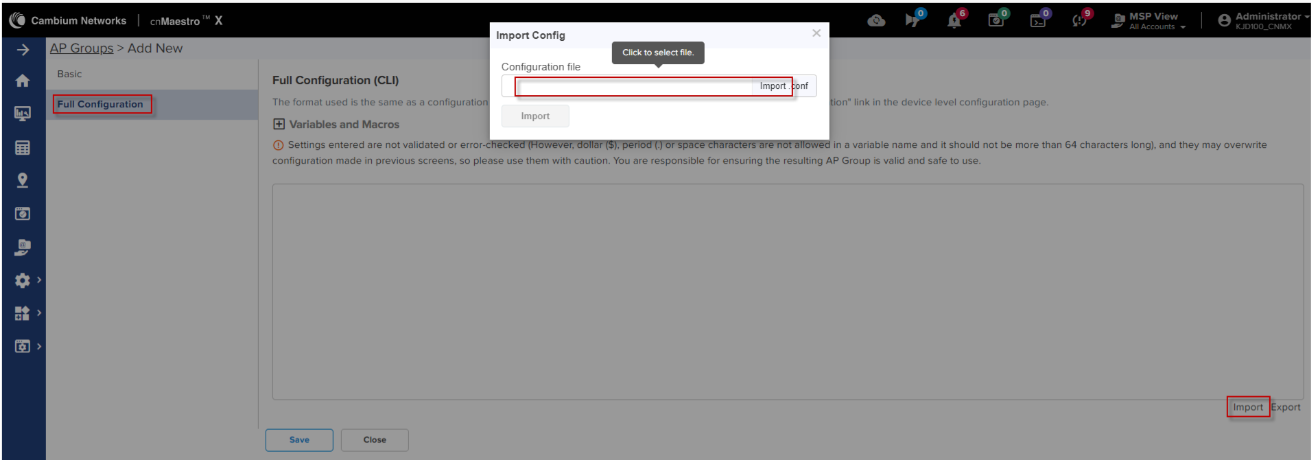
| 5. | Select the CLI command file from the unzipped directory. |

5. Click Import.
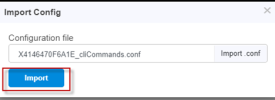
The configuration file is displayed.
| 6. | Click Save. |
APs pending for approval in cnMaestro X based on the Migrate APs to cnMaestro X steps as described above.
You can claim APs to Approve from Onboarding page.
Perform the following steps to approve APs from OnBoarding page.
1. Navigate to the Onboarding page > Devices > click Approve All or Approve.
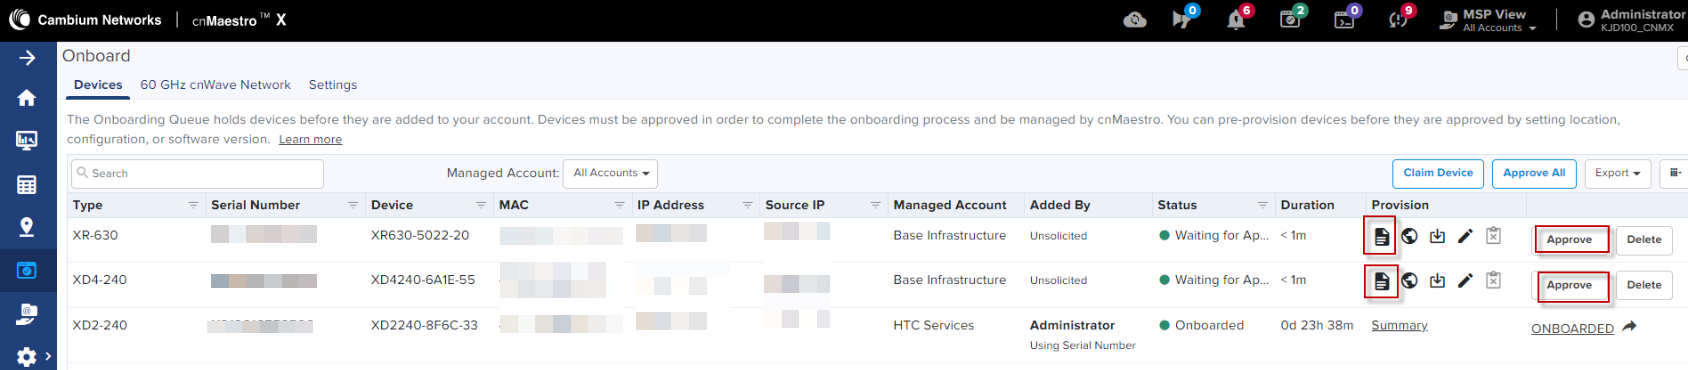
2. Enter the required details, provision the device for location, and assign to an AP Group.
| 7. | Click Save. |
| 8. | In the Onboarding page select Approval All or you can select the Approve to approve individual AP. |
APs imported are ready for basic configuration. Import AP configuration using .csv file from exported directory.
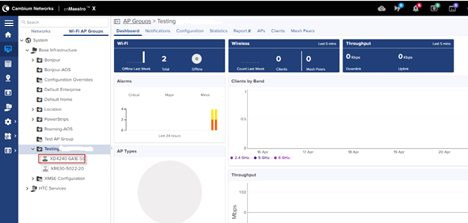
| 1. | Navigate to Wi-Fi AP Group > select AP Group > AP Configuration. |
| 2. | Select all APs to configure, click Configure. |
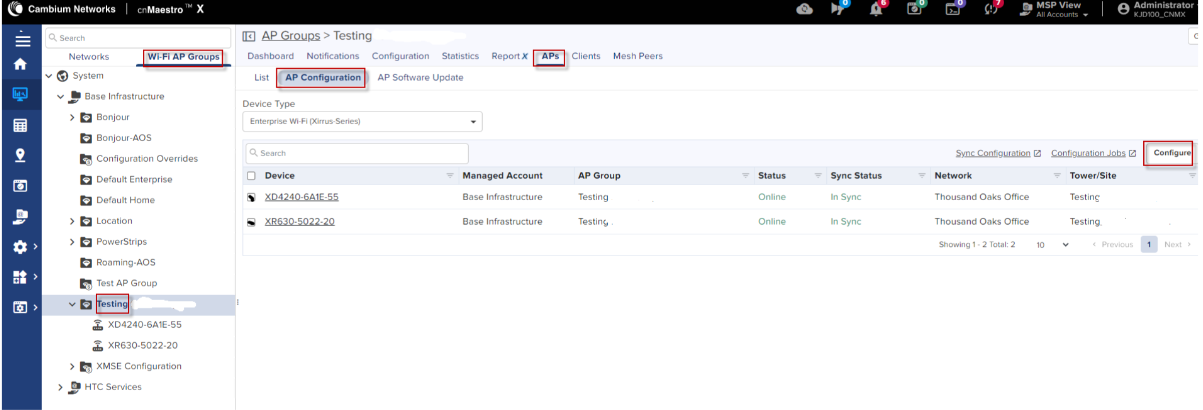
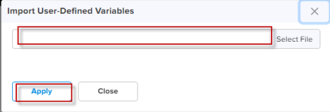
| 3. | In Device Override table, verify AP details and click Import. |
|
|
Email and Phone fields are auto populated from the .csv file. |
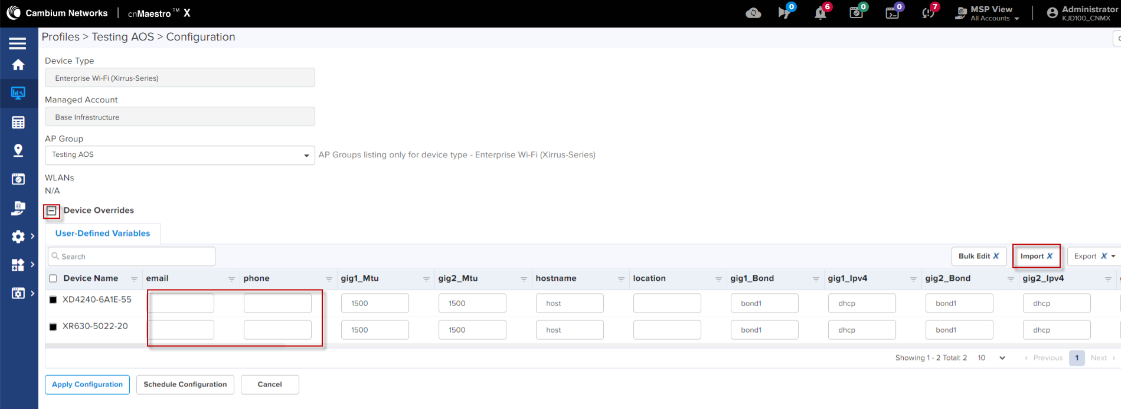
| 4. | Select the .csv import file from the unzipped directory folder and click Apply. |
All the configuration values from the .csv file is populated for each AP. The data is auto populated to the User Defined Variables tab. The APs receive complete configurations including all their IAP settings.
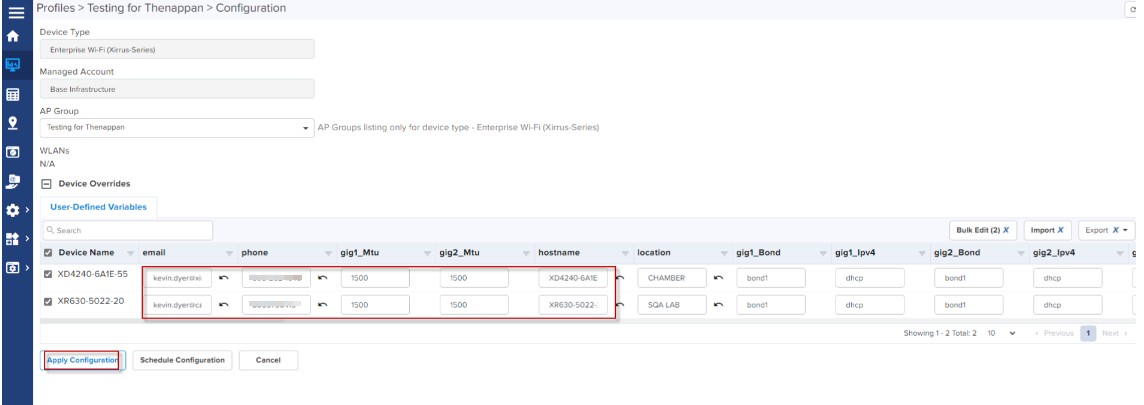
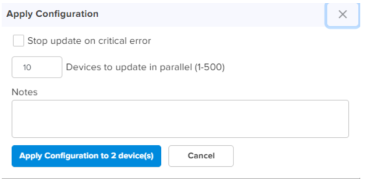
| 5. | Click Apply Configuration. |
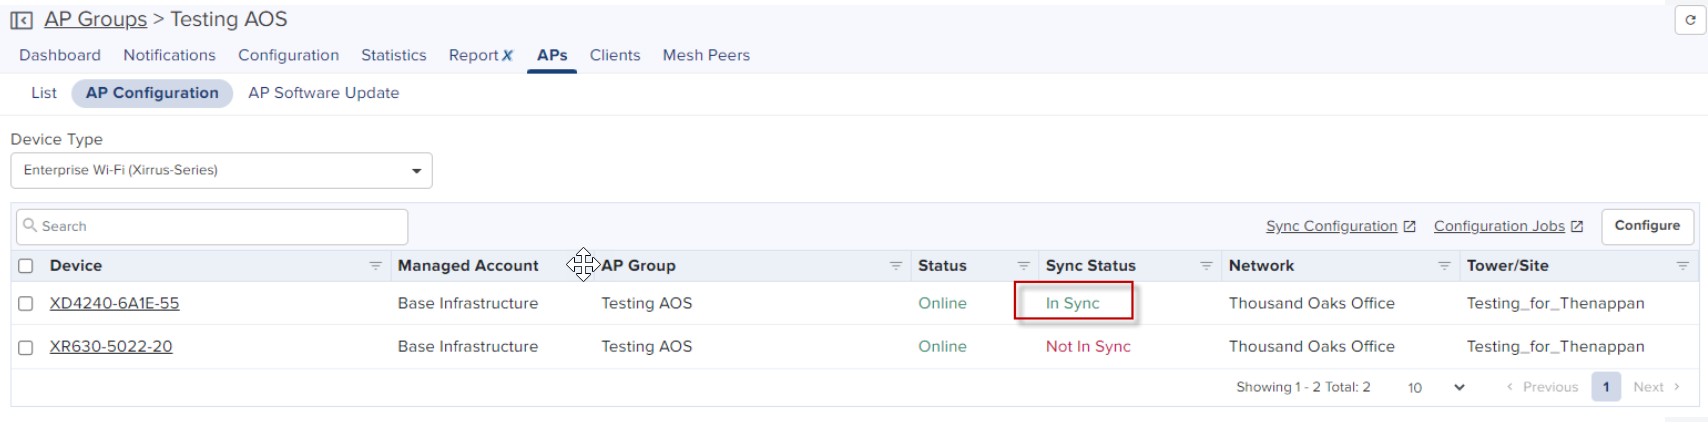
When the APs are completely configured Sync Status is displayed as In Sync.
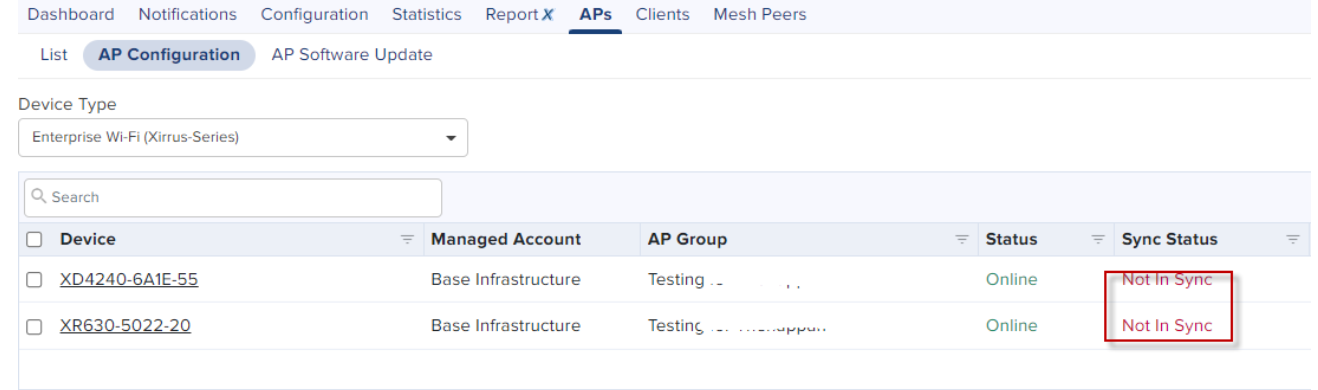
You have to refresh the page to view the updated Sync Status.