Users
This chapter provides the following details:
Managing Users
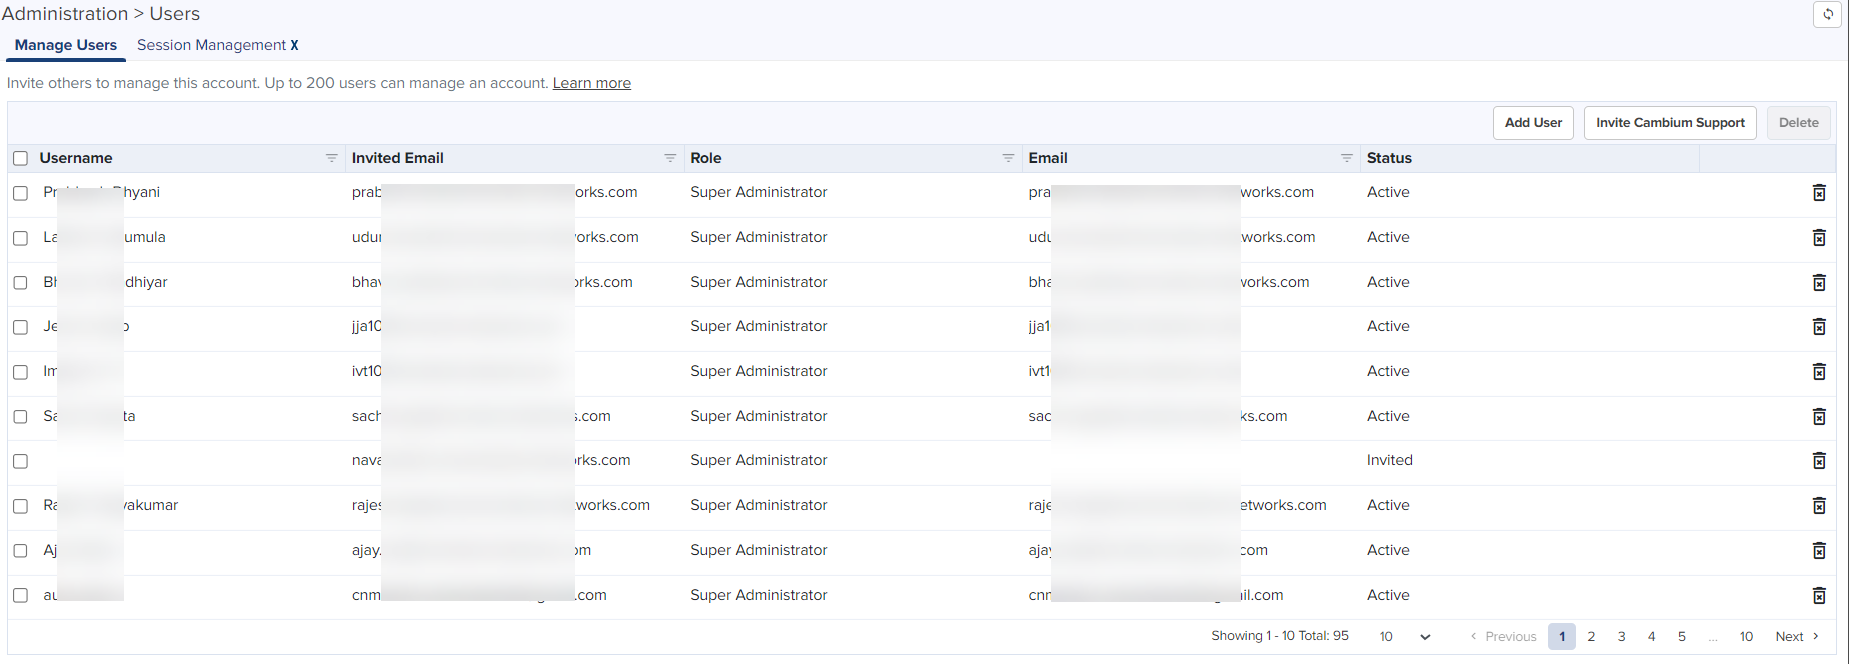
cnMaestro allows you to add Users using the Administration > Users page.
|

|
NOTE:
|
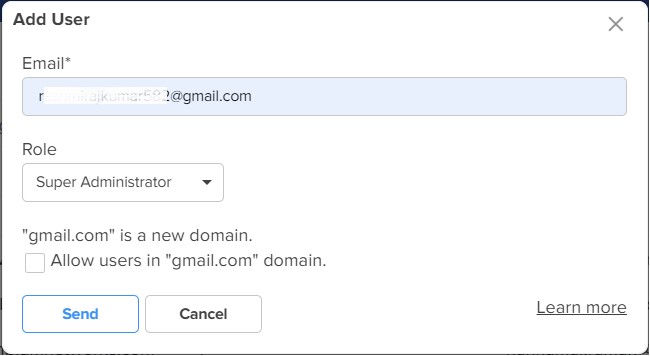
Figure 1 Adding Users
Role-Based Access
cnMaestro supports the following user Roles:
|
|
Super Administrator – Super Administrators can perform all operations. |
|
|
Administrator – Administrators can modify cnMaestro application functionality, but they are not able to edit User, API, or Server configuration. |
|
|
Operator – Operators are able to configure device-specific parameters and view all configuration. |
|
|
Monitor - Monitors have only the view access. |
|
|
CPI - CPI can perform on-boarding the devices using the CBRS tool and has the view access only. |
|
|
NOTE:
|
|
cnMaestro allows one to limit the number of concurrent sessions for each Role and display current active user sessions. |
|
|
CPI role is authorized only when the CBRS is Enabled. |
|
Role-Mappings
The table below defines how Roles are authorized to access specific features.
Table 1: Role-Mappings
|
Feature
|
Description
|
| Application Operations
|
Application level operations such as to create, update and delete operations for Networks, Towers/Sites. Bulk device configuration.
|
|
Super Administrator - All |
|
| Application Settings |
Change global application configuration and onboarding key.
|
|
Super Administrator - All |
|
| Configuration/Software Update |
Manage configuration/software update jobs.
|
|
Super Administrator - All |
|
| Device Operations |
Device operations such as reboot device, link test, connectivity test, tech support file download, and Wi-Fi performance test.
|
|
Super Administrator - All |
|
| Device Overrides
|
Per-device configuration, including updating AP Group and applying configuration.
|
|
Super Administrator - All |
|
| Floor Plan |
Floor Plan configuration
|
|
Super Administrator - All |
|
| Global Configuration |
The ability to create and apply configuration for global features such as Templates, WLANs, AP Groups, and bulk sync configuration.
|
|
Super Administrator - All |
|
| Guest Portal
|
Guest Portal configuration.
|
|
Super Administrator - All |
|
|
Monitor - View (Sessions Only) |
|
| Monitoring |
Display of monitoring data at all levels.
|
|
Super Administrator - All |
|
| Notifications |
Alarms and Events management.
|
|
Super Administrator - All |
|
| Onboarding
|
Device approval, modifying individual device configuration, and performing software update.
|
|
Super Administrator - All |
|
| Reporting
|
Report generation.
|
|
Super Administrator - All |
|
| Session Management
|
Capability to view and logout other users sessions.
|
|
Super Administrator - All |
|
| Software Upgrade |
Upgrade the device with the latest software.
|
|
Super Administrator - All |
|
| User Management
|
User management operations such as manage users and roles.
|
|
Super Administrator - All |
|
Creating Users and Configuring User Roles
To add an administrator:
|
1.
|
Navigate to Administration > Users page. |
|
2.
|
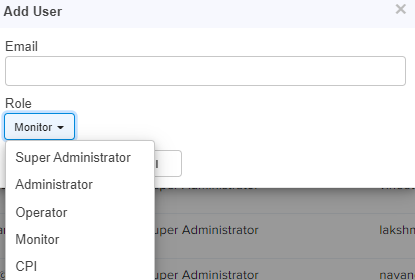
Click Add User button. The following window is displayed: |
|
3.
|
Enter the ID in the Email textbox. |
|
4.
|
To configure the User Role, select any one of the role for the user from the Role drop-down list: |
|
5.
|
Click Send button to add this user. |
To edit or delete a user, click the Edit icon or the Delete icon against the user in the Administration > Users page.
Whitelisting specific domains
Using the Administration > Users page, you can allow (or whitelist) a specific domain (for example, gmail.com). When users from the whitelisted (or allowed) domain are added, an invite email is sent directly to them. When the users accept the invite, they are allowed to access a particular cnMaestro UI account.
You can also blacklist or disallow a specific domain to prohibit all users of that domain from accessing the UI account.
|
|
NOTE:
|
|
Domain whitelisting is not applicable to NFR User accounts. |
|
|
For users from the whitelisted domains, you can create the MSP user account. |
|
To whitelist or blacklist a specific domain, perform the following steps:
|
1.
|
Navigate to Administration > Users page. |
The Manage Users page appears.
|
2.
|
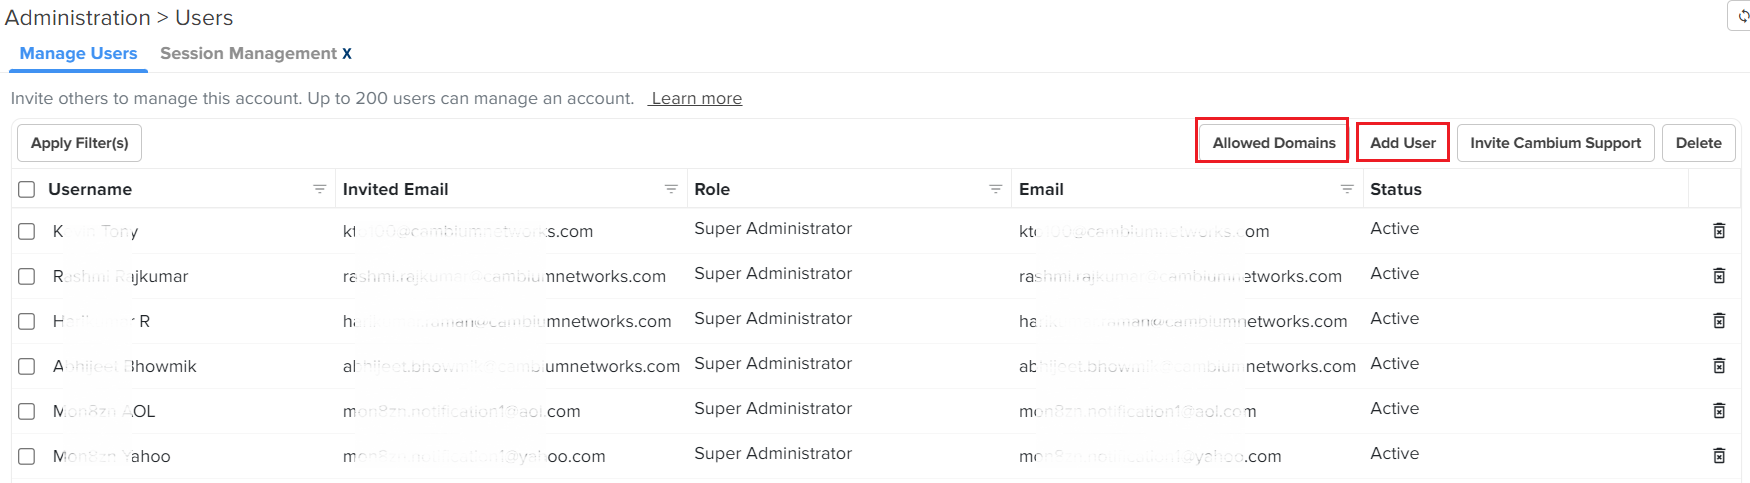
To add a new domain (for example, a gmail ID ), click on the Add User button. |
The Add User window appears. You must set the fields, as described in the Creating Users and Configuring User Roles section. The Add User window also displays that the email ID used is a new domain, as shown in the following example (in this case, gmail.com is the new domain):
|
3.
|
Select the Allow users in "gmail.com" domain check box (the domain name varies based on the email ID you add). |
The new domain is added to the database.
When users who belong to this allowed domain (for example, gmail.com) are added (using the Add User button), an invite email is directly sent to the users. When the users accept the invite, they can access a particular cnMaestro UI account. The Allow users in "gmailail.com" domain check box is available only when you are adding a new domain.
when you are adding users from that allowed domain.
|
4.
|
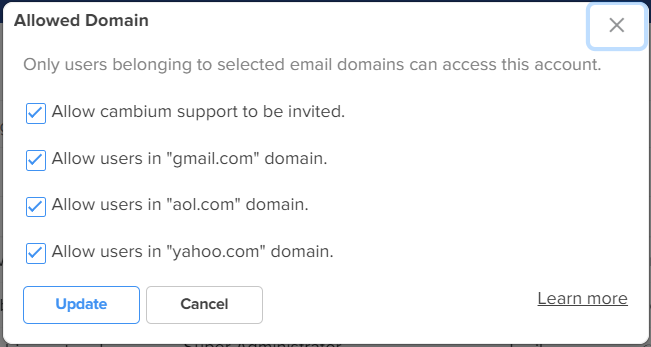
To blacklist or disallow a specific domain, click on the Allowed Domains button on the Manage Users page. |
The Allowed Domain window appears with a list of whitelisted domains.
|
5.
|
Uncheck the required domain check box to blacklist hat specific domain. |
All users from that blacklisted domain are not allowed to access the UI. To allow the blacklisted domain, you must check the required domain check box on the Allowed Domain window.
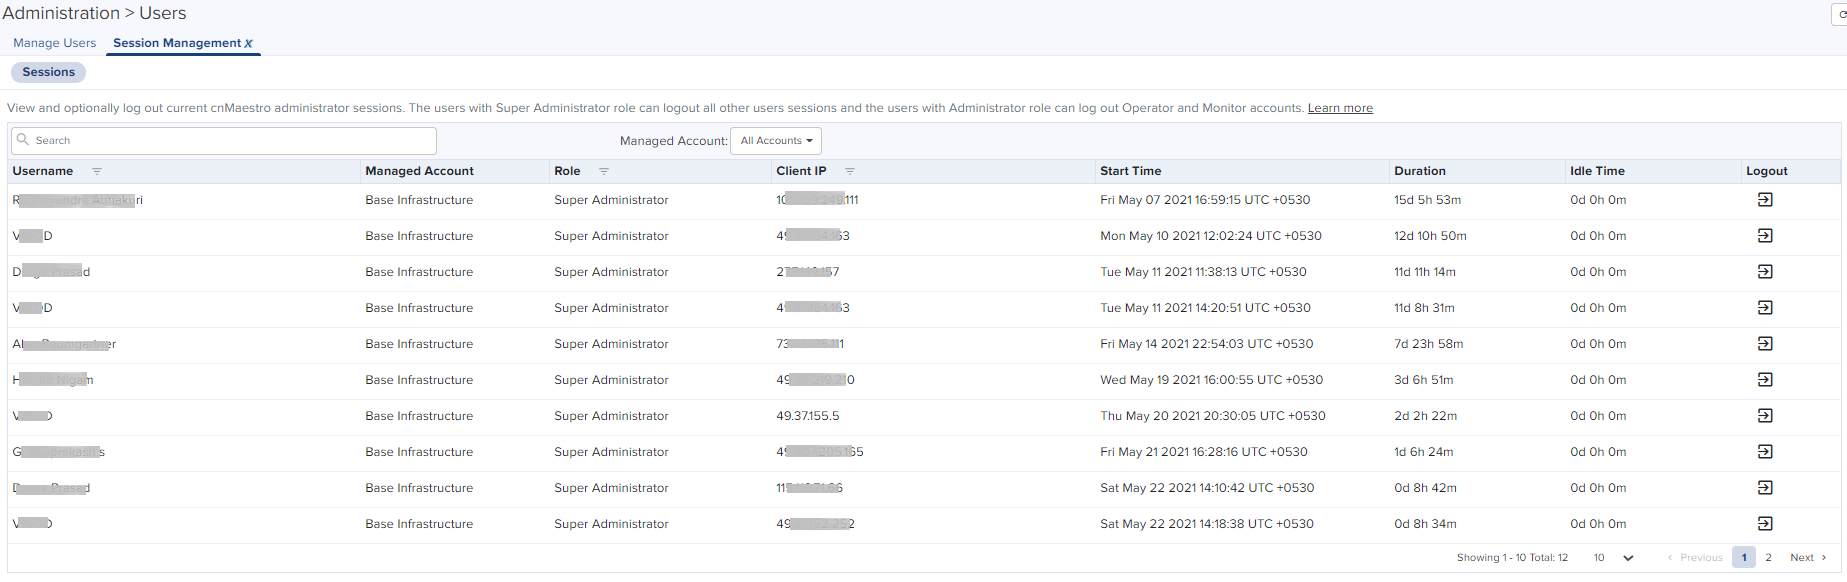
Session Management
View and optionally log out current cnMaestro administrator sessions. The users with Super Administrator role can logout all other users sessions and the users with Administrator roles can logout Operator and Monitor accounts.
Sessions
Displays the detailed information on the user sessions.