Creating a Cloud Account
This section provides an overview of the various services and components available with the cnMaestro platform.
This section includes the following:
Overview
There are two types of accounts for cnMaestro management as shown in Account Types.
Table 1: Account Types
|
Account
|
Description
|
| CloudManagement
|
Cloud Managements are created by users to manage their devices. After a Cloud Management is created, the user can claim devices and add them to the account. Generally, users have a single Cloud Management that contains all of their devices. Once the devices are added to Cloud Management, they must be explicitly deleted before they can be added to a second account.
|
|
User Accounts
|
User accounts map to an individual and is shared with the Cambium Support Center and Cambium Community. One must have a user account to access Cambium services.
|
Creating a User Account
When a new user first accesses the Cambium Cloud website, they need to register with Cambium to create a User account.
|
2.
|
Navigates to the Sign in page and select click here to register. |
|
3.
|
Enter your Email in the respective textbox and click Register. |
|
4.
|
An email will be sent to the email address provided. |
|
5.
|
Open the email received from Cambium and click the link. |
|
6.
|
The registration completion form window appears and fill in details, such as your name, the name of your company, and a password. |
|
7.
|
Click the Sign in button to log into the UI. |
Creating a Cloud Management
If you do not have a CloudManagement, you will be asked to create one after logging in and accessing Cambium Cloud. This allows you to access cnMaestro functionality and start claiming devices.
|
1.
|
Log in to the cnMaestro UI. |
|
2.
|
Click Create Account. You will be redirected to the Cambium Networks Cloud Services page. |
|
3.
|
Enter details such as Cambium ID, Cloud Account Name, Country, Time Zone, Account Type, and Account View. |
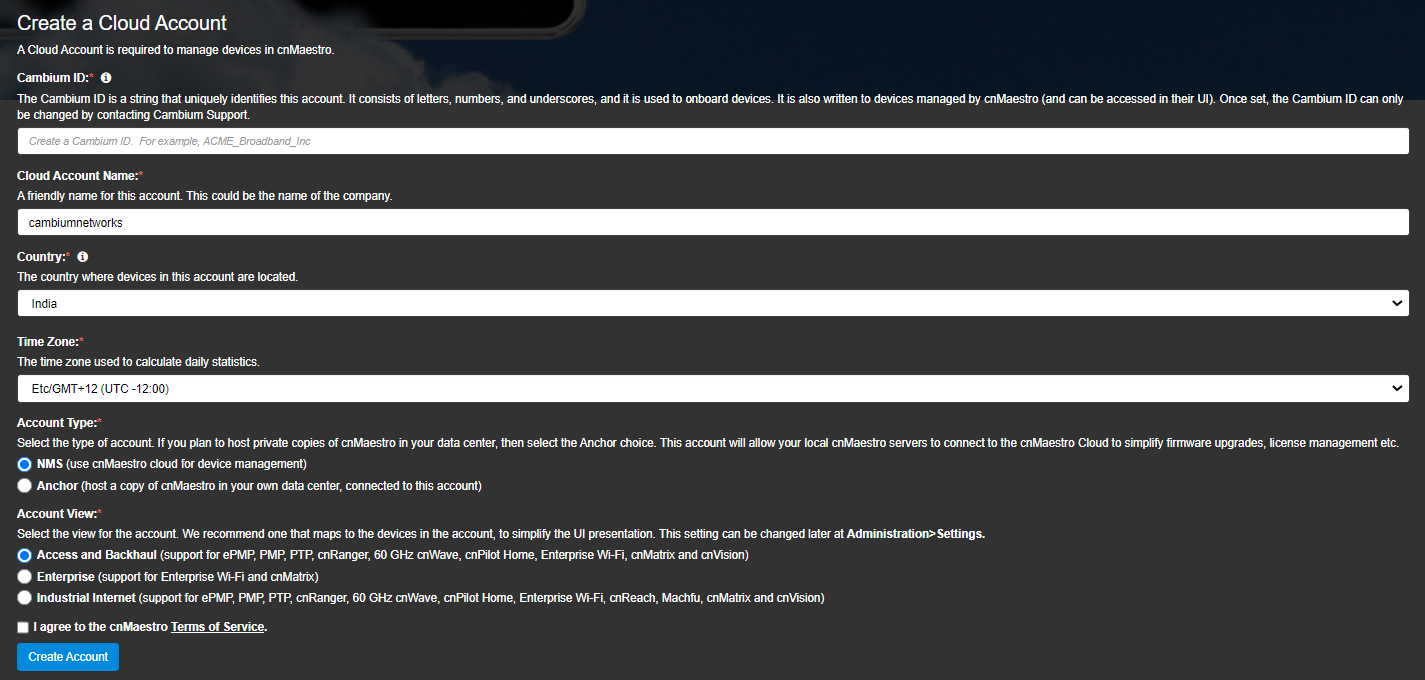
The required fields are defined below:
Table 2: Creating a CloudManagement -Fields
|
Parameter
|
Description
|
| Account View |
The Account Type should be set to Enterprise if only cnMaestro Enterprise devices will be managed (these include the cnPilot E Series and ePMP Hotspot). The user interface for Enterprise is tailored to those products, and it can always be changed later by navigating to Administration > Settings. |
|
Account Type
|
Select the type of account. If user plan to host private copies of cnMaestro in your data center, then select the Anchor choice. This account will allow your local cnMaestro servers to connect to the cnMaestro Cloud to simplify firmware upgrades, license management, etc.
|
| Cloud Account Name |
The account name is assigned to this account. It is generally the same as Company provided one when the User account was created, but it doesn’t have to be. |
| Country |
The country is needed to determine where to store the device data. Cambium has data centers in North America, Europe, and Asia. If your devices are going to be located within more than one region, then you should create a separate account for a country in each region. |
| Cambium ID |
The Cambium ID identifies this account externally – both when claiming a device to be onboarded (by entering the Cambium ID through the device UI) or when submitting a support case for the account. The Cambium ID is an alphanumeric string without spaces (but underscore and hyphen are supported). Once created it can only be changed by contacting Cambium Support. |
| Time Zone |
The time zone is used to aggregate daily device statistics. Daily statistics are collected starting at 12:00 AM in the time zone selected. |
|
6.
|
Click the drop-down next to the username, to view the created Cloud Account. |
Once you have created a Cloud Management, you will automatically be directed to the home page of that account on subsequent login.
Multiple CloudManagements
In general, each user has a single Cloud Management, and it contains all their devices. However, Cambium Cloud supports additional Cloud Managements if desired. Each Cloud Management is managed independently. To create another Cloud Management, select Create Account from the drop-down list in the top right corner. After the account information is entered and the account is created, the UI navigates to the new account.
Figure 1 Multiple Cloud Management Accounts
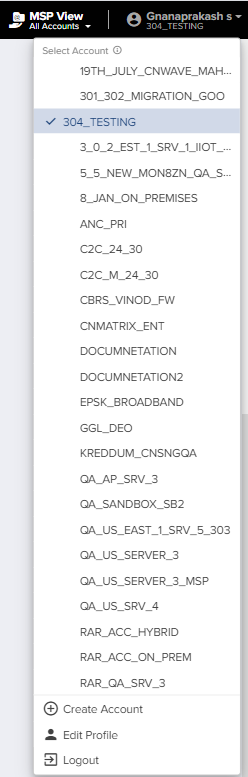
Account Selection
To switch between the accounts, use the drop-down list in the top right corner. It displays the accounts to which the user has access. Selecting a different account changes the context of the UI as it displays in the account data.
Figure 2 Account Selection

Concurrent Access
The same user can access multiple accounts simultaneously; however, each account needs to be opened in a separate browser window or browser tab.
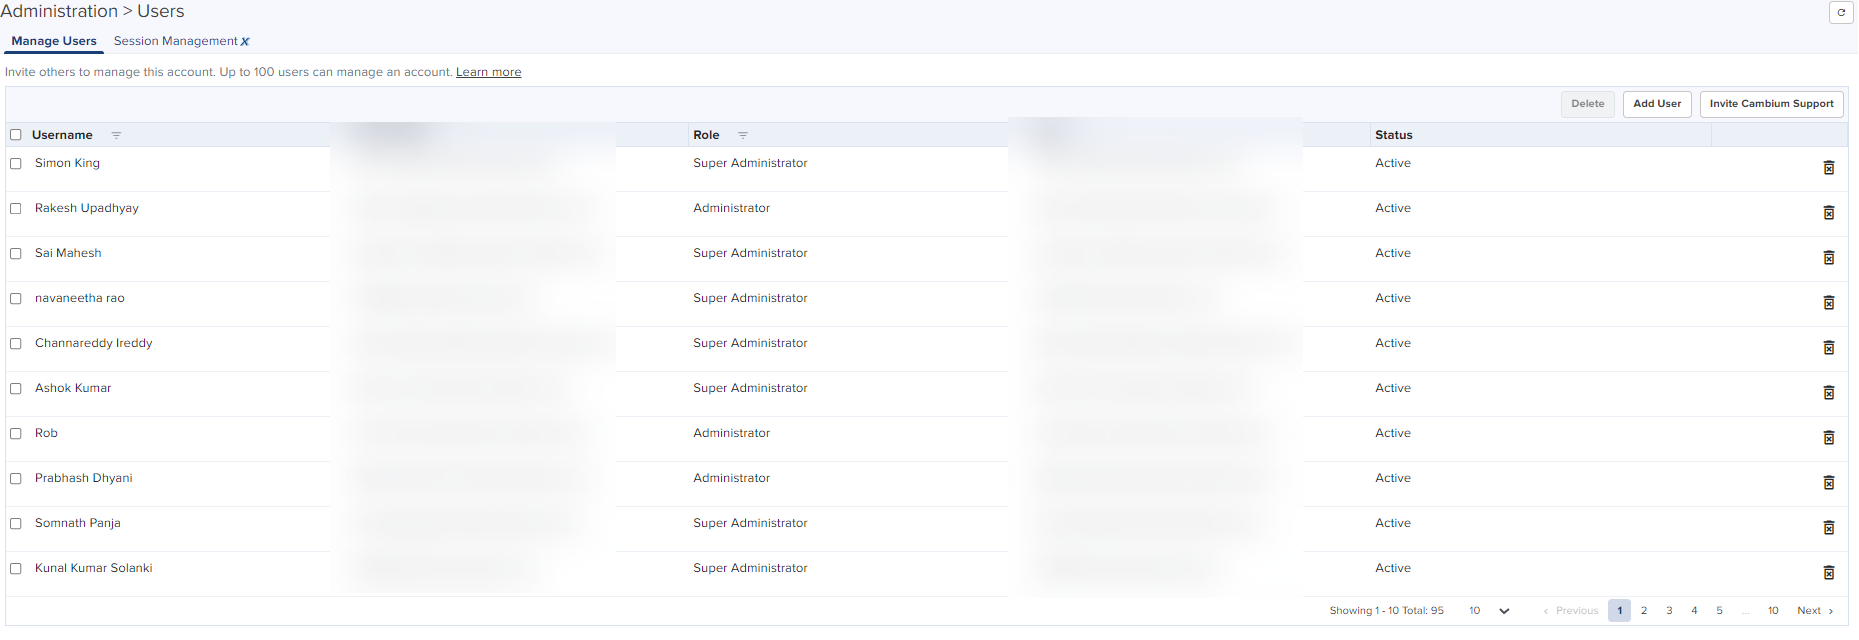
Managing Users
A user can add additional administrators to their Cloud Management accounts. These users will have full access to the devices in their account and can manage them.
Figure 3 Managing Users
Creating Users and Configuring User Roles
To add a user:
|
1.
|
Navigate to Administration > Users Page > Manage Users. |
|
2.
|
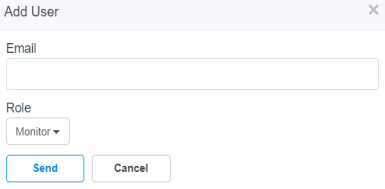
click Add User button the following window displays: |
|
3.
|
Enter the Email ID in the Email. |
|
4.
|
To configure user role, Select any one of the roles from the Role drop-down list : |
For more details on Role-Based Access, please refer Role-Based Access section.
|
6.
|
Cambium Cloud will send an email with directions on how to add themselves to the account. |

|
Note
The email does not need to match the email address of an existing Cambium user.
|
|
7.
|
The email contains a link that directs the user to the Cambium Cloud website. |
|
8.
|
Login using an existing Cambium User account, or create a new Cambium User account. Once complete, they will have access to the new account. |
Role-Based Access
Each user is assigned a Role that defines their authorization. On successful authentication, every request from this user is processed in light of their Role.
cnMaestro supports the following user Roles:
|
|
Super Administrator – Super Administrators can perform all operations. |
|
|
Administrator – Administrators can modify cnMaestro application functionality, but they are not able to edit User, API Client, or Server configuration. |
|
|
Operator – Operators can configure device-specific parameters and view all configurations. |
|
|
Monitor - Monitors have only view access. |
|
|
CPI- CPI can perform on-boarding up to 10 devices using the CBRS tool and has view access only. |
For more details on Role-Based Access, please refer Role-Based Access section.
Deleting Users
Users can be deleted from an account through the Administration > Users page click  .
.
When a user is removed by the Super Admin, their access to the account is immediately terminated, even if they are currently logged in.