
| | There is only one Primary Account in an Organization. |
| | CBRS configuration can be set in the Primary Account and optionally shared to Secondary Accounts. |
An Organization allows multiple accounts to share CBRS billing and SAS ID. The Primary Account owns this configuration, and the Secondary Account can optionally share it. Both accounts must authorize the sharing.
|
|
|
This chapter provides the following information:
| | Create an Organization |
| | Remove Accounts |
| | Disable Secondary Account Services |
| | Edit Services |
| | Share CBRS Configuration with the On-Premises Instance |
| | Organization History |
Perform the following steps on the Primary Account:
| 1. | Navigate to Network Services > Organization > Accounts. |
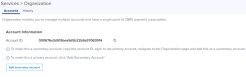
| 2. | Click Add Secondary Account. |
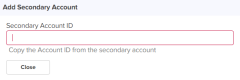
| | Navigate to the planned Secondary Account and copy the Account ID of the Secondary Account using the Copy to Clipboard. |
| 3. | Paste the copied Account ID in the Secondary Account ID text box. |
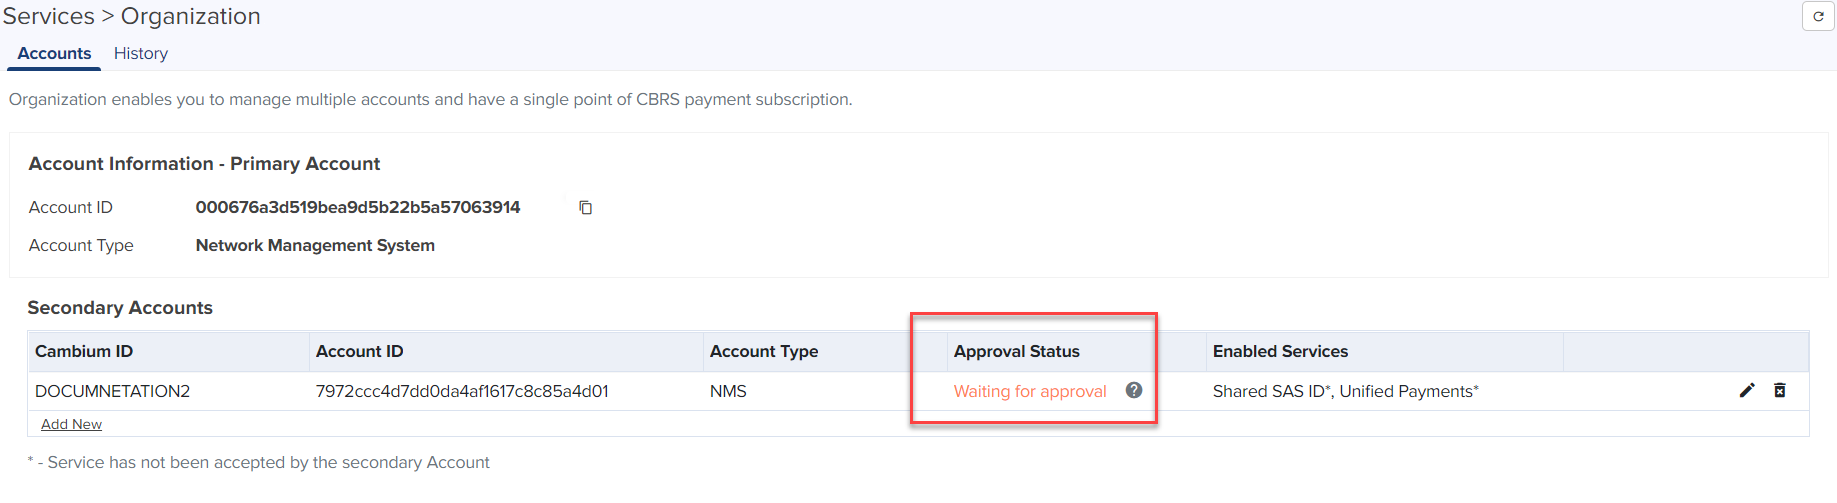
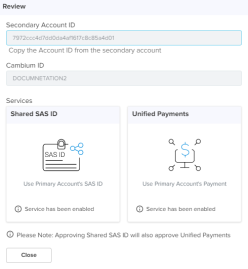
| 4. | Once the Secondary Account is validated, the Cambium ID is displayed as shown below. |
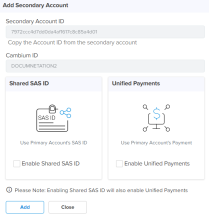
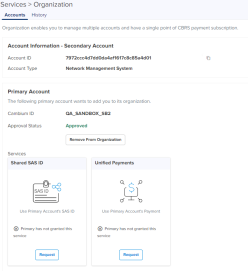
| 5. | The Primary Account can offer services such as: |
| | Shared SAS ID: This allows the Secondary Account to use the CBRS SAS ID configured in the Primary Account. |
| | Unified Payments: This allows the Secondary Account to use payment details configured in the Primary Account. |
|
|
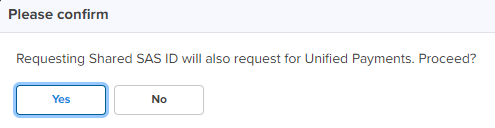
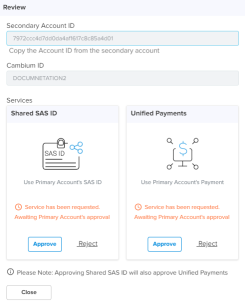
Sharing the SAS ID automatically enables Unified Payments. |
| 6. | Enable the Services Shared SAS ID or Unified Payments. |
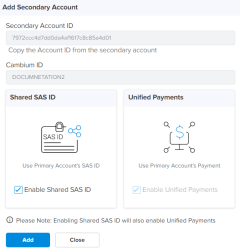
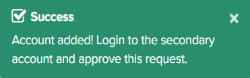
| 7. | Click Add. It displays the Success message as shown below: |
|
|
The Secondary Account administrator must approve this request from the Primary Account to join the Organization. |
| 8. | In the Secondary Accounts table, the Approval Status is displayed as Waiting for approval. |
Login to the Secondary Account to complete Organization creation. The Secondary Account must approve the request and authorize the shared services. The Secondary Account can also request additional services (which must be approved by the Primary Account).
Perform the following steps in the Secondary Account:
| 1. | Navigate to Network Services > Organization > Accounts. |
| 2. | Click Approve. |

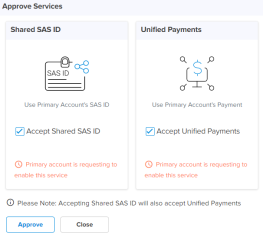
| 3. | The Approve Services window pops up. Review the services requested and click Approve. |
Additional services can be added after the Secondary Account joins the Organization, such as including the Unified Payments Service.
Perform the following steps on the Secondary Account:
| 1. | Navigate to Network Services > Unified Payments and click Enable. |
|
|
This generates a request to the Primary Account to provide support for Unified Payments. |
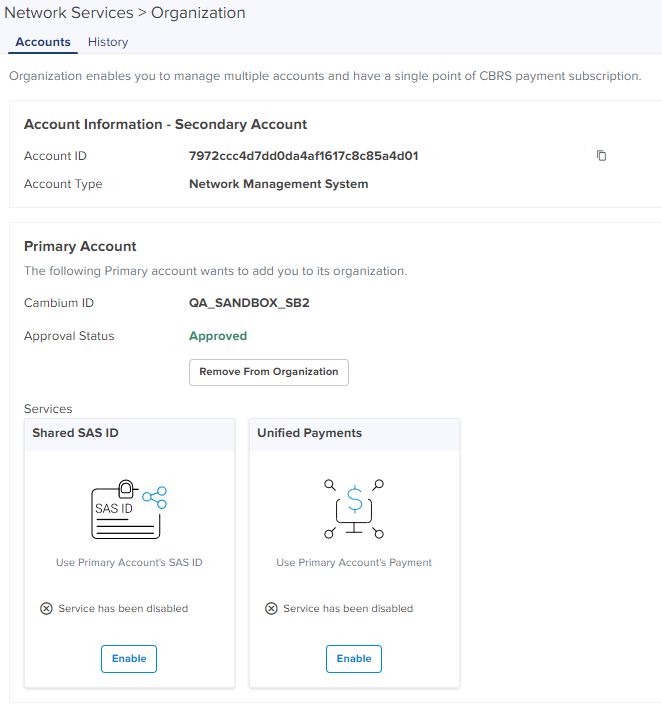
| 2. | Once the services are enabled and approved in the Primary Account, the following displays in the Secondary Account. |
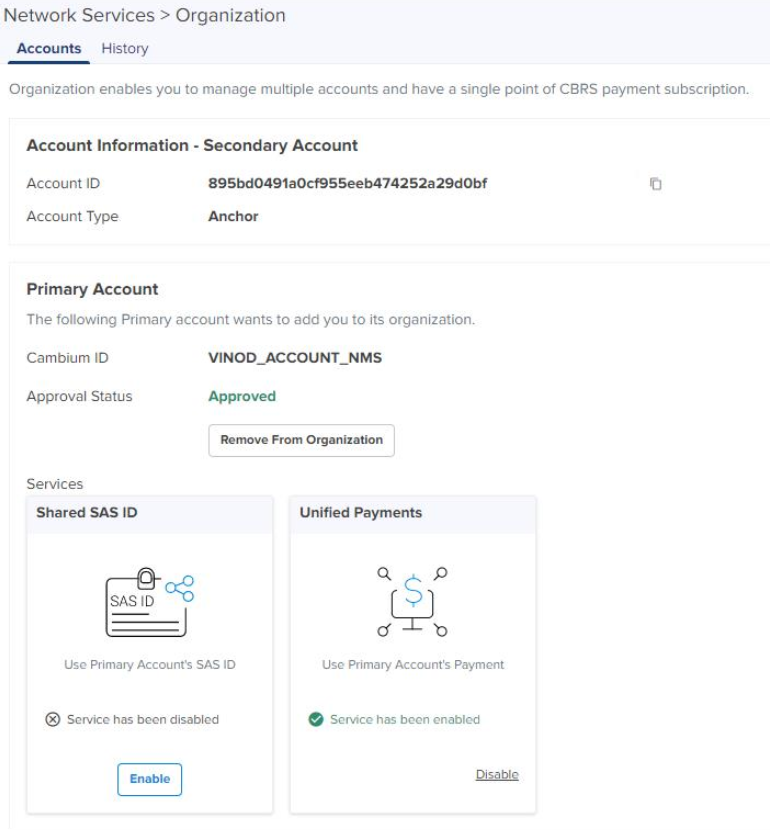
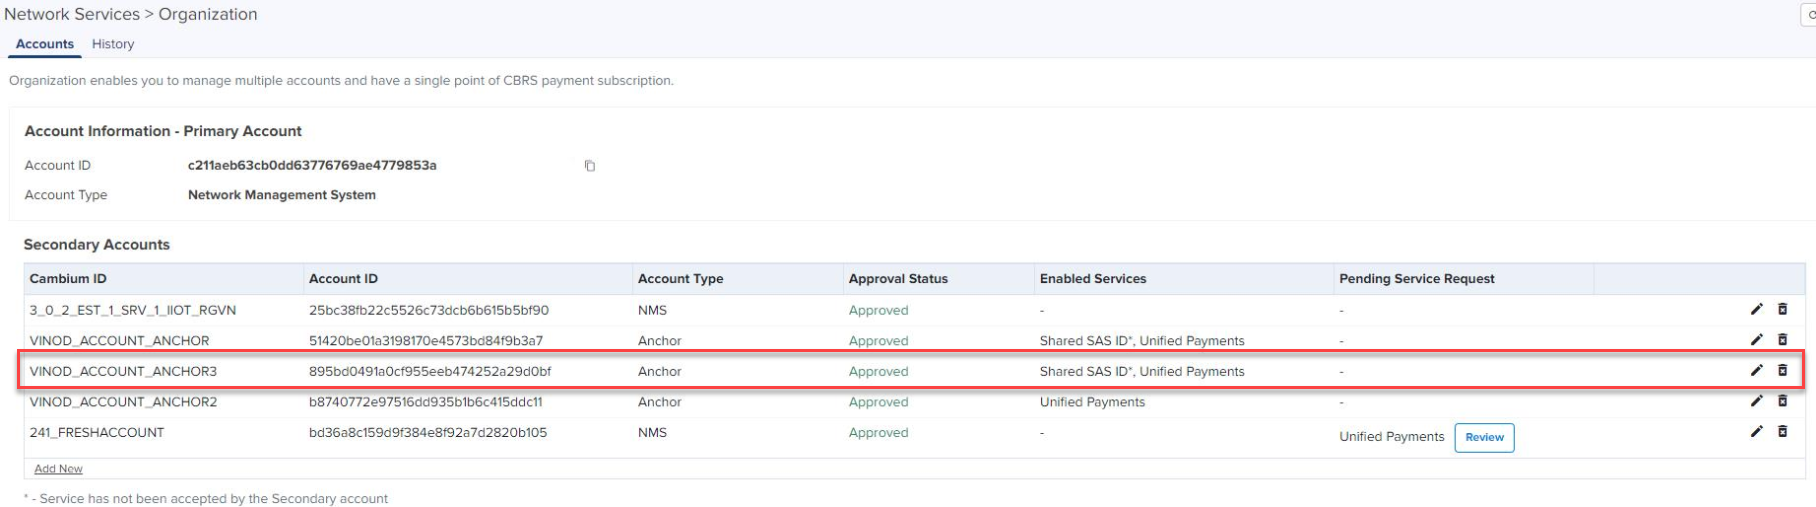
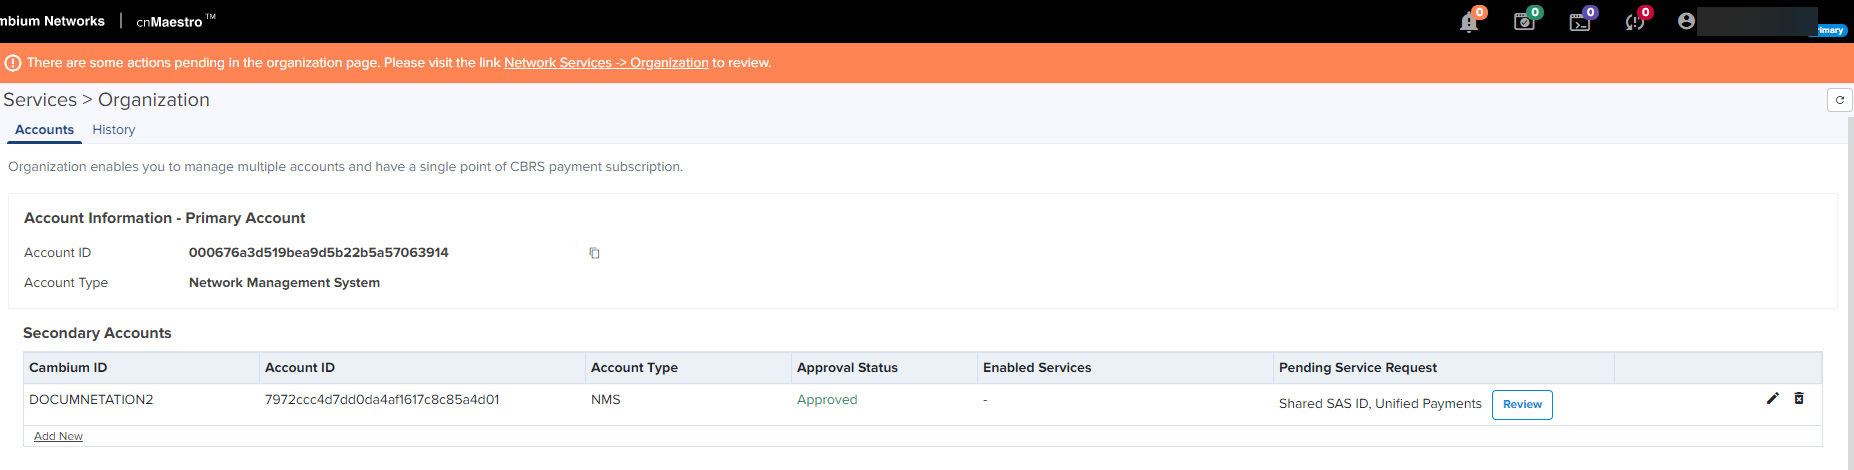
| 3. | The enabled services will be displayed in the Primary Account. |
Perform the following steps on the Primary Account to remove the Secondary Account:
| 1. | Navigate to Network Services > Organization > Accounts. |
| 2. | In the Secondary Accounts, click Delete ( ) icon. ) icon. |
| 3. | The Remove From Organization window pop up. |
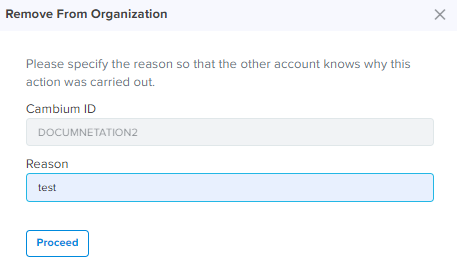
| 4. | Enter the Reason. |
| 5. | Click Proceed. |
Without Active Services
| n | If services such as Shared SAS ID or Unified Payments are inactive in the Secondary Account, it can be deleted without any approval. |
| n | The following message displays if successful. |

With Active Services
| n | If services such as Shared SAS ID or Unified Payments are active in the Secondary Account, the services need to be disabled from the Secondary Account, and the request must be approved by the Secondary Account administrator.
|
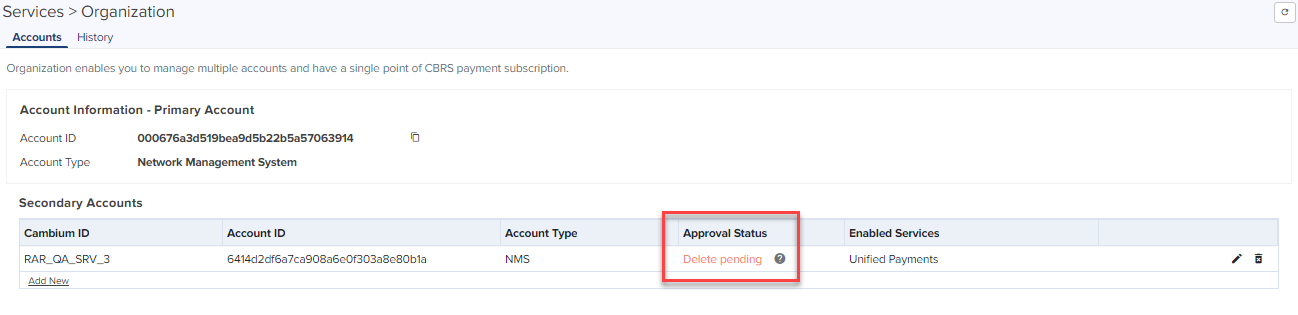
| n | The following message displays if successful. |
| n | In the Secondary Accounts table, the UI displays the Approval Status as Delete Pending. |
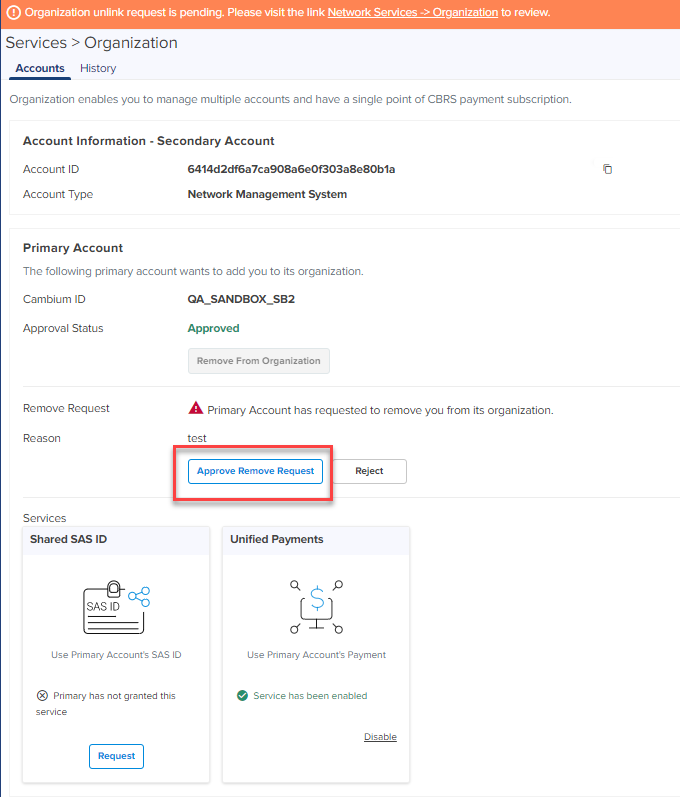
The Secondary Account administrator must approve the remove request from the Primary Account. For more details, refer to Approve Remove Request (with active services).
Perform the following steps on the Secondary Account to remove an Organization:
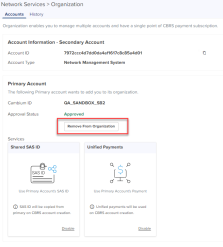
| 1. | Navigate to Network Services > Organization > Accounts. |
| a. | Click Remove From Organization (without active services). |
| n | To remove the Secondary Account from an Organization with no active services. |
| n | Click Yes in Please confirm window to remove this account. |
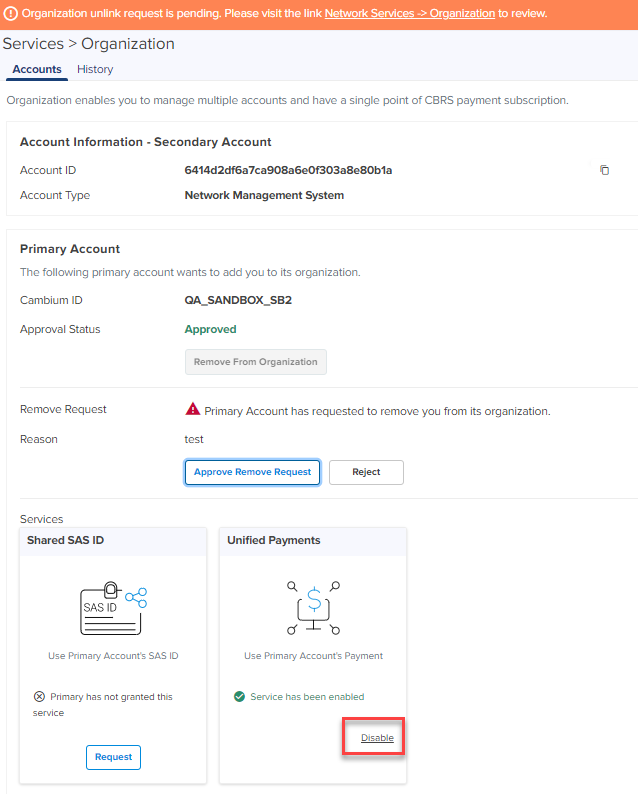
| b. | Approve Remove Request (with active services). |
|
|
Disable active services before Approve Remove Request. |
| n | If the Secondary Account is using services such as Shared SAS ID or Unified Payments, the following message displays. |
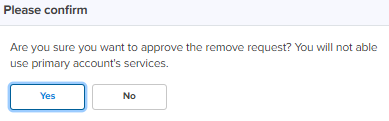
| n | Click Yes in Please confirm window to approve the request. |
| 2. | The following message displays if successful. |

The Secondary Account user can disable services without leaving the Organization.
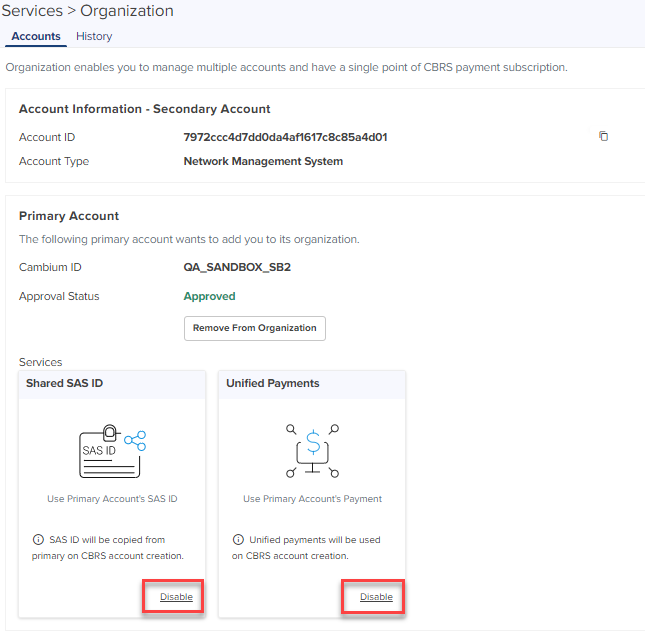
| 1. | Navigate to Services > Organization > Accounts and select Services. |
| 2. | Click Disable. |
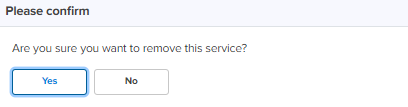
| 3. | Click Yes in the Please confirm window. |
| 4. | After disabling, the following displays. |
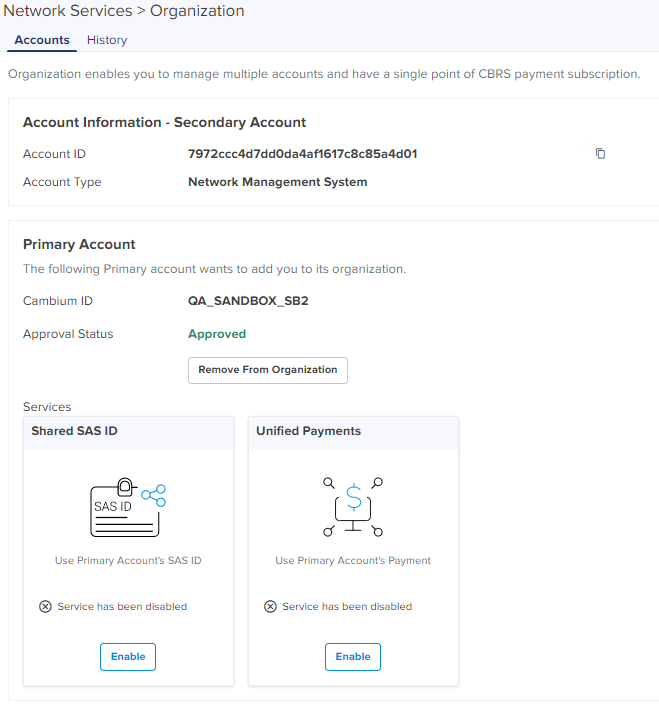
| 5. | Click Enable to reactivate the services. |
|
|
Active Services are highlighted in Green color. |
The Secondary Account user can disable the Shared SAS ID services.
| 1. | Navigate to Services > Organization > Accounts and select Services. |
.png)
| 2. | Click Disable in the Shared SAS ID. |
| 3. | Click Yes in the Please confirm window. |

| 4. | If CBRS account is active in Secondary Account, while disabling it displays the following error message. |
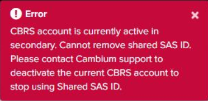
If an Error message pops up, the user needs to raise a request to Cambium Support for the SAS vendor cancellation. Cambium Support will disable the CBRS services and deregister all devices associated to the Secondary Account.
Once disabled, the Secondary Account user can view the SAS vendor page and create a new CBRS account as shown below.
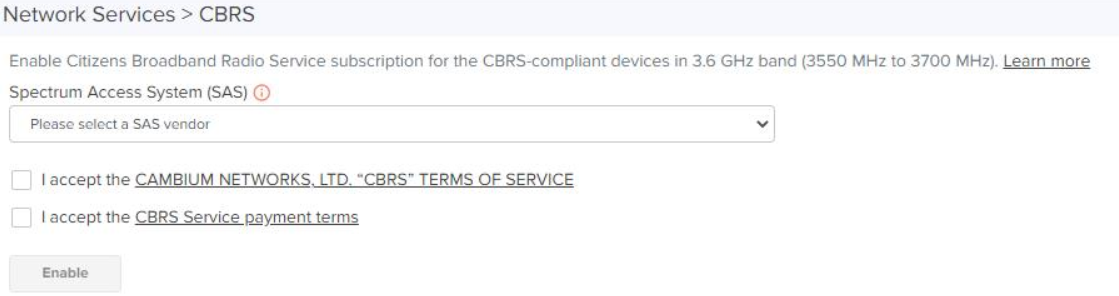
For further information on creating a new CBRS account, refer to CBRS.
|
|
Services in the Secondary Account cannot be disabled unless CBRS is inactive in Secondary Account. Contact Cambium Support to disable CBRS operation or change SAS Vendor. |
The Secondary Account user can disable Unified Payments.
| 1. | Navigate to Services > Organization > Accounts and select Services. |
| 2. | Click Disable within Unified Payments. |
| 3. | Click Yes in Please confirm window. |
| 4. | If Unified Payments is active in CBRS of the Secondary Account, it displays an Error message. |
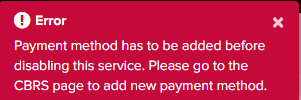
If this happens, the user needs to add new CBRS payment details into the Secondary Account.

For further information on Payment details, refer to CBRS.
The user can disable the Unified Payments once the new payment details are added successfully to the Secondary Account.
The Primary Account can edit or disable services shared with the Secondary Account as shown below:
|
|
When the services are active in CBRS of the Secondary Account, the Primary Account cannot disable those services. |
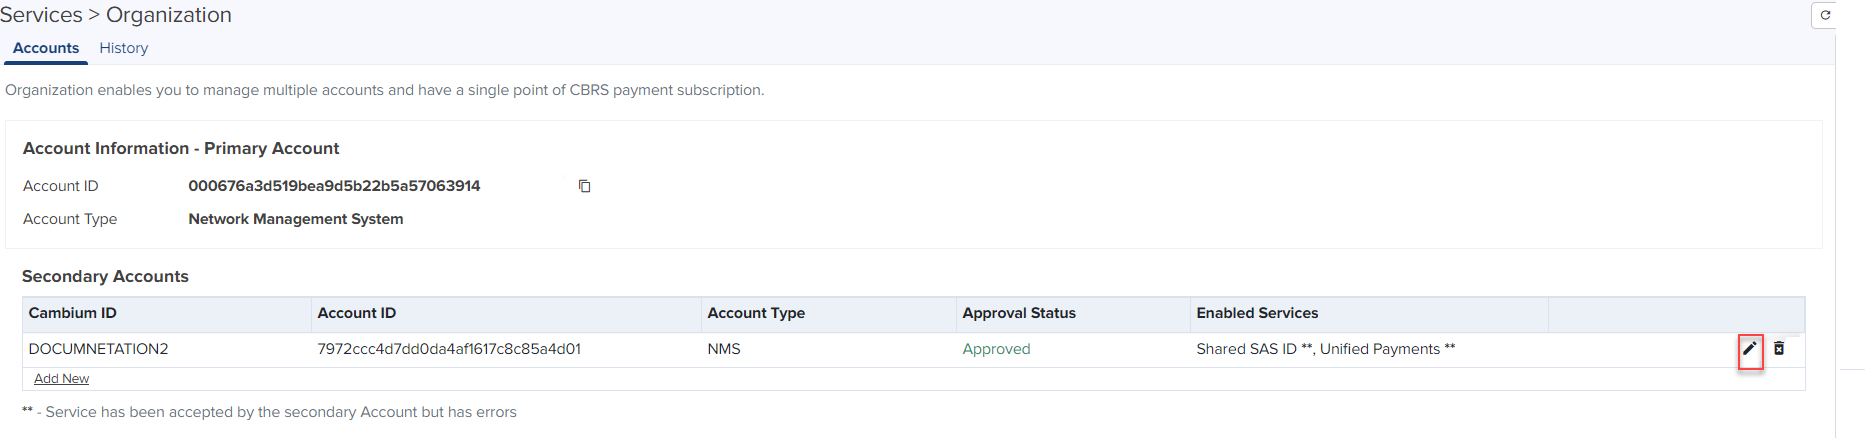
| 1. | Navigate to Accounts > Secondary Accounts tab. |
| 2. | Click Edit ( ) icon. ) icon. |
| 3. | Edit Secondary Account window pops up. |
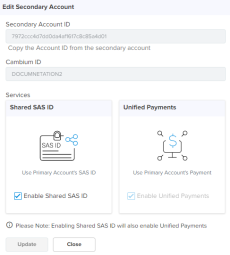
| 4. | Disable the Services and click Update. |

| 5. | The following message displays if successful. |

If the services are disabled, the Secondary Account needs to make a request to the Primary Account to activate them.
To request activation, perform the following on the Secondary Account:
| 1. | Navigate to Network Services > Organization > Accounts. |
| 2. | Click Request. |
| 3. | Click Yes in Please confirm window. |
| 4. | It displays the Success message as shown below: |

| 5. | Once requested, login to the Primary Account page and Approve the request. |
The Primary Account administrator must approve this request from the Secondary Account in order to enable the services.
Perform the following steps on the Primary Account.
| 1. | Navigate to Services > Secondary Accounts tab. |
| 2. | Click Review in Pending Service Request. |
| 3. | The Review window pops up. Click Approve. |
| 4. | Once approved, the requested services are enabled in the Secondary Account. |
|
|
Starting with version 3.0.3, cnMaestro supports synchronizing CBRS Configuration to On-Premises instance. |
Once On-Premises is connected to the Anchor Account, the user can synchronize CBRS details (SAS ID, Token) to the cnMaestro On-Premises instance to register CBRS devices.


| | If the user shares (sync) CBRS details configured on Anchor account to connected On-Premises and if any devices are registered in On-Premises with different CBRS token or SAS ID it displays the deregister error as shown below. |
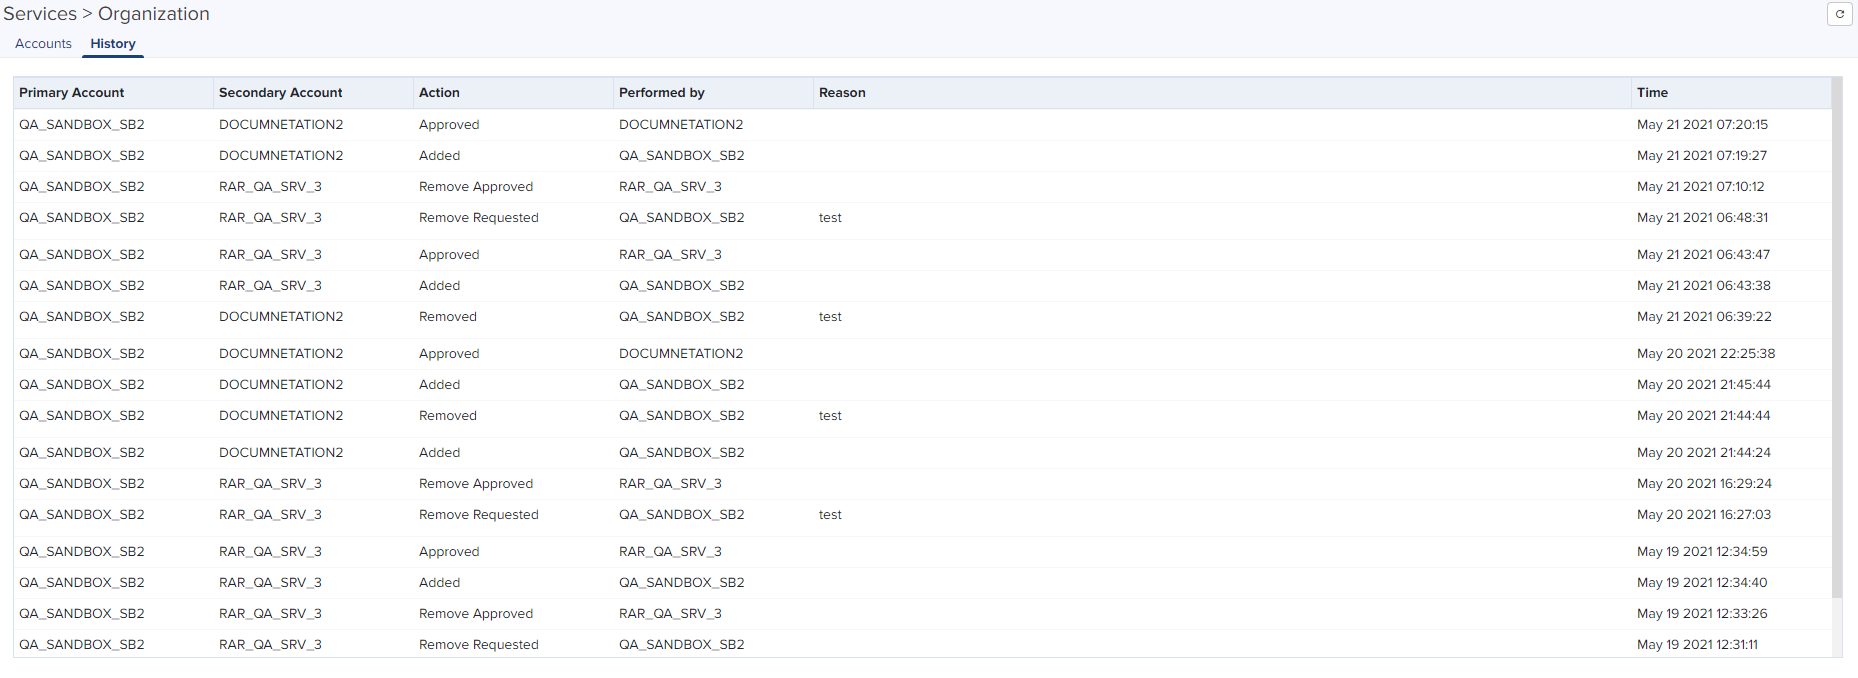
In Organization History user can view changes to the Organization status over time. This includes details of Primary Account, Secondary Account, Action, Performed by, and Reason.
To view Organization History:
Navigate to Network Services > Organization > History tab.


.png)