Cloud Anchor Account
This chapter provides the following details:
Manage Instances
Registration of an On-Premises customer accounts to Cloud is addressed by this feature. This allows the user to synchronize inventory and other configuration details between the On-Premises instances and the Cloud account.
Manage Instances describes the following topics:
Onboarding
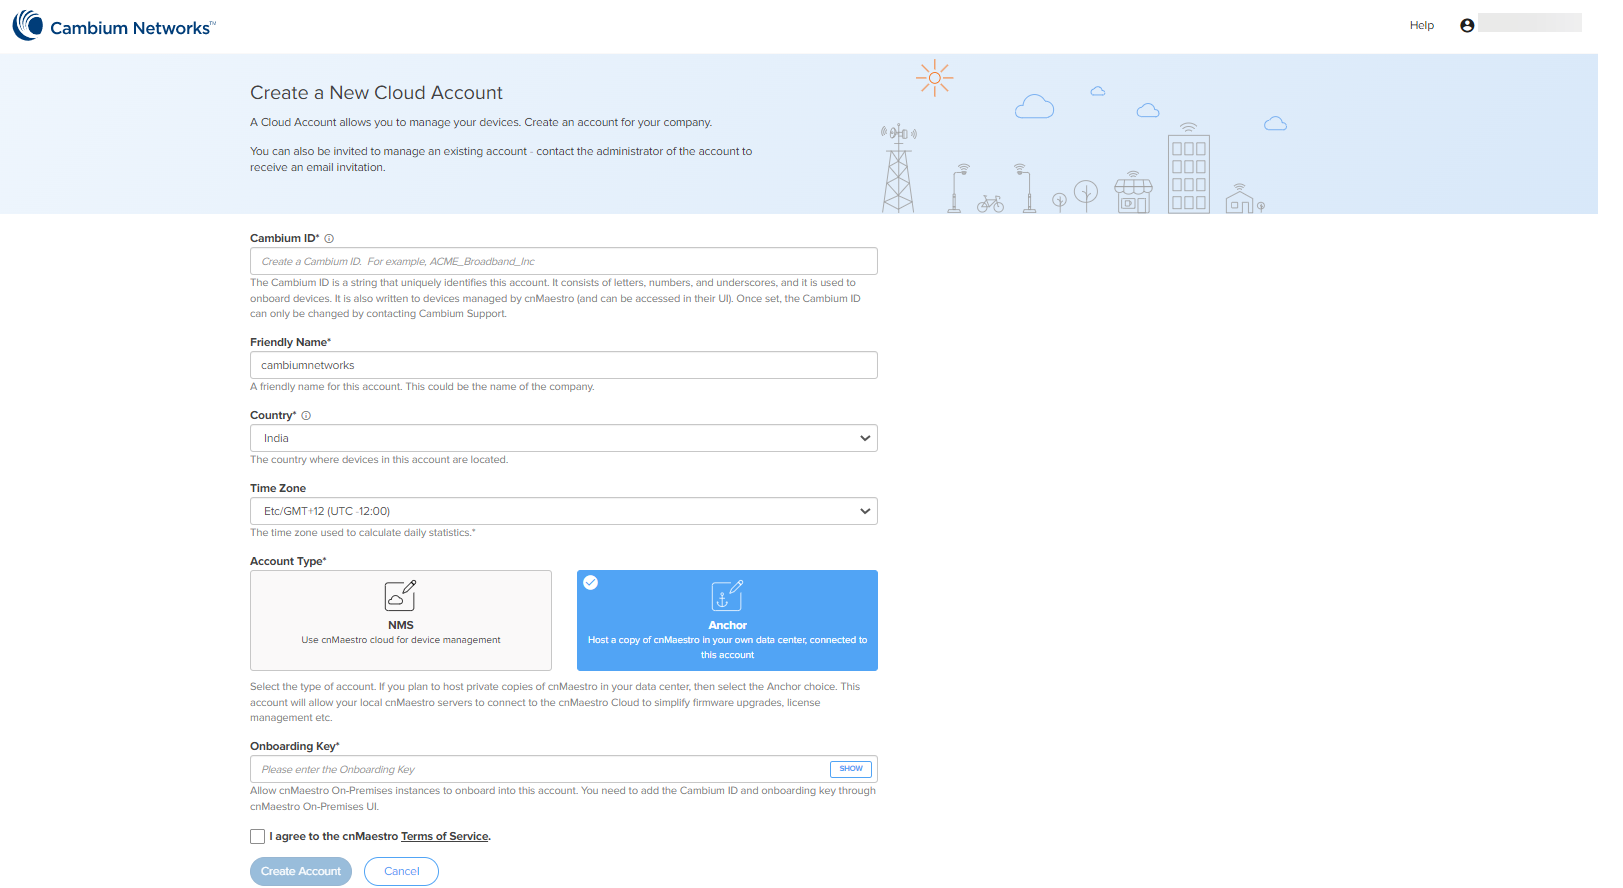
To onboard the devices to the Cloud Anchor Account, you need to create the Cloud account before connecting to cnMaestro On-Premises:
-
Log in to the cnMaestro UI, https://cloud.cambiumnetworks.com.
-
In Account Type, select Anchor.
-
Enter the On-Premises Onboarding Key.
-
Click I agree to the cnMaestro Terms of Service.
-
Click Create Account.
-
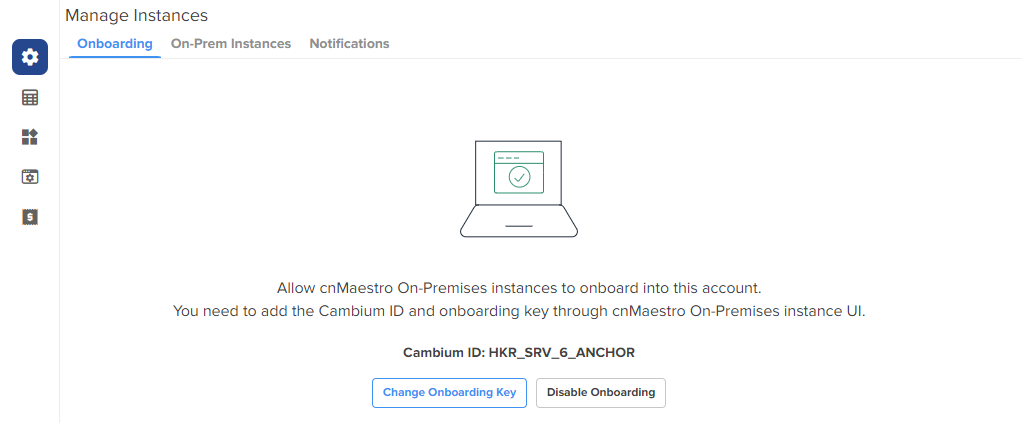
When the Anchor Account is created, an Onboarding Key must be set to allow On-Premises instances to connect.
-
Navigate to the Manage Instances page as shown below and allows you to change the Onboarding Key and Disable Onboarding.
This key needs to be entered in the cnMaestro On-Premises UI to connect to the Anchor Account.
On-Premises Instances
Once the On-Premises server has been onboarded with the Key, it will be included in the On-Prem Instances page. Multiple On-Premises installations can be added to a single Anchor Account.
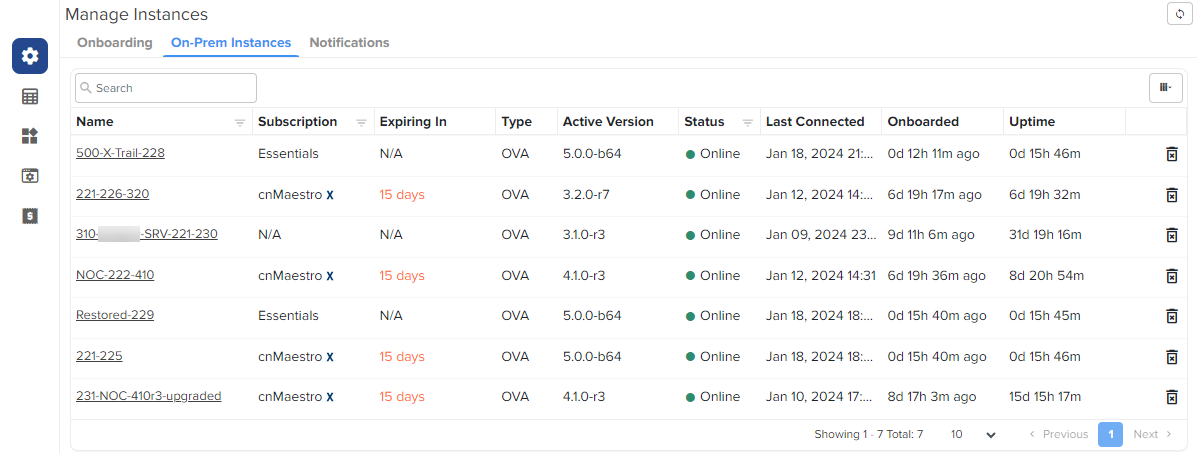
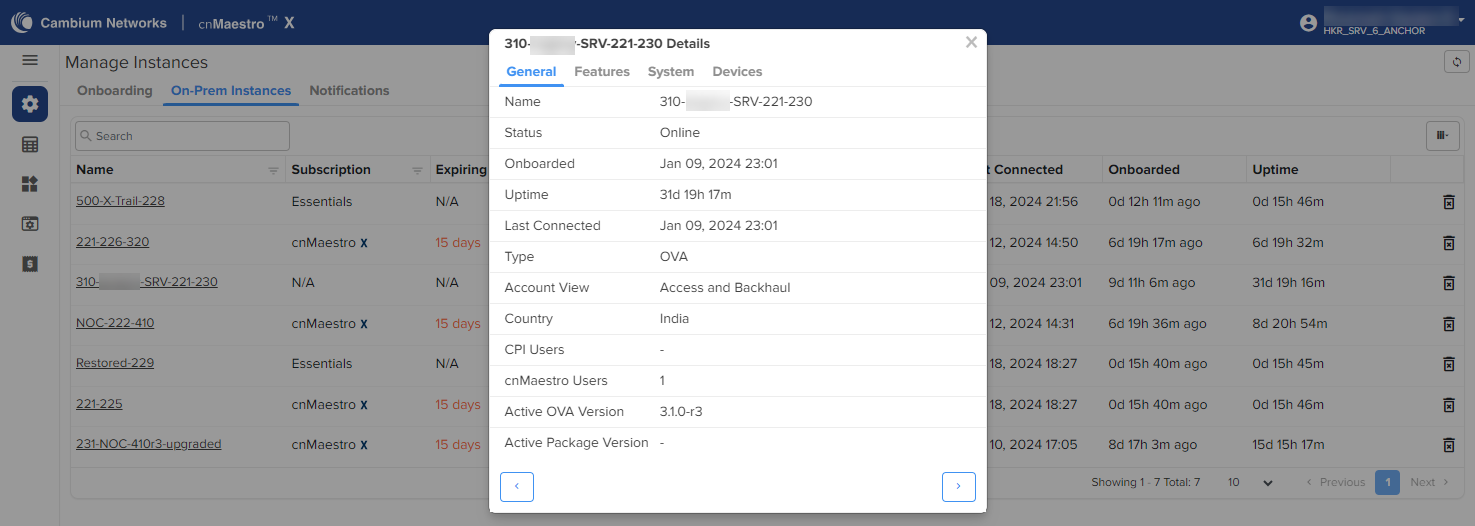
By clicking the instance host name, you can see the On-Premises server details such as General, Features, System, and CBRS:
Notifications
Notification page displays the history of the most recent events notification of On-Premises instances with Severity, Source, Name, Raised Time, and Message.
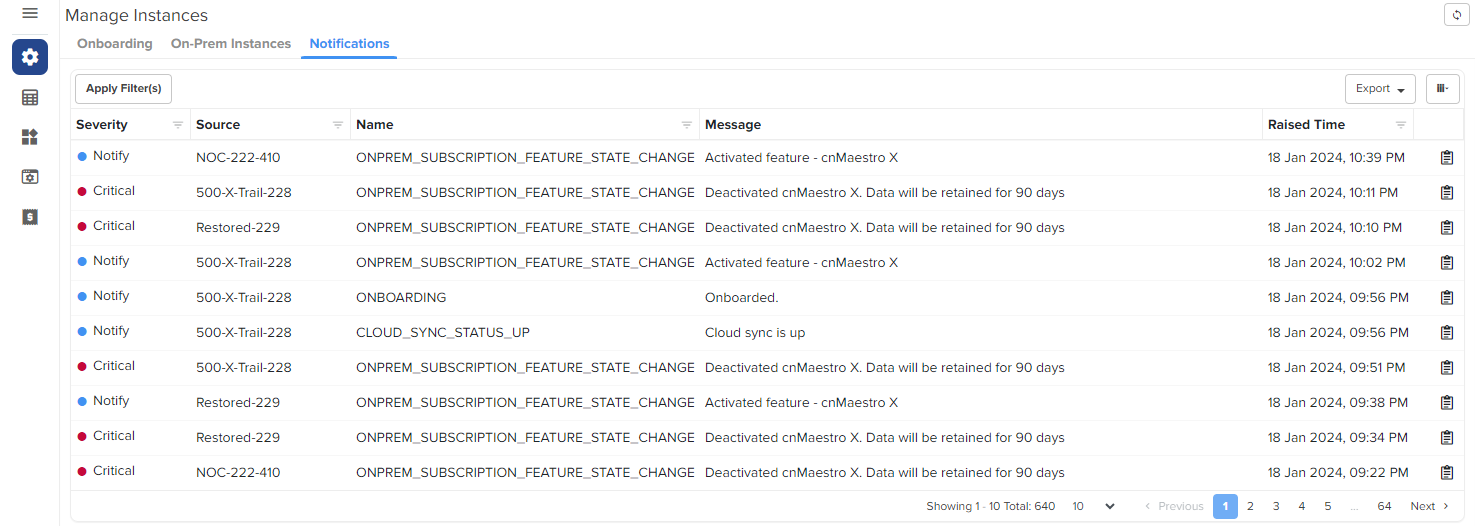
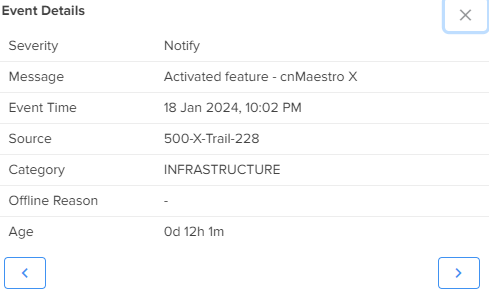
Click View Details to view the Event Details as shown below:
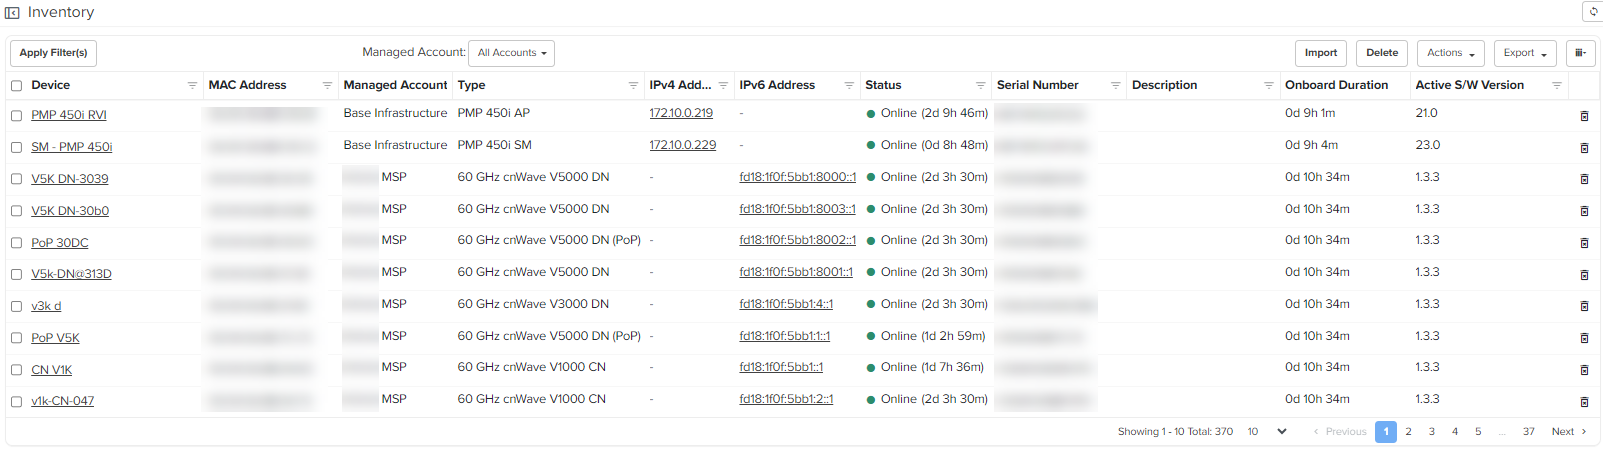
Inventory
The Inventory page displays a list of devices under the selected Node. It presents health and maintenance information provides a tabular view that allows for sorting and filtering. When selected for a single device, it presents a detailed customized page of that device.
Administration
Administration provides the following details:
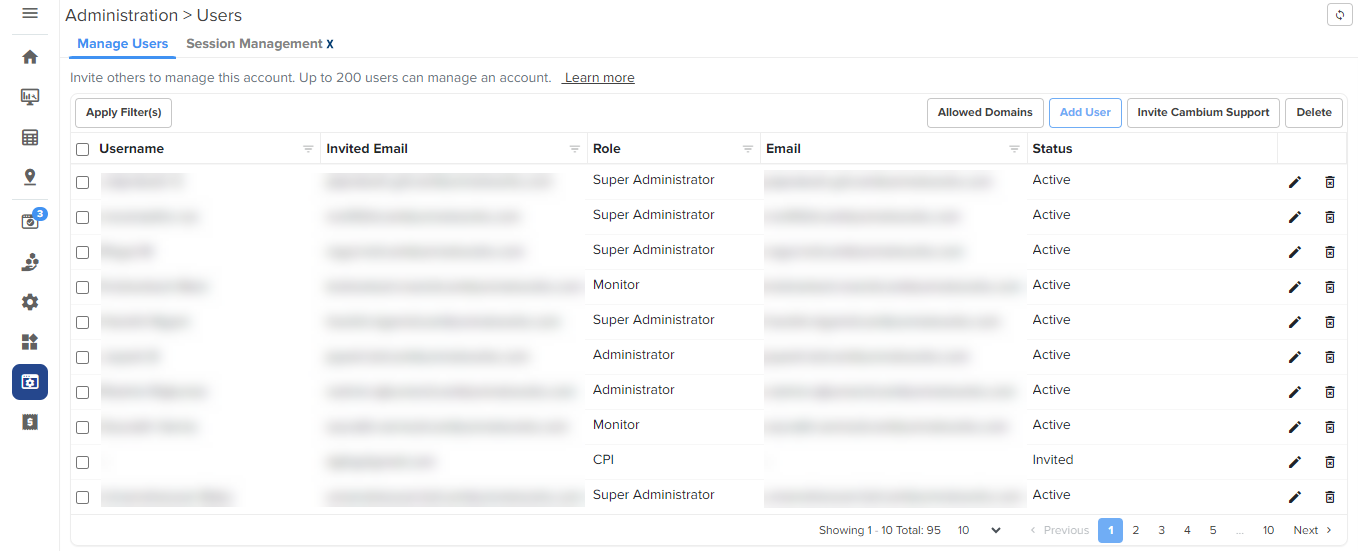
Users
cnMaestro allows to add Users using the Administration > Users page. A maximum of ten users are currently allowed in the system.
Figure 1 Adding Users
Role-Based Access
On successful authentication, every request from this user is processed in light of their Role.
cnMaestro supports the user Role:
Creating Users and Configuring User Roles
To add an administrator:
-
Navigate to Administration > Users page.
-
Click Add User button. The following window is displayed:
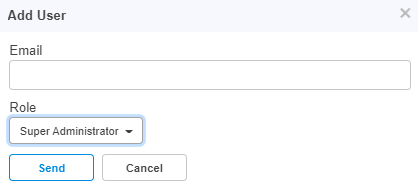
-
Enter the ID in the Email text box.
-
Click Send button to add this user.
To delete, click the delete icon against the user in the Administration > Users page.
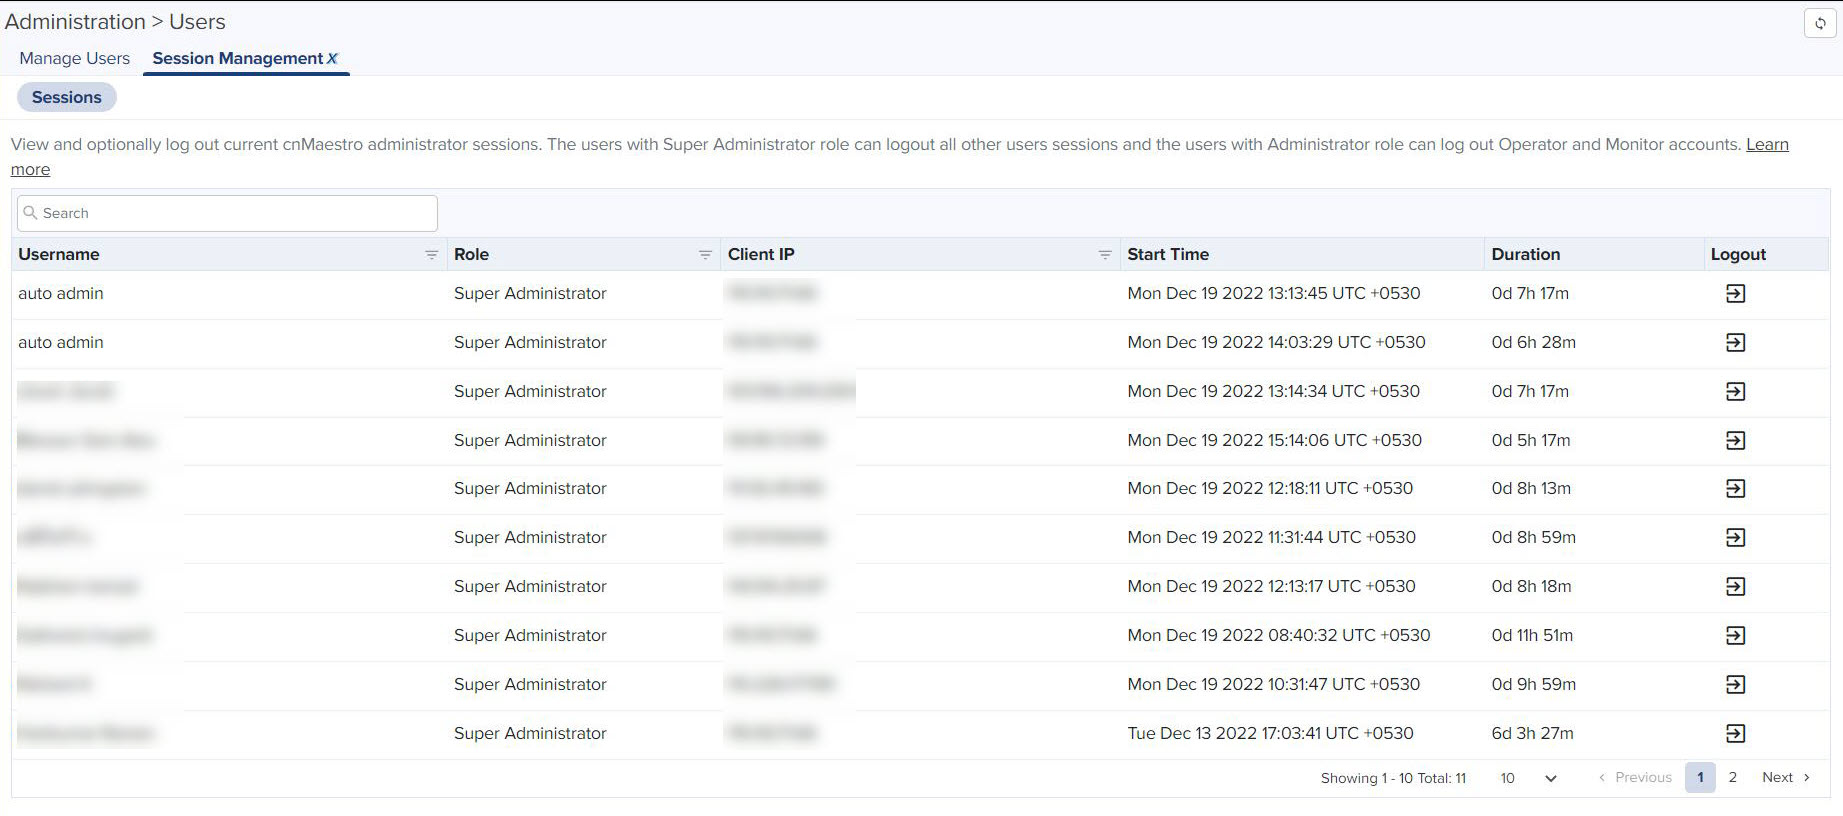
Session Management
View and optionally log out current cnMaestro administrator sessions. The users with Super Administrator role can logout all other users sessions and the users with Administrator role can log out Operator and Monitor accounts.
Network Services
Network Services provide the following details:
CBRS
Citizens Broadband Radio Service subscription for the CBRS-compliant devices in 3.6 GHz band (3550 MHz to 3700 MHz).
For further information, refer to CBRS.
Organization
An Organization allows multiple accounts to share CBRS billing and SAS ID. The Primary account owns this configuration, and the Secondary account can optionally share it. Both accounts must authorize the sharing.
For further information, refer to Organization.
Manage Subscriptions
Manage Subscriptions provide the following details:
-
Subscriptions
-
Devices
-
On-Premises Instances
Subscriptions
Subscriptions page describes about the usage summary and a list of pending, active, and expired subscriptions. It aids planning for renewals and the purchase of new subscriptions.
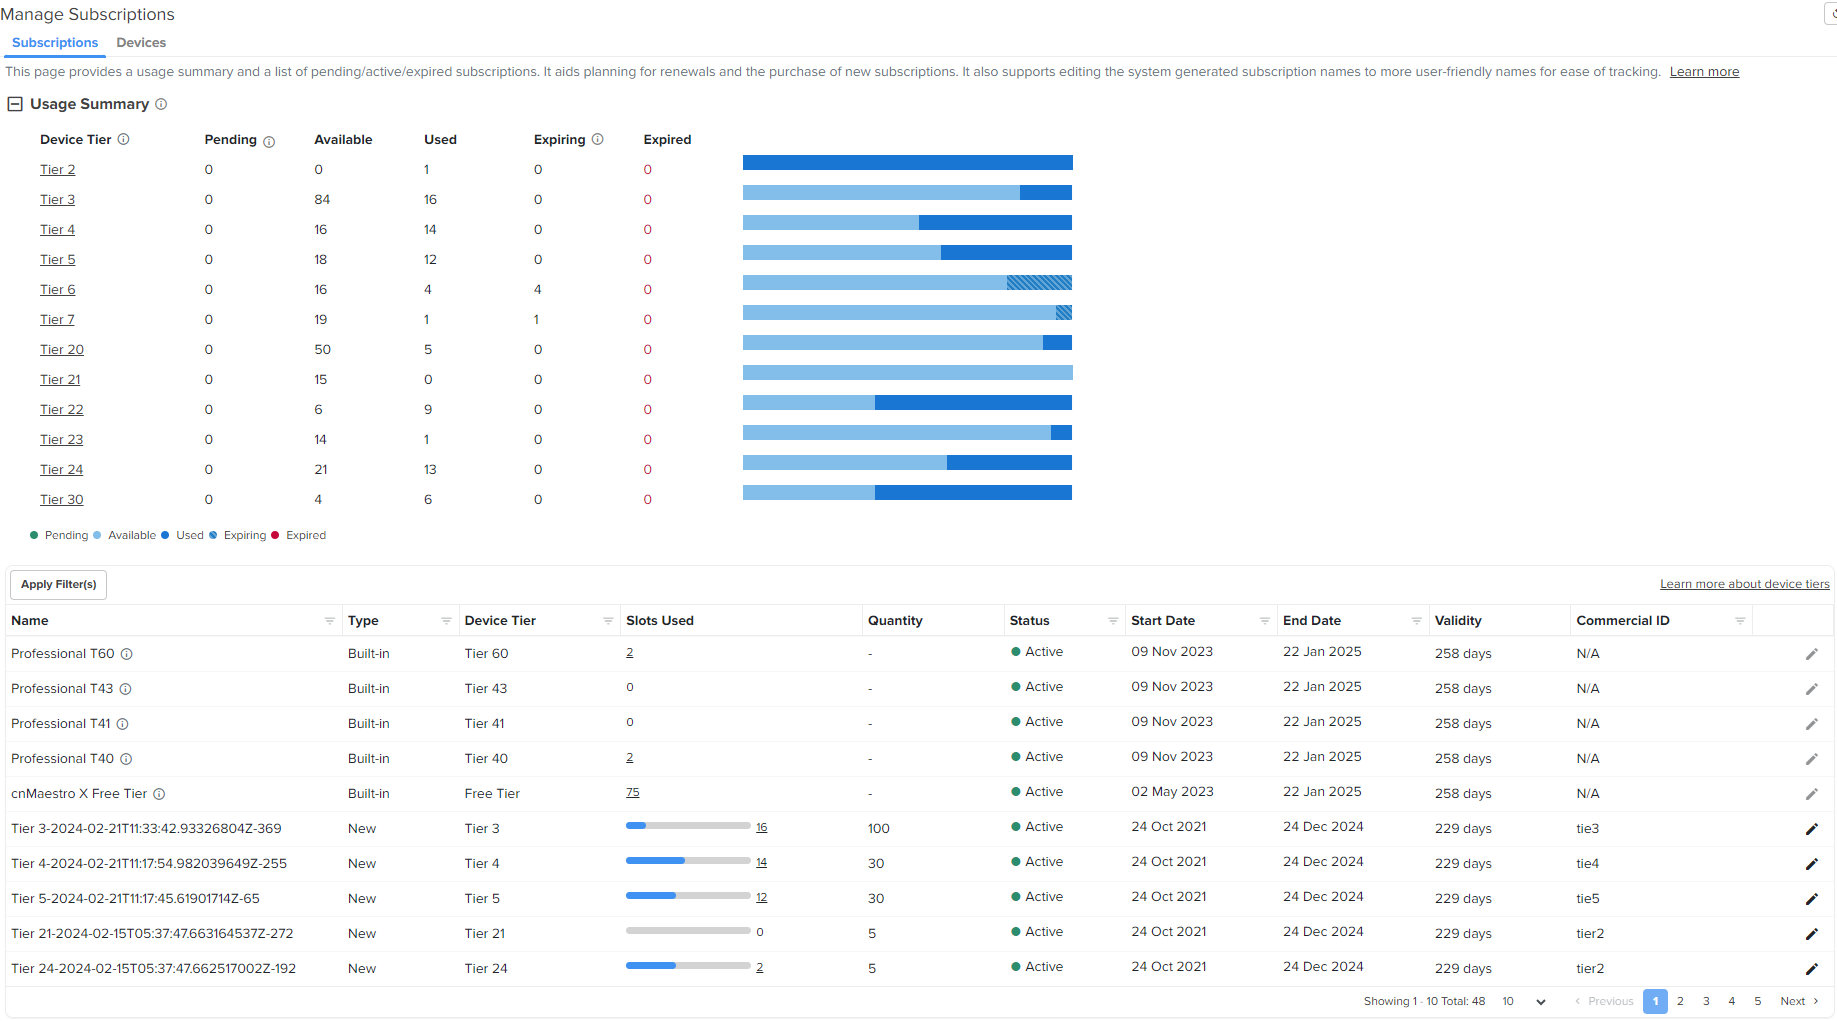
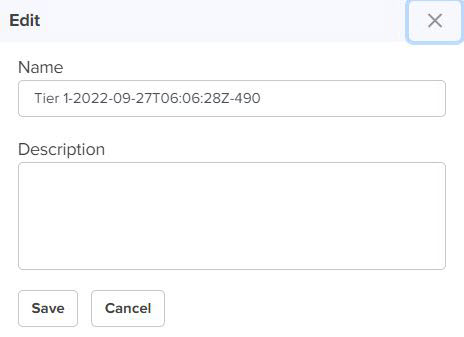
It also supports editing the system generated subscription names to more user-friendly names for ease of tracking.
To edit the Subscriptions perform the following steps:
|
1.
|
click edit ( ) icon. ) icon. |
Edit window pops up as shown below.
|
2.
|
Enter Name and Description. |
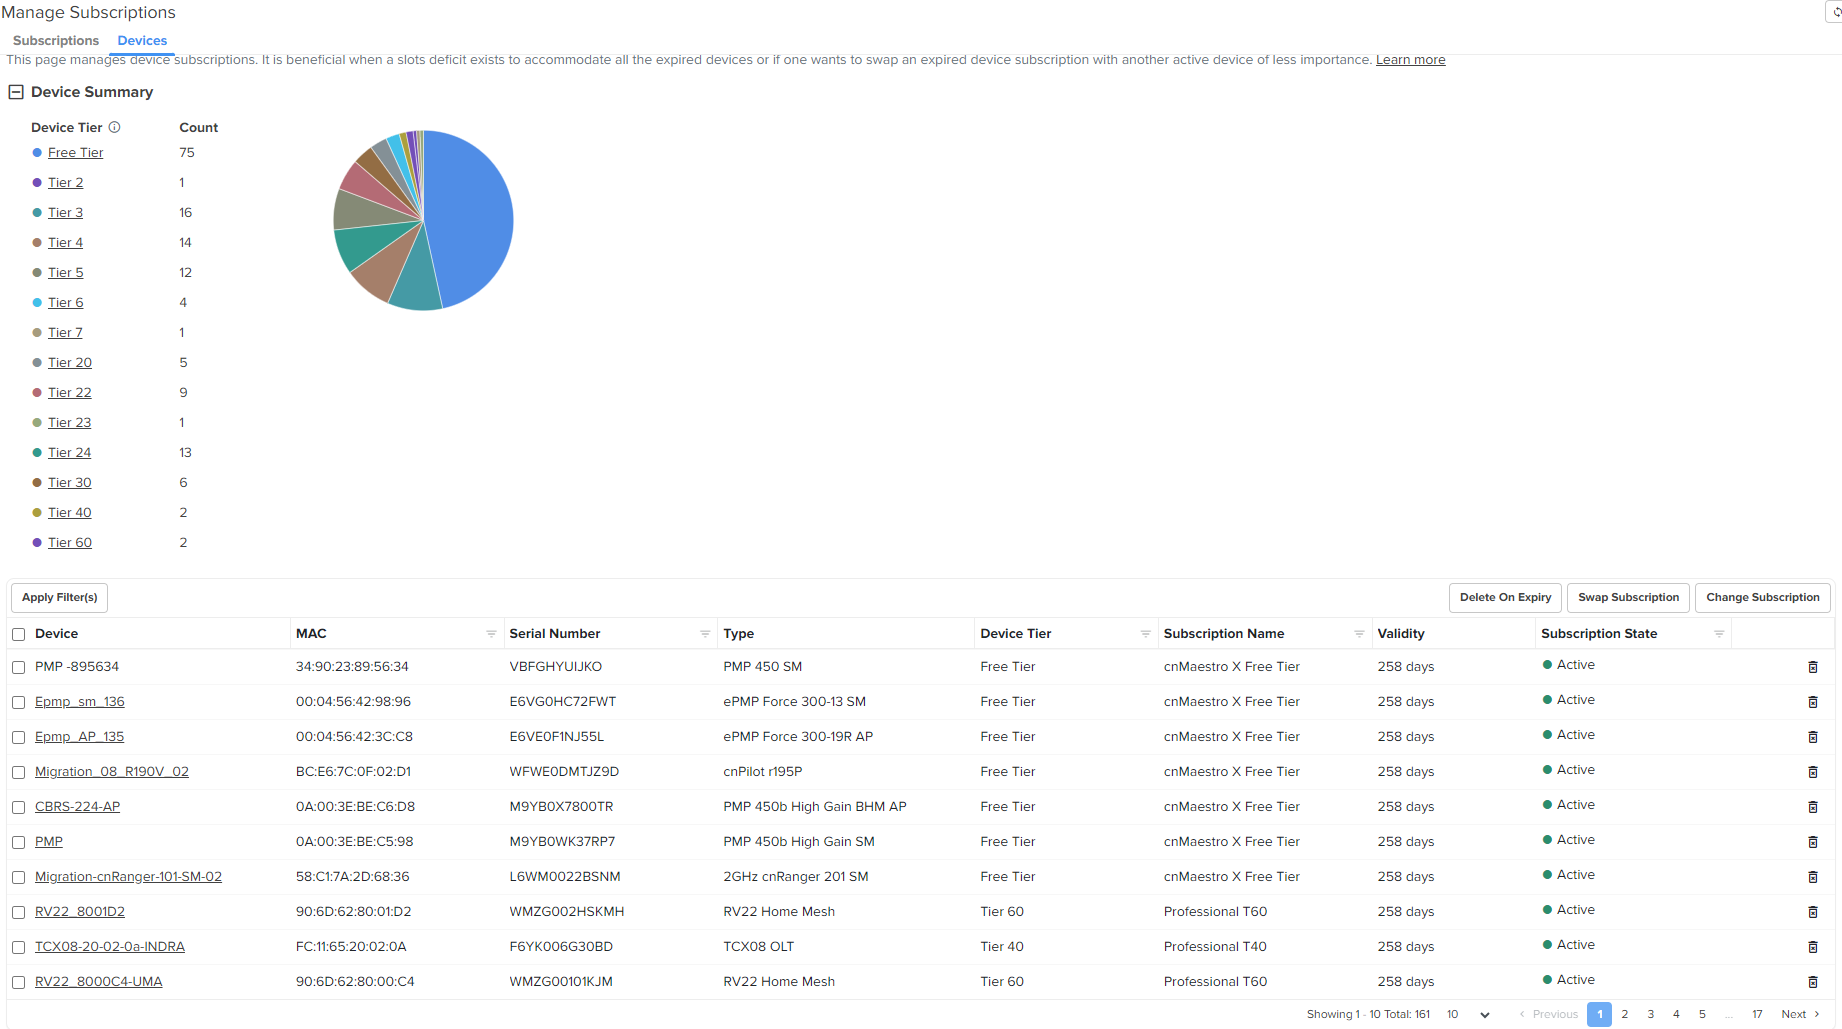
Devices
Devices page manages device subscriptions. It is beneficial when a slots deficit exists to accommodate all the expired devices or if one wants to swap an expired device subscription with another active device of less importance. For more info refer to Subscription Management.