Creating a Cloud Account

This section provides an overview of cnMaestro Cloud Accounts. This section includes the following:

Overview

There are two types of accounts for cnMaestro cloud management.

Table 1 Account types

Account

Description

Cloud NMS

Cloud NMS accounts allow users to manage their devices through https://cloud.cambiumnetworks.com. Devices can be claimed, onboarded, and fully managed through the cloud service.

Cloud Anchor

Cloud Anchor Accounts are needed for on-premises installations of cnMaestro. After cnMaestro is deployed in a local data center, it connects to a Cloud Anchor Account. See the following section for more details on Creating an Anchor Account.

Both Cloud NMS and Cloud Anchor Accounts require a Support Center ID to login.

Creating a Support Center User ID

New Cambium Cloud users need to register with Cambium Support Center to create a Support Center ID.

  1. Navigate to https://cloud.cambiumnetworks.com and click Sign In.

  2. In the Sign In page, click Register.

  3. Enter your email address in the text box and click Register.

  4. An email will be sent to the address provided. Open the email and click the link.

  5. Fill in details on the registration completion form, such as your name, the name of your company, and a password.

  6. Click Sign in to log into the UI.

Creating a Cloud NMS Account

If you do not have a Cloud NMS Account, you will be asked to create one after logging in and accessing cnMaestro Cloud. The NMS Account allows you to access cnMaestro functionality and start claiming devices.

  1. Log in to the cnMaestro UI https://cloud.cambiumnetworks.com.

  2. Click Add New Account. You will be redirected to the Create a New Cloud Account page.
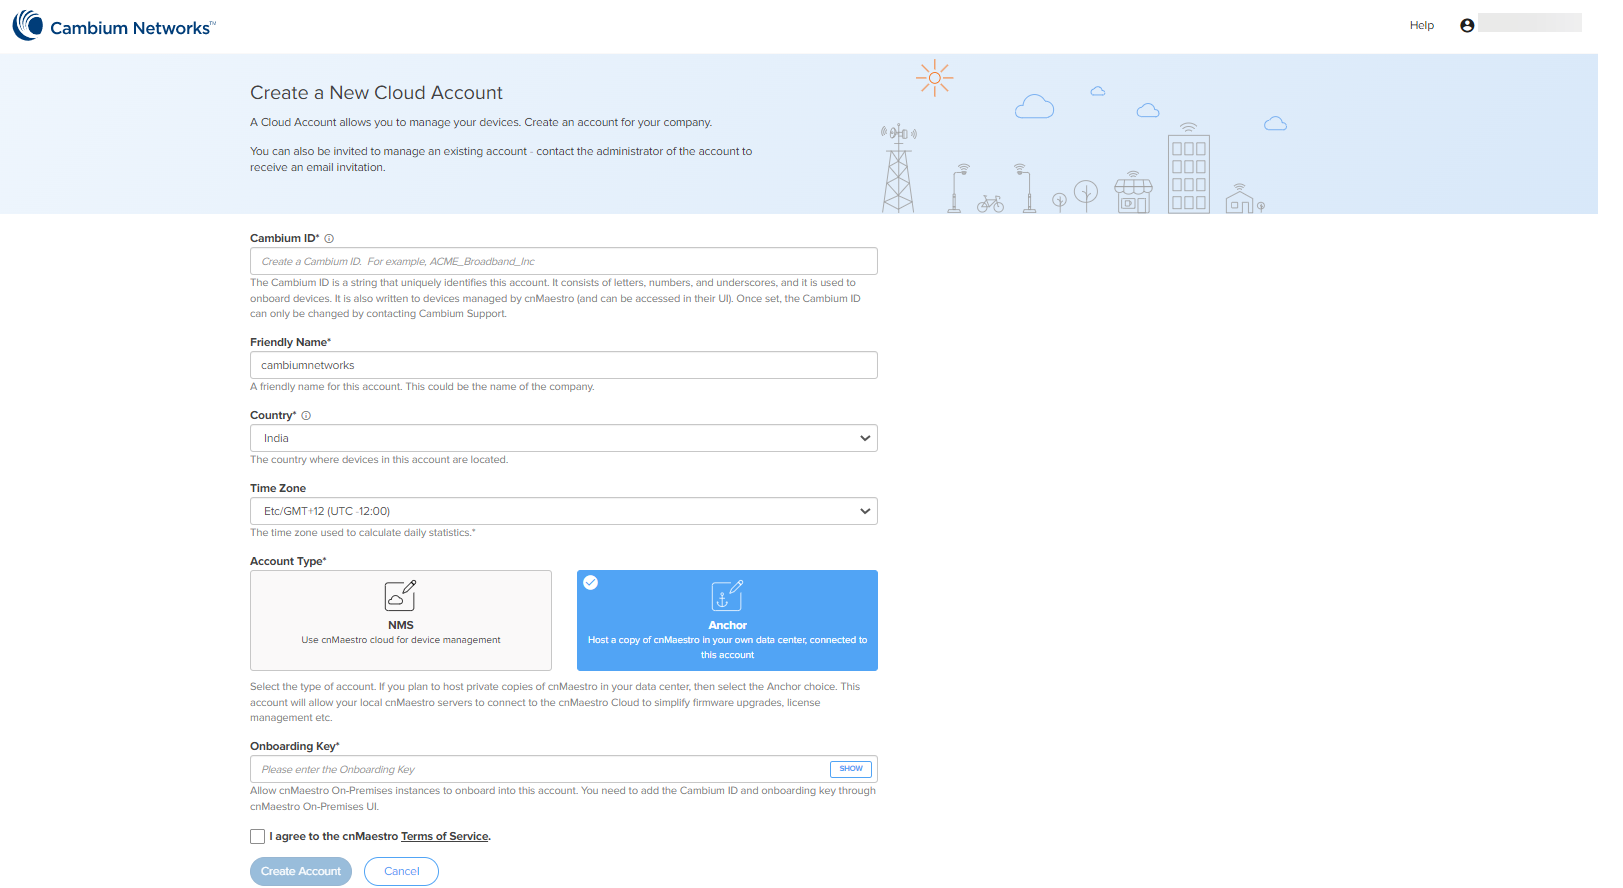
  3. Enter details such as Cambium ID, Friendly Name, Country, Time Zone, Account Type, and Account View. The Account Type should be set to NMS.

  4. Enable I agree to the cnMaestro Terms of Service.

  5. Click Create Account.

    Figure 1 Create Cloud NMS account

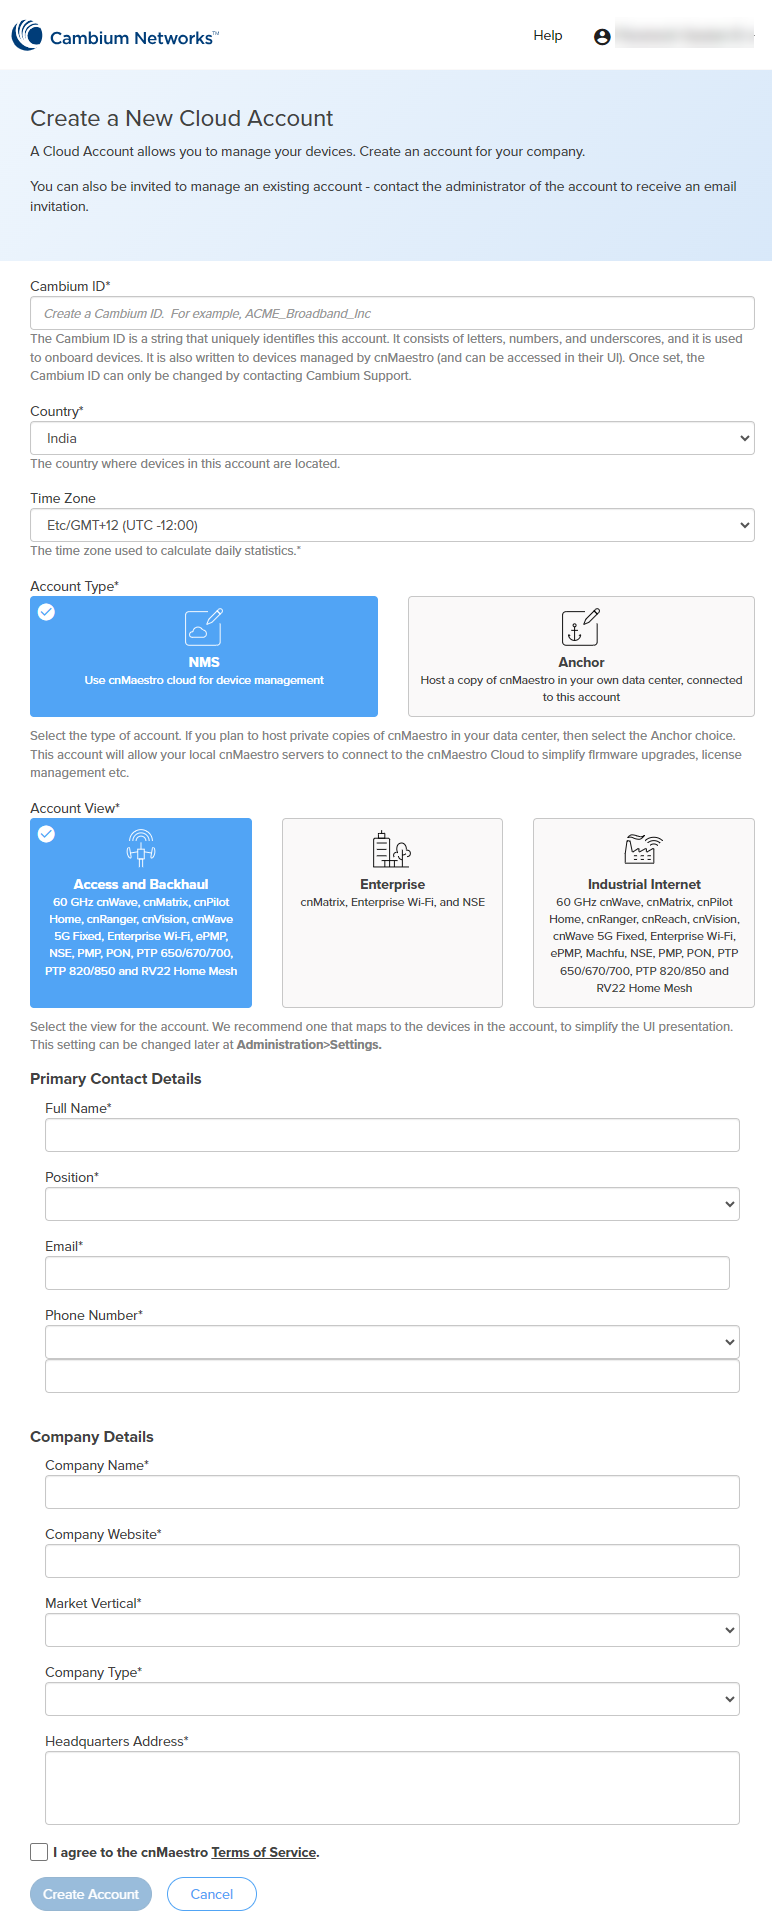
    The required fields are defined below:

    Table 2 NMS Cloud management fields

    Parameter

    Description

    Cambium ID

    The Cambium ID identifies this account externally.

    Supported characters—alphabets, integers, and underscore only.

    Once created, it can only be changed by contacting Cambium Support.

    Country

    Determines where the devices in this account are located.

    Cambium has data centers in North America, Europe, and Asia. If your devices are located in more than one region, you must create a separate account for a country in each region.

    Time Zone

    Specifies the time zone used to calculate device statistics.

    Daily statistics are collected at 12 AM in the configured time zone.

    Account Type

    Specifies the type of cnMaestro account you want to use to manage devices.

    Following options are supported:

    • NMS—Manage devices through cnMaestro Cloud

    • Anchor—Manage devices locally on your own data center through cnMaestro On-Premises

    Account View

    Specifies the cnMaestro account view based on the devices you intend to manage.

    • Access and Backhaul

      • 60 GHz cnWave

      • cnMatrix

      • cnPilot Home (cnPilot R-Series)

      • RV22 Home Mesh

      • cnRanger

      • cnVision

      • cnWave 5G Fixed

      • Enterprise Wi-Fi (E-Series and XE/XV/X7-Series) and cnPilot Enterprise (ePMP 1000 Hotspot)

      • Enterprise Wi-Fi (Xirrus-Series)

      • ePMP

      • NSE

      • PMP

      • PON

      • PTP 650/670/700

      • PTP 820/850

    • Enterprise—

      • cnMatrix

      • Enterprise Wi-Fi (E-Series and XE/XV/X7-Series) and cnPilot Enterprise (ePMP 1000 Hotspot)

      • Enterprise Wi-Fi (Xirrus-Series)

      • NSE

    • Industrial internet—

      • 60 GHz cnWave

      • cnMatrix

      • cnPilot Home (cnPilot R-Series)

      • RV22 Home Mesh

      • cnRanger

      • cnReach

      • cnVision

      • cnWave 5G Fixed

      • Enterprise Wi-Fi (E-Series and XE/XV/X7-Series) and cnPilot Enterprise (ePMP 1000 Hotspot)

      • Enterprise Wi-Fi (Xirrus-Series)

      • ePMP

      • NSE

      • PMP

      • PON

      • PTP 650/670/700

      • PTP 820/850

    You can change this view later by navigating to the Administration > Settings > General page.

    Primary Contact Details

    Full Name

    User's full name to appear in the cnMaestro account.

    Position

    Designation of the user in the company.

    Select from the drop-down list.

    Email

    Email ID of the user.

    Phone Number

    Phone number of the user.

    Select the country code from the drop-down list and provide a valid phone number.

    Company Details

    Company Name

    Name of the company.

    This name will appear as the Cloud Account Name in the cnMaestro home page.

    Company Website

    URL of the company website.

    Market Vertical

    Type of market or industry the company caters to.

    For example, Government, Defense, Education.

    Select from the drop-down list.

    Company Type

    Nature of work that the company does.

    For example, Defense, Manufacturer, Distributor.

    Select from the drop-down list.

    Headquarters Address

    Address of the company headquarters.

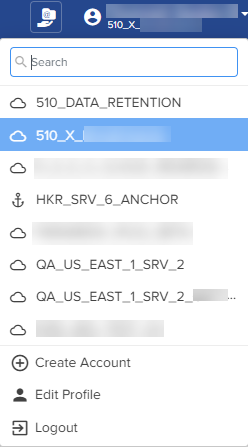
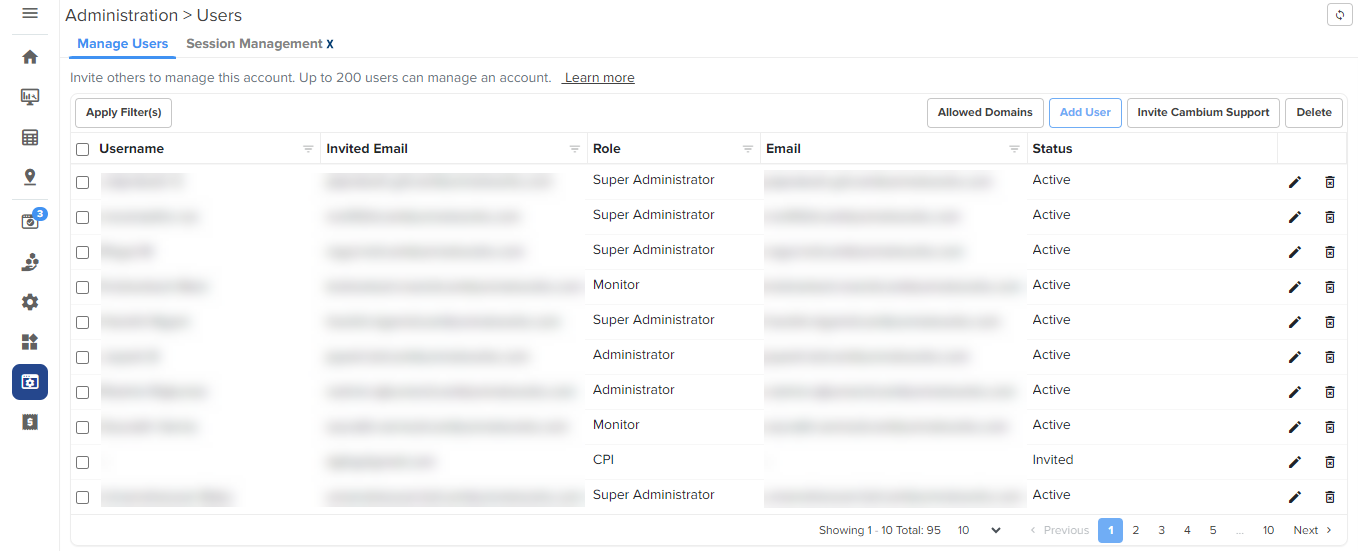
  6. Click the drop-down next to the username or search option to view the created Cloud account.

    Once you have created a Cloud NMS Account, you will be directed to the home page on subsequent login.

Creating an Anchor Account

An Anchor Account is required only if installing cnMaestro On-Premises.

  1. Log in to the cnMaestro UI https://cloud.cambiumnetworks.com.

  2. In Account Type, select Anchor.

  3. Once the Anchor Account is created, an Onboarding Key must be set to allow On-Premises instances to connect.

  4. Navigate to the Manage Instances page as shown below and edit the Onboarding Key. This key needs to be entered in the cnMaestro On-Premises UI to connect to the Anchor Account.

  5. Once the On-Premises server has been onboarded with the Key, it will be included in the Instances page. Multiple On-Premises installations can be added to a single Anchor Account.

    Clicking the instance host name displays the server information collected.

Multiple Cloud Accounts

Individuals can belong to multiple Cambium Cloud accounts. To create another Cloud Account (NMS or Anchor), select Create Account from the drop-down in the top-right corner. Enter the ID name in the Search field to filter the particular ID.

Figure 2 Multiple Cloud Management Accounts

Account selection

To switch between accounts, use the drop-down in the top-right corner of the UI. It displays all accounts to which the user has access.

Figure 3 Account selection

Concurrent access

The same user can access multiple accounts simultaneously; however, each account needs to be opened in a separate browser window or tab.

Managing users

A user can add additional administrators to their cloud management accounts and assign roles such as Super Administrator, Administrator, Operator, Monitor, and CPI.

Figure 4 Managing users

Creating Users and Configuring User Roles

To add a user:

  1. Navigate to Administration > Users Page > Manage Users.

  2. Click Add User.

  3. Enter the Email address in the Email text box.

  4. To configure user role, select from the Role drop-down:

  5. Click Send.

  6. Cambium Cloud sends an email with directions on how to access the Cloud management account.

    Note

    The email does not need to match the email address of an existing Cambium user.

  7. The email contains a link that directs you to the Cambium Cloud website https://cloud.cambiumnetworks.com.

  8. Login using an existing Cambium Support Center account or create a new Cambium Support Center account.

Organization

Organizations allow multiple Cloud NMS Accounts and Anchor Accounts to consolidate CBRS billing into one Primary Account.

Organizations are currently only used with CBRS. Refer CBRS on how they can simplify CBRS management across multiple accounts.

General details of Organizations include:

  1. One Organization can include accounts created in different countries and regions.

  2. The maximum number of accounts managed by an Organization is 5.

  3. There is one required Primary Account in an Organization and optionally multiple Secondary Accounts.

  4. Removing the Primary Account will dissolve the Organization.

  5. Both NMS and Anchor Accounts can be included in an Organization, and either can be Primary.