![]()
Note
-
Operator users can add new subscribers only.
-
Operator users are not allowed to add or configure Subscriber Service Profiles or the Subscriber application branding.
To enable a subscriber to manage the router using the Android or iOS application, you must add a subscriber profile in cnMaestro and send an invitation to the subscriber.
This pocess involves the following actions:
|
|
Note
|
To add a subscriber service profile, complete the following steps:
Navigate to the Manage Services > Managed Subscribers > Subscriber Service Profiles tab.
The Subscriber Service Profiles page appears.
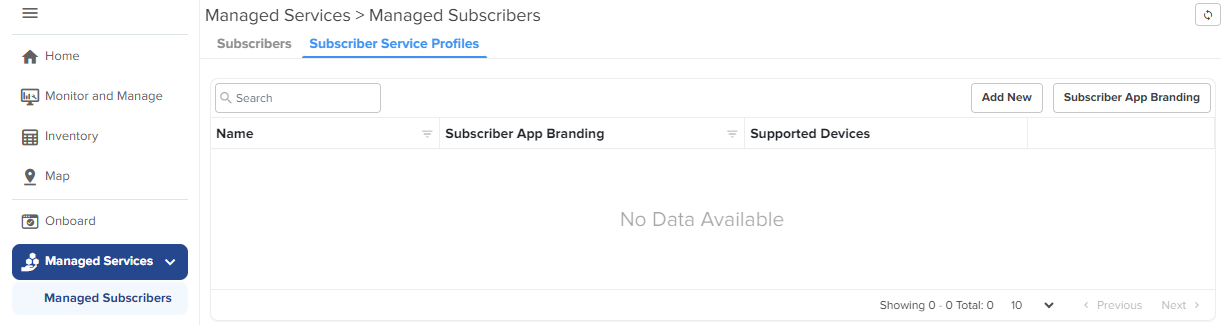
Click Add New.
The Add Subscriber Service Profile window appears.
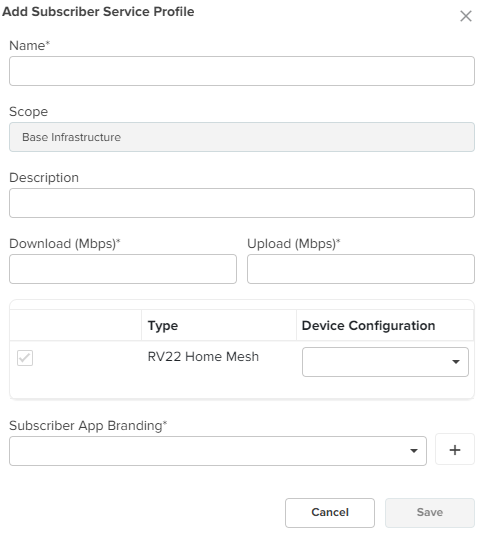
Select the Home Mesh Router configuration to which you want to associate with the subscriber service profile and configure the parameters as described in Table 1.
Table 1 Subscriber Service Profile parameters
|
Parameter |
Description |
|---|---|
|
Name |
Name of the subscriber service profile. |
|
Description |
Brief description for the subscriber service profile. |
|
Download (Mbps) |
Download speed (in Mbps) configured for the profile. |
|
Upload (Mbps) |
Upload speed (in Mbps) configured for the profile. |
|
Type |
Displays the device type as RV22 Home Mesh. This field cannot be modified. |
|
Device Configuration |
Specifies the Wi-Fi AP group (created for the Home Mesh Router device type) that must be associated with the service profile. Select the group from the dropdown list. |
|
Subscriber App Branding |
Specifies the cnMaestro Subscriber application branding that must be used in this profile. All routers sent to subscribers in this service profile contain the selected branding logo and information. Select the required branding from the dropdown list. If no branding is present, create one by clicking the add ( |
Click Save.
Click the Subscribers tab on the Managed Subscribers page.
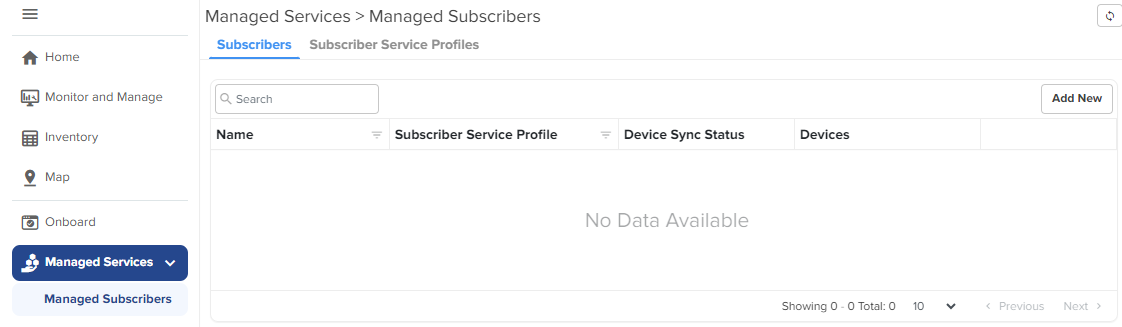
Click Add New.
The Add Subscriber window appears.
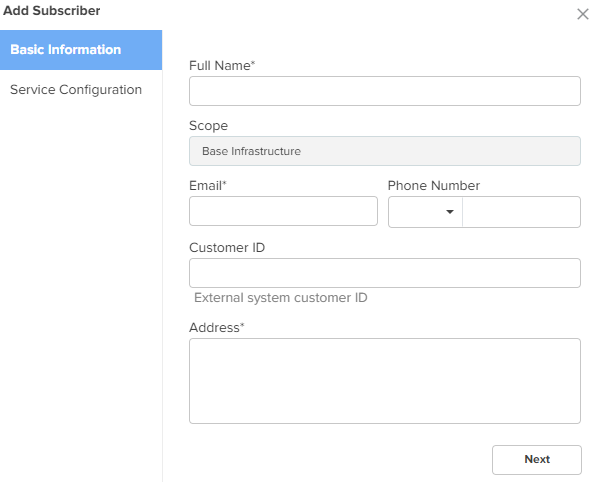
In the Add Subscriber window, configure the details of the subscriber in the Basic Information section, as described in Table 2.
Table 2 Subscriber > Basic tab parameters
|
Parameter |
Description |
||
|---|---|---|---|
|
Full Name |
Name of the subscriber. |
||
|
Email ID |
Email address of the subscriber. This email address receives the invitation to join the Home Mesh Router (RV22) site. Through this email address the user will be able to access and manage the router as a primary user and invite other users (secondary users), through the mobile application, to manage the routers.
|
||
|
Phone Number |
Phone number of the subscriber. |
||
|
Customer ID |
Unique ID for the subscriber. |
||
| Address |
Address of the subscriber where the routers will be installed. |
Click Next.
The Service Configuration tab is displayed.
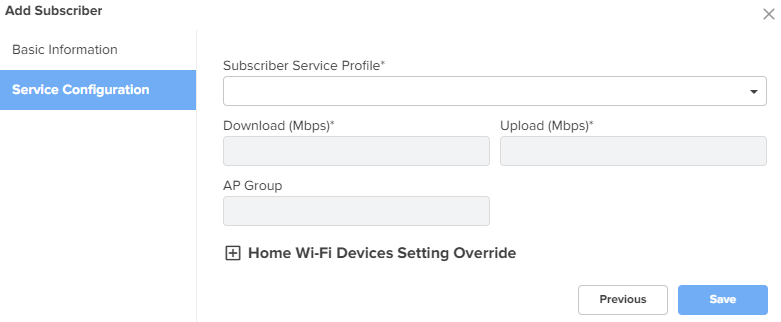
Select the subscriber service profile to be associated with this subscriber from the Service Profile dropdown list.
To configure port forwarding rules, expand the Home Wi-Fi Devices Setting Override section and click the Port Forwarding tab.
Port forwarding allows external devices to access services hosted on internal network devices (for example, web servers and game servers) by routing traffic through the router to the configured internal IP and port.
|
|
Note
|
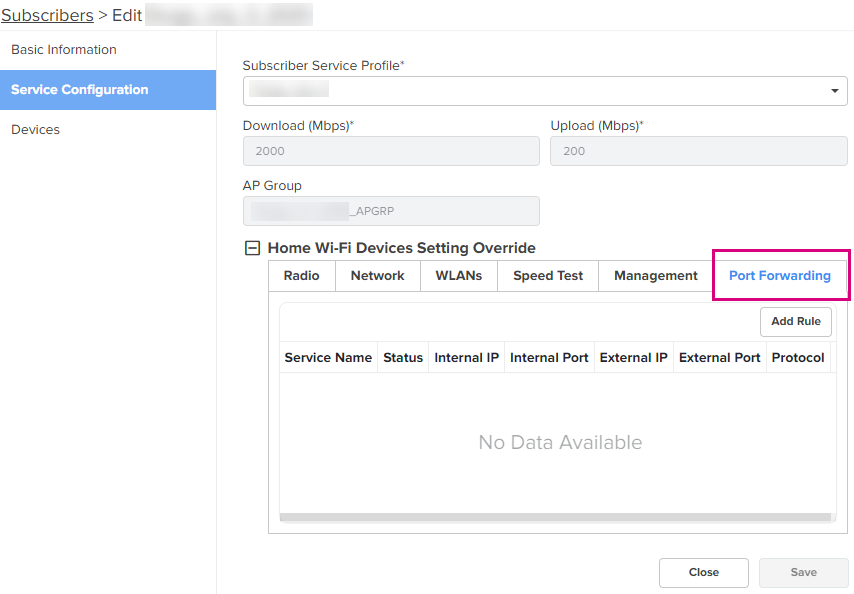
Click Add Rule.
The Add Rule window is displayed.
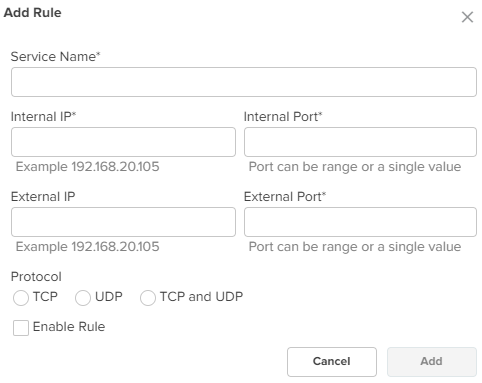
Configure the following parameters:
Table 3 Subscriber > Service Configuration > Port Forwarding rule parameters
|
Parameter |
Description |
|---|---|
|
Service Name |
Name of the service. |
|
Internal IP |
IP address of the device on the local network that will receive the forwarded traffic. For example, 192.168.20.105 |
|
Internal Port |
Port number of the device on the local network that will receive the forwarded traffic. The field supports a single port number or a port range. For example: 80, 22, 3000-3010 |
|
External IP (Optional) |
IP address from which incoming traffic is allowed. For example, 203.0.113.25 |
|
External Port |
Port number of the router’s public IP that listens for incoming connections. For example, 8080 |
|
Protocol |
Type of protocol to be used for providing access. The following protocols are supported:
|
| Enable Rule |
Indicates whether the port forwarding rule must be enabled or disabled. Select the checkbox to enable the rule. |
Click Add.
The rule is listed in the Port Forwarding tab.
Click Save.
A new tab, Devices appears, where you can link (or claim) the Home Mesh Router to the subscriber. See Claiming the Home Mesh Router.
The cnMaestro Subscriber application invitation email is sent to the subscriber with the link to join the account.
Click Devices.
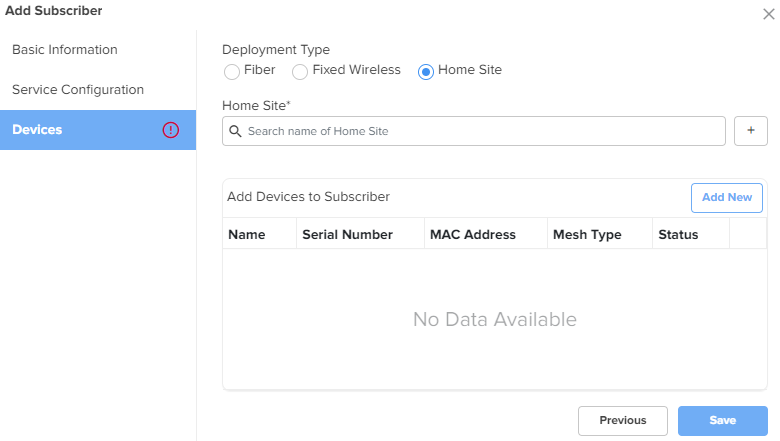
Select one of the following options in the Deployment Type field to filter the available deployment types:
Fiber—Select the Optical Network Unit (ONU) device that you want to associate with the subscriber's router by searching in the ONU search box.
Fixed Wireless—Select the Subscriber Module (SM) device that you want to associate with the subscriber's router by searching in the SM search box.
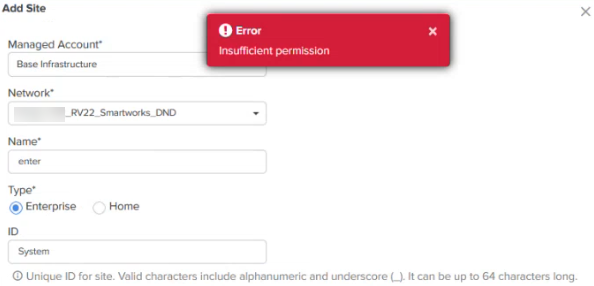
Home Site—Select the home site you want to associate with the subscriber's router by searching in the Home Site search box. To add a home site, see Adding a Home Site.
|
|
Note
|
Before linking the Home Mesh Router to the subscriber, click Save.
You can modify the owner details for the Subscriber App by modifying the email ID.
|
|
Warning Modifying the email address will remove all existing users, both primary and secondary. |
To modify the email address, complete the following steps:
Navigate to the Manage Services > Managed Subscribers > Subscribers tab.
In the list of subscribers, click the subscriber name for which you want to modify the email ID.
The corresponding subscriber details are displayed.
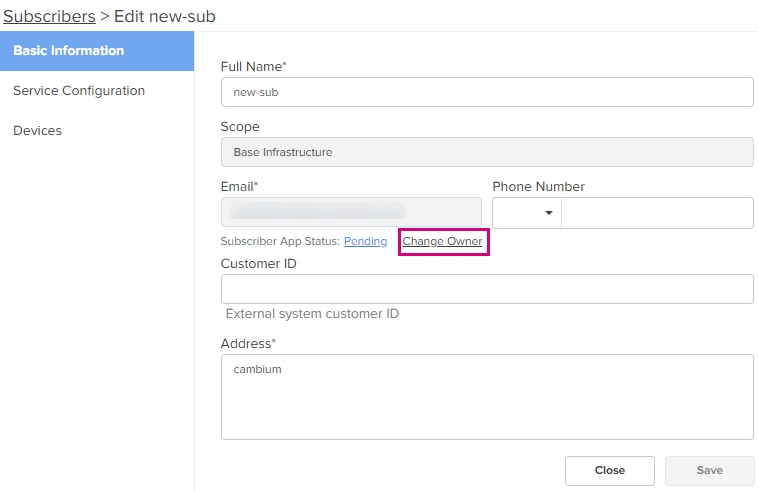
Under the Email parameter, click Change Owner.
The Change Owner window is displayed.
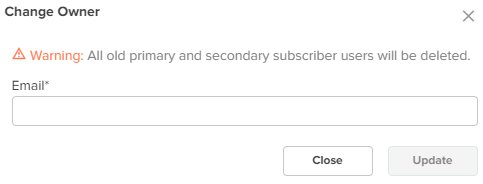
Enter the new email ID for the subscriber.
Click Update.
After adding a subscriber profile and a subscriber, you must now associate the Home Mesh Router to the subscriber by claiming the router in cnMaestro.
To claim the router, complete the following steps:
Navigate to the Manage Services > Managed Subscribers > Subscribers tab.
In the list of subscribers, select the subscriber name for which you want to associate the Home Mesh Router.
Click the Devices tab.
In the Add Devices to Subscriber section, click Add New.
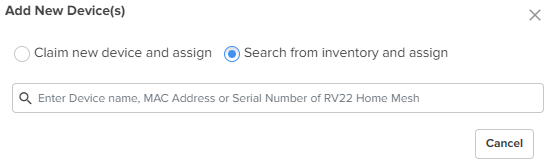
The Link Subscriber window appears.
In the Link Subscriber window, link the Home Mesh Router to the subscriber by using any of the following methods:
To claim a new router that is not onboarded to cnMaestro, select the Claim new and assign option and enter the serial number of the device to be claimed.
You can claim multiple routers by adding multiple serial numbers separated by commas.
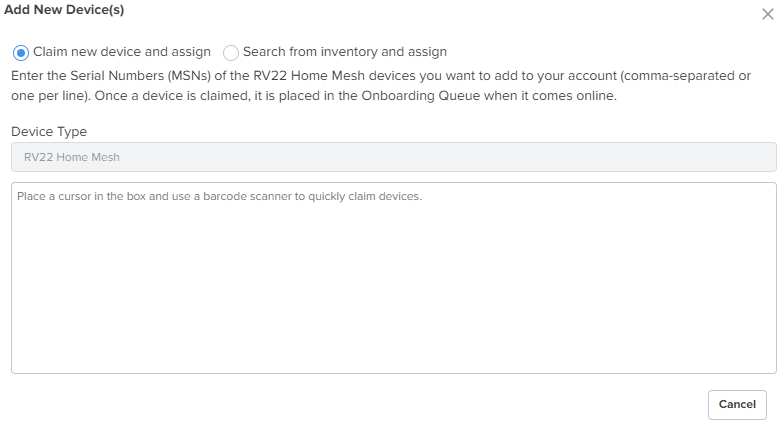
To claim a router that is already onboarded to cnMaestro, select the Search for inventory and assign option.
Enter the details of the router you want to claim.
Click Assign.
The assigned router appears in the Add Devices to Subscriber section.

|
|
Note Click the unlink ( |